AWS S3 InvalidAccessKeyId Error Fix for Node.js

Setting up cloud storage for your application is almost essential for storing long-format information such as videos, high-definition photos, and other pieces of critical user information for your web application. Thankfully there are many resources out there that we can set up for free that allow us to do this in a simple way, particularly Amazon S3. However, you can run into the issue of setting this up properly with your Node application. Thus I will be discussing how to fix a particular bug:

InvalidAccessKeyId: The AWS Key Id you provided does not exist in our records.

I received this error after I set up my application correctly with the AWS-SDK. As you can see here I have a component that allows me to upload any document to my S3 bucket. 

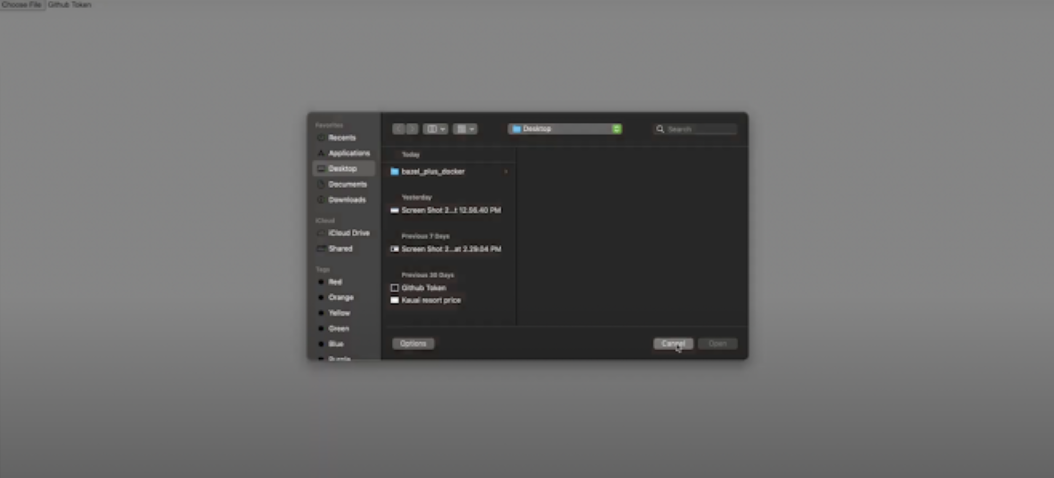
However after trying to upload something I was hit with the above error, InvalidAccessKeyId. To fix this I took the following steps:

Step 1-) Reinstall aws-sdk in Node

It may be that your npm version is out of date, this can cause this error. Simple npm install once more.

  • npm install aws-sdk

Step 2-) Ensure the credentials are properly set from the shared credentials file

When the SDK for JS loads, it auto-searches the shared credentials file which is simply named "credentials". Depending on whether you are using Mac, Linux, or Windows, the paths for the credentials are shown here:

  • The shared credentials file on Linux, Unix, and macOS: ~/.aws/credentials
  • The shared credentials file on Windows: C:\Users\USER_NAME\.aws\credentials

If you do not have the file already you can simply create it in the above paths (do not use any other path). 

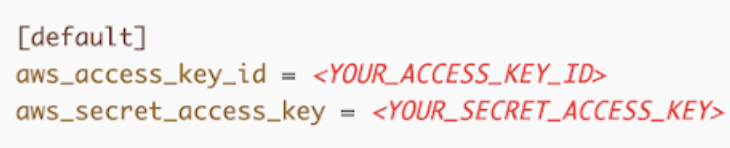
The contents of the file are supposed to resemble the above. However, you need to fill in your access key id and secret access key by simply editing the file. You need to generate these credentials if you do not have them. 

To generate the credentials:

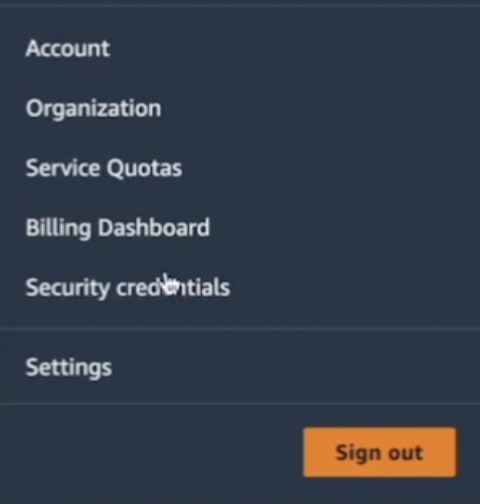
  • Go to the Security Credentials page in your AWS account, which will be shown in the dropdown menu after clicking your email in the top-right.

Create an access key, make sure to save this, and keep it stored safely

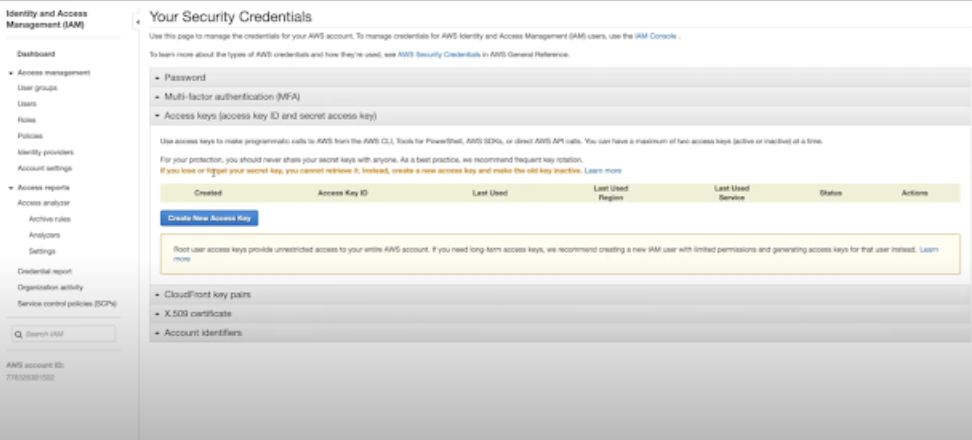
Insert the corresponding information into your credentials file and save the file.

Conclusion:

It is as simple as that, you just have to re-install the npm package and ensure you have the proper keys in your credentials file. This will resolve many of the cases, however, do note there may be some edge cases where you will need to take other steps to solve the issue. Hope this helped someone, let me know what you think in the comments! Thanks for reading.

Create a free account to access full content.

All access to code and resources on ShillehTek.

Signup Now

Already a member? Sign In

Explore More on Our Blog

Implementing Google reCAPTCHA in a Simple React and Node.js App

Implementing Google reCAPTCHA in a Simple React and Node.js App

Learn how to protect your React applications from bots and spam with Google reCAPTCHA integration! This step-by-step tutorial...

AWS Lambda Tutorial: Using Selenium with Chromedriver in Python

AWS Lambda Tutorial: Using Selenium with Chromedriver in Python

In this tutorial, I will guide you through the process of running Selenium with ChromeDriver inside an AWS...

How to Connect MLX90614 Infrared Thermometer to Raspberry Pi Pico W: MicroPython Tutorial!

How to Connect MLX90614 Infrared Thermometer to Raspberry Pi Pico W: MicroPython Tutorial!

Learn how to use the MLX90614 with the Raspberry Pi Pico W and get infrared values in MicroPython.

Raspberry Pi Pico/Pico W Free Simulator

Raspberry Pi Pico/Pico W Free Simulator

Discover how to simulate Raspberry Pi Pico projects using Wokwi, a free online simulator for Arduino and MicroPython....

Interfacing the MPU6050 with Raspberry Pi Pico W in C++

Interfacing the MPU6050 with Raspberry Pi Pico W in C++

Interface with the MPU6050 using the Raspberry Pi Pico W in C++.

How to Write your First C++ Program on the Raspberry Pi Pico W

How to Write your First C++ Program on the Raspberry Pi Pico W

Write your first C++ Program on the Pico W in a few simple steps.

How to Use ThingSpeak with the Raspberry Pi Pico W

How to Use ThingSpeak with the Raspberry Pi Pico W

Learn how to create a real-time environmental monitoring system with the Raspberry Pi Pico W and ThingSpeak!

How to Use ADS1115 with the Raspberry Pi (Part 1)

How to Use ADS1115 with the Raspberry Pi (Part 1)

Discover how to expand your Raspberry Pi projects by integrating the ADS1115 ADC for precise analog signal reading....

How to Install Pip Packages in AWS Lambda Using Docker and ECR

How to Install Pip Packages in AWS Lambda Using Docker and ECR

Learn how to streamline AWS Lambda deployments by using Docker and Amazon Elastic Container Registry (ECR) to package...

Create Tabular Product Descriptions on Your Shopify Store

Create Tabular Product Descriptions on Your Shopify Store

Enhance your Shopify store's product pages with our comprehensive guide on implementing tabular descriptions. Learn how to add a...

Back to blog

Leave a comment

Please note, comments need to be approved before they are published.