

Project Overview
Arduino + WS2812 8x8 LED Matrix Pixel Art Display: Build a desktop pixel art frame that plays your own 8x8 animations (spaceships, countdowns, explosions, and more) by converting images into Arduino code with a free tool. The original build was hand-soldered from 64 LEDs, but a ready-made 8x8 matrix module lets you skip straight to the fun part.
- Time: 1-2 hours (with the pre-built matrix; a weekend if you solder your own)
- Skill level: Beginner
- What you will build: A self-contained animated pixel display with a diffused grid face, driven by an Arduino and the FastLED library.

Parts List
From ShillehTek
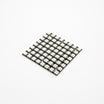
- CJMCU-64 8x8 WS2812 RGB LED Matrix Module - 64 addressable LEDs already wired in the zig-zag layout this project expects
- Arduino Nano V3.0 Pre-Soldered (or an Uno) - runs the FastLED sketch and drives the matrix
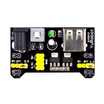
- MB102 Breadboard Power Supply - provides 5V power since 64 RGB LEDs at full white need more current than a USB port
- Dupont Jumper Wires - quick wiring between the Arduino, power, and matrix
External
- Thin cardboard for the pixel grid, baking paper as the diffuser
- An enclosure (the original repurposed an ice-cream tub)
- Hot glue gun; a 5V supply for standalone use
Note: The hand-soldered route (a jig + 64 individual WS2812 LEDs) is documented below, but the pre-wired matrix module is electrically identical and saves an entire evening of soldering.
Step-by-Step Guide
Step 1 - The Matrix (Buy It or Build It)
Goal: Get 64 addressable pixels in an 8x8 grid.
What to do: The original build soldered 64 loose WS2812 LEDs using a homemade jig, joining them in a zig-zag pattern left-to-right, then pressed them into a cardboard backing. That zig-zag wiring is exactly how pre-made matrix modules are laid out internally, so if you use the CJMCU-64 board, your data order matches this project's code as-is.


Expected result: A working 8x8 LED plane, bought or built.
Step 2 - Build the Pixel Grid and Diffuser
Goal: Turn 64 points of light into 64 square pixels.
What to do: Slot strips of thin cardboard into a square grid (one cell per LED) and hot-glue it over the LEDs. Cover the face with baking paper to diffuse each cell into a soft, even square.


Expected result: Crisp square pixels instead of bare LED points.
Step 3 - Box It Up
Goal: Make it a self-contained desk unit.
What to do: Mount everything in a shallow enclosure (the original used an ice-cream tub) with a power switch and a hole for the 5V feed. Place the Arduino inside so the whole unit becomes a standalone gadget you can plug in.


Expected result: A finished frame that needs only 5V.
Step 4 - Turn Any Image into Arduino Code
Goal: Convert 8x8 artwork into color arrays.
What to do: Draw (or downscale) an image to exactly 8x8 pixels, then open it in the free LCD Image Converter (SourceForge). Configure: Options Convert, set Block size to 24-bit on the Image tab, and Type to Color on the Prepare tab. Click Show Preview, copy the generated array, and paste it into the sketch. Each value is one pixel's color.


Expected result: A 64-value color array for every frame of your animation.
Step 5 - Flash the FastLED Player
Goal: Play your frames on the matrix.
What to do: Install FastLED, paste your frame arrays into the sketch (stored in flash with PROGMEM so you can fit many frames), and upload to your Arduino:
Code:
#include <avr/pgmspace.h>   // store frames in flash with PROGMEM
#include "FastLED.h"

#define NUM_LEDS 64
#define DATA_PIN 9

CRGB leds[NUM_LEDS];

// One 8x8 frame from LCD Image Converter (64 x 24-bit colors)
const long frame1[] PROGMEM = {
  0x000000, 0xff0000, 0x000000, /* ... 64 values total ... */
};

void setup() {
  FastLED.addLeds<NEOPIXEL, DATA_PIN>(leds, NUM_LEDS);
  FastLED.setBrightness(40);
}

void loop() {
  for (int i = 0; i < NUM_LEDS; i++) {
    leds[i] = pgm_read_dword(&(frame1[i]));
  }
  FastLED.show();
  delay(500);
  // add frame2, frame3... and cycle them for animation
}
Expected result: Your artwork glowing on the matrix.
Step 6 - Make Animations
Goal: Bring the frame to life.
What to do: An animation is just multiple frames played in order. Convert each 8x8 image, add its array, and cycle through them in loop(). The original runs spaceship flights, 3-2-1-0 countdowns, and explosion sequences.


Expected result: A personal pixel-art gallery you can reprogram any time.
Conclusion
With an Arduino, an 8x8 WS2812 LED matrix, a simple cardboard grid, and baking paper diffusion, you can build a charming animated pixel-art display. The image-to-code workflow means you can put your own art on the matrix without manually mapping pixel coordinates.
Want the exact parts used in this build? Grab them from ShillehTek.com. If you want help customizing this project or building something for your product, check out our IoT consulting services.
Credits
All photos and images in this tutorial are credited to mpg28 on Hackster.io. The original guide by mpg28 served as the reference for this ShillehTek version. We thank them for their excellent work in the maker community.




.png?v=25000753014097803521791168436)

.png?v=68677308723310773341791168436)


