

Project Overview
Arduino UNO + 0.91 inch SSD1306 OLED: In this guide, you will wire a 128x32 SSD1306 I2C OLED display to an Arduino UNO and upload a U8g2 sketch to show crisp text on the screen.
This slim monochrome OLED is common in compact gadgets because each pixel emits its own light, so contrast stays high in the dark and power draw is typically lower than an LCD with a backlight. The SSD1306 controller uses I2C, so you only need four connections.
- Time: 20 to 30 minutes
- Skill level: Beginner
- What you will build: A working 128x32 OLED readout on an Arduino UNO-class board.

Parts List
From ShillehTek
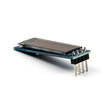
- SSD1306 0.91 inch 128x32 I2C OLED Display Module - the monochrome OLED display used in this build.
- Arduino Nano V3 - works the same as an Arduino UNO for this I2C example.
- 120pcs 20cm Dupont Jumper Wires - makes the four I2C connections easy.
External
- USB cable for the Arduino - for power and uploading the sketch.
Note: The module runs on DC 3.3 to 5V, so it works unmodified with Arduino, ESP32, and Raspberry Pi Pico boards.
Step-by-Step Guide
Step 1 - Know the Four Pins
Goal: Identify the interface and what each pin does.
What to do: The header carries GND, VCC (3.3 to 5V), SCL (clock), and SDA (data). This is a standard I2C device.

Expected result: You can match each OLED pin to the correct Arduino connection.
Step 2 - Wire It to the UNO
Goal: Make the four I2C connections between the OLED and Arduino UNO.
What to do: Wire the OLED to the Arduino UNO I2C pins (A4 SDA and A5 SCL):
OLED GND -> Arduino GND
OLED VCC -> Arduino 5V
OLED SCL -> Arduino A5
OLED SDA -> Arduino A4

Expected result: The display is connected to the Arduino UNO I2C bus.
Step 3 - Install the U8g2 Library
Goal: Add a graphics library that supports SSD1306 OLED displays.
What to do: Install U8g2 from the Arduino Library Manager (search for "U8g2"). You can also use Sketch → Include Library → Add .ZIP Library if you have the ZIP file.

Expected result: U8g2 is installed and available for your sketches.
Step 4 - Upload the Starter Sketch
Goal: Draw text on the 128x32 OLED using the correct U8g2 constructor.
What to do: Select Arduino UNO (or your Nano) and the correct COM port, then upload this starter sketch. This example uses the SSD1306 128x32 hardware I2C constructor:
#include <U8g2lib.h>
#include <Wire.h>

// SSD1306 128x32, hardware I2C
U8G2_SSD1306_128X32_UNIVISION_F_HW_I2C u8g2(U8G2_R0);

void setup() {
  u8g2.begin();
}

void loop() {
  u8g2.clearBuffer();
  u8g2.setFont(u8g2_font_ncenB08_tr);
  u8g2.drawStr(0, 12, "Hello from the");
  u8g2.drawStr(0, 28, "0.91in 128x32 OLED");
  u8g2.sendBuffer();
  delay(1000);
}

Expected result: The sketch compiles and uploads successfully.
Step 5 - Verify the Display Output
Goal: Confirm the OLED is working and rendering text.
What to do: After the upload, the display should light up and show the text. From here, you can swap fonts, draw lines and boxes with U8g2 primitives, or display live values from sensors.


Expected result: A bright, sharp 128x32 display showing your text.
Conclusion
You connected a 0.91 inch SSD1306 128x32 OLED to an Arduino UNO over I2C, installed the U8g2 library, and uploaded a sketch that renders text on the display. With only four wires, it is a clean way to add a compact status readout to your projects.
Want the exact parts used in this build? Grab them from ShillehTek.com. If you want help customizing this project or building something for your product, check out our IoT consulting services.




.png?v=25000753014097803521791168436)

.png?v=68677308723310773341791168436)


