

Project Overview
Arduino R307 Fingerprint Sensor: In this project, you wire an Arduino to an R307 (R307S) optical fingerprint module over software serial, enroll fingerprints into the sensors onboard flash, then match fingerprints in real time to trigger an LED output.
The R307 includes its own DSP and matching algorithm, and it can store up to 127 fingerprint templates. This workflow is a common foundation for door locks, tool access control, and any build that needs basic biometric identification.
- Time: About 1 hour
- Skill level: Beginner
- What you will build: An Arduino that enrolls fingerprints into the R307s flash and then recognizes them in real time.

Parts List
From ShillehTek
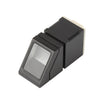
- R307S Optical Fingerprint Sensor Module with Cable - reads and stores fingerprint templates internally
- Arduino Nano V3 (ATmega328P) - or any Arduino UNO-compatible board to run enrollment and matching sketches
- 120pcs 20cm Dupont Jumper Wires - for VCC, GND, TX, and RX wiring
- 400-Point Solderless Breadboard - optional, keeps the wiring tidy
External
- Soldering iron and measuring tools (only if your sensor cable needs new ends)
- Insulation tape
Note: The R307S works at both 3.3V and 5V logic, so the same wiring approach works on Arduino, ESP32, and Raspberry Pi Pico class boards.

Step-by-Step Guide
Step 1 - Meet the R307 Module
Goal: Understand what the module does on its own so the code makes sense.
What to do: Look over the module before wiring. The R307 combines an optical scanner, a high-speed DSP, a fingerprint-matching algorithm, and flash storage for 127 templates. It communicates over TTL UART (default 57600 baud) and also has a USB 2.0 interface for PCs.
Supply voltage is 4.2 to 6.0 V with a working current of about 50 mA, image capture takes under 0.3 seconds, and it supports both 1:1 verification and 1:N search. A jumper on the sensor selects 3.3V or 5V logic, so it connects directly to 3.3V or 5V microcontrollers.


Expected result: You can identify the four wires you actually need: VCC, GND, TX, and RX.
Step 2 - Understand Enrollment vs. Matching
Goal: Know the two-phase workflow every fingerprint project uses.
What to do: Fingerprint handling happens in two parts. During enrollment you place the same finger on the scanner twice; the module processes both captures, builds a single template, and saves it to a numbered slot in flash.
During matching the module scans a live finger, generates a temporary template, and either compares it against one specific stored template (1:1) or searches the entire library (1:N). Either way it reports success or failure, and your sketch reacts to the result.

Expected result: You know why the enrollment sketch asks for the same finger twice.
Step 3 - Wire the Sensor to the Arduino
Goal: Connect the R307 without using the Arduinos hardware serial port used for USB programming.
What to do: The Arduinos only hardware UART is shared with USB programming, so the sensor goes on a software serial port instead. Set the sensors logic jumper for 5V operation with an UNO-class board and make these four connections:
R307 VCC  ->  Arduino 5V
R307 GND  ->  Arduino GND
R307 TX   ->  Arduino D2 (software serial RX)
R307 RX   ->  Arduino D3 (software serial TX)
Expected result: Four wires connected, with TX/RX crossed between the sensor and the board.
Step 4 - Enroll Your Fingerprints
Goal: Store finger templates in the modules flash.
What to do: Install the Adafruit Fingerprint Sensor Library from the Arduino IDEs Library Manager, then upload the enrollment sketch below. Open the serial monitor at 9600 baud, type a slot number from 1 to 127, and follow the prompts. You will place the same finger twice so the module can build one clean template.
Code:
#include <Adafruit_Fingerprint.h>
#include <SoftwareSerial.h>
SoftwareSerial mySerial(2, 3); // RX, TX

Adafruit_Fingerprint finger = Adafruit_Fingerprint(&mySerial);

uint8_t id;

void setup() {
  Serial.begin(9600);
  while (!Serial);
  delay(100);
  Serial.println("\n\nFingerprint sensor enrollment");
  finger.begin(57600);
  if (finger.verifyPassword()) {
    Serial.println("Found fingerprint sensor!");
  } else {
    Serial.println("Did not find fingerprint sensor :(");
    while (1) { delay(1); }
  }
}

uint8_t readnumber(void) {
  uint8_t num = 0;
  while (num == 0) {
    while (! Serial.available());
    num = Serial.parseInt();
  }
  return num;
}

void loop() {
  Serial.println("Ready to enroll a fingerprint!");
  Serial.println("Please type in the ID # (from 1 to 127) you want to save this finger as...");
  id = readnumber();
  if (id == 0) return; // ID #0 not allowed
  Serial.print("Enrolling ID #");
  Serial.println(id);
  while (! getFingerprintEnroll() );
}

uint8_t getFingerprintEnroll() {
  int p = -1;
  Serial.print("Waiting for valid finger to enroll as #"); Serial.println(id);
  while (p != FINGERPRINT_OK) {
    p = finger.getImage();
    switch (p) {
      case FINGERPRINT_OK: Serial.println("Image taken"); break;
      case FINGERPRINT_NOFINGER: Serial.println("."); break;
      case FINGERPRINT_PACKETRECIEVEERR: Serial.println("Communication error"); break;
      case FINGERPRINT_IMAGEFAIL: Serial.println("Imaging error"); break;
      default: Serial.println("Unknown error"); break;
    }
  }
  p = finger.image2Tz(1);
  if (p != FINGERPRINT_OK) { Serial.println("Could not process image"); return p; }
  Serial.println("Remove finger");
  delay(2000);
  p = 0;
  while (p != FINGERPRINT_NOFINGER) { p = finger.getImage(); }
  Serial.print("ID "); Serial.println(id);
  p = -1;
  Serial.println("Place same finger again");
  while (p != FINGERPRINT_OK) {
    p = finger.getImage();
    if (p == FINGERPRINT_OK) Serial.println("Image taken");
    else if (p == FINGERPRINT_NOFINGER) Serial.print(".");
  }
  p = finger.image2Tz(2);
  if (p != FINGERPRINT_OK) { Serial.println("Could not process image"); return p; }
  Serial.print("Creating model for #"); Serial.println(id);
  p = finger.createModel();
  if (p == FINGERPRINT_OK) {
    Serial.println("Prints matched!");
  } else {
    Serial.println("Fingerprints did not match");
    return p;
  }
  p = finger.storeModel(id);
  if (p == FINGERPRINT_OK) {
    Serial.println("Stored!");
  } else {
    Serial.println("Could not store");
    return p;
  }
}
Expected result: You see Prints matched! followed by Stored!. The template now lives in the modules flash and survives power cycles.
Step 5 - Match Fingerprints and Trigger an Output
Goal: Recognize enrolled fingers and act on a match.
What to do: Upload the matching sketch below. On boot it prints how many templates the module holds, then waits for a finger. On a match it reports the ID with a confidence score and drives a pin high for three seconds. You can swap that pin for a relay or lock driver to build an access-control system.
Code:
#include <Adafruit_Fingerprint.h>
#include <SoftwareSerial.h>

SoftwareSerial mySerial(2, 3);
Adafruit_Fingerprint finger = Adafruit_Fingerprint(&mySerial);

void setup() {
  Serial.begin(9600);
  while (!Serial);
  delay(100);
  Serial.println("fingertest");
  pinMode(12, OUTPUT);
  pinMode(11, OUTPUT);
  finger.begin(57600);
  if (finger.verifyPassword()) {
    Serial.println("Found fingerprint sensor!");
  } else {
    Serial.println("Did not find fingerprint sensor :(");
    while (1) { delay(1); }
  }
  finger.getTemplateCount();
  Serial.print("Sensor contains "); Serial.print(finger.templateCount); Serial.println(" templates");
  Serial.println("Waiting for valid finger...");
}

void loop() {
  getFingerprintIDez();
  delay(50);
  digitalWrite(12, LOW);
  digitalWrite(11, LOW);
}

// returns -1 if failed, otherwise returns ID #
int getFingerprintIDez() {
  uint8_t p = finger.getImage();
  if (p != FINGERPRINT_OK) return -1;
  p = finger.image2Tz();
  if (p != FINGERPRINT_OK) return -1;
  p = finger.fingerFastSearch();
  if (p != FINGERPRINT_OK) return -1;
  // found a match!
  digitalWrite(12, HIGH);
  delay(3000);
  digitalWrite(12, LOW);
  Serial.print("Found ID #"); Serial.print(finger.fingerID);
  Serial.print(" with confidence of "); Serial.println(finger.confidence);
}

Expected result: Enrolled fingers print Found ID # with a confidence value and light the LED; unknown fingers are rejected.
Conclusion
You interfaced the R307 optical fingerprint sensor with an Arduino, enrolled fingerprints into the modules onboard flash, and ran real-time 1:N matching with confidence scores. Because templates are stored inside the sensor, your enrolled fingers keep working even after reflashing the Arduino.
Want the exact parts used in this build? Grab them from ShillehTek.com. If you want help customizing this project or building something for your product, check out our IoT consulting services.





.png?v=25000753014097803521791168436)

.png?v=68677308723310773341791168436)


