

Project Overview
PZEM-004T Energy Monitor with Arduino: Read AC mains voltage, current, power, energy (kWh), frequency, and power factor over a simple serial link, then stream the measurements to the Arduino Serial Monitor using a fast single-transaction read.
- Time: ~1 hour
- Skill level: Intermediate (mains electricity involved, read the safety note)
- What you will build: A live AC energy monitor on your Arduino serial console, ready to grow into a home energy dashboard, solar monitor, or appliance cost tracker.

Safety first: The PZEM-004T connects to live AC mains. Keep the high-voltage side fully insulated, never touch the board while energized, and if you are not comfortable working around mains wiring, have someone qualified check your setup.
Parts List
From ShillehTek
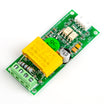
- PZEM-004T AC Energy Meter & Power Monitor Module with Current Transformer - the AC measurement module and CT used to read voltage, current, power, and kWh.
- Arduino Uno R3 - the microcontroller that polls the meter and prints readings (the library also supports UNO R4, Nano, and Mega).
- Arduino Nano V3.0 Pre-Soldered - a compact Arduino alternative if you prefer a smaller build.
- Dupont Jumper Wires - for 5V, GND, TX, and RX connections on the logic side.
External
- An insulated AC test setup (plug, socket, and load such as a lamp or kettle)
- Enclosure for the high-voltage side
Note: The split-core current transformer clamps around one conductor (live), not the whole cable. Orientation and single-conductor placement matter for correct readings.
Step-by-Step Guide
Step 1 - Know Your Meter
Goal: Understand what the PZEM-004T V4.0 measures.
What to do: The module pairs a metering IC with an isolated TTL serial interface, and its 100 A current transformer clips around the live wire. It reports six quantities: voltage (80 to 260 V AC), current (0 to 100 A), active power (up to 23 kW), cumulative energy (0 to 9999.99 kWh), frequency (45 to 65 Hz), and power factor (0.00 to 1.00). Your Arduino polls it over serial and gets calibrated numbers back, with no analog front-end design required.
Expected result: You know the six measurements you are about to stream.
Step 2 - Wire It (Four Wires)
Goal: Connect the meter TTL side to your board.
What to do: Only 5V, GND, TX, and RX are needed on the logic side. On an UNO R4 you can use the hardware Serial1 port directly.

On an UNO R3 or Nano, the library falls back to SoftwareSerial pins.

On the AC side, wire the module voltage terminals across live and neutral, and clamp the CT around the live conductor of the load you are measuring.
Expected result: Logic side wired to the Arduino, and the AC side is safely insulated.
Step 3 - Install the Library
Goal: Get PZEM004Tv40_R4 into your IDE.
What to do: In the Arduino IDE go to Sketch Include Library Manage Libraries, search for PZEM004Tv40_R4, and click Install. PlatformIO users add bharanidharanrangaraj/PZEM004Tv40_R4 to lib_deps. It ships with four examples: basic reading, individual parameters, energy reset with cost calculation, and address changing for multi-sensor setups.
Expected result: Library installed with examples available under File Examples.
Step 4 - Read Everything at Once
Goal: Stream all six measurements every second.
What to do: The headline feature is readAll(). One Modbus transaction fetches every register in about 200 ms, roughly six times faster than polling the six values one by one (about 1200 ms). Upload this and open the Serial Monitor at 115200.
Code:
#include <PZEM004Tv40_R4.h>

// Create PZEM object on hardware Serial1 (UNO R4)
// For UNO R3 / Nano, construct with SoftwareSerial pins instead
PZEM004Tv40_R4 pzem(&Serial1);

void setup() {
  Serial.begin(115200);
  pzem.begin();
}

void loop() {
  // Read all values in one ~200 ms transaction
  if (pzem.readAll()) {
    Serial.print("Voltage: ");
    Serial.print(pzem.getVoltage(), 1);
    Serial.println(" V");

    Serial.print("Current: ");
    Serial.print(pzem.getCurrent(), 3);
    Serial.println(" A");

    Serial.print("Power: ");
    Serial.print(pzem.getPower(), 1);
    Serial.println(" W");
  }

  delay(1000);
}
Expected result: Voltage, current, and power scroll past once per second. Add getEnergy(), getFrequency(), and getPowerFactor() for the full picture.
Step 5 - Use the Power Features
Goal: Go beyond basic readings.
What to do: Three features make this library production-friendly. Energy reset: zero the kWh counter on demand, which is useful for daily or weekly consumption windows and cost tracking. Multiple meters: give each PZEM a unique Modbus address (change it with one sensor connected at a time) and monitor several circuits from one Arduino. Error detection: failed or corrupted reads are reported explicitly, so a dead link never masquerades as zero watts.
Expected result: You can reset counters, chain sensors, and trust your data.
Step 6 - Final Checks and Next Ideas
Goal: Validate the CT and addressing setup before expanding the project.
What to do: If current reads zero under load, the CT is clamped around the whole cable or the wrong conductor. It must encircle only the live wire. If an address change fails, disconnect the other sensors first because two meters sharing an address will conflict. From here, you can expand into a whole-home energy monitor, solar production tracker, smart power strip, battery charge/discharge logger, or an appliance cost calculator.
Expected result: Reliable readings and a clear path to scaling the build.
Conclusion
With a PZEM-004T and an Uno-class Arduino, you get a calibrated, isolated AC power meter that reports voltage, current, power, energy, frequency, and power factor in one fast serial read. This is a practical starting point for real home energy monitoring projects.
Want the exact parts used in this build? Grab them from ShillehTek.com. If you want help customizing this project or building something for your product, check out our IoT consulting services.





.png?v=25000753014097803521791168436)

.png?v=68677308723310773341791168436)


