

Project Overview
Arduino Nano + W5500 Ethernet module: Build a wired Ethernet web server that shows DHT11 temperature and humidity, reads a button, and switches a relay from any browser on your LAN. You will also add a /json endpoint so a second Arduino Nano (or a Raspberry Pi, or Home Assistant) can pull the same data over the network.
Wi-Fi is convenient until it is not: a garage, a metal cabinet, a basement rack, or anywhere you want a connection that never drops and never needs a password. A W5500 module gives a plain Arduino Nano a real Ethernet port for the price of a coffee. No cloud, no radio, one cable.
- Time: ~45 minutes
- Skill level: Intermediate
- What you will build: A DHCP-or-static Ethernet web server on a Nano with a phone-friendly status page, relay control via URL, a JSON API, and a companion client sketch that mirrors the server's inputs on another board.

Parts List
From ShillehTek
- Arduino Nano V3.0 Pre-Soldered (two for the client/server pair)
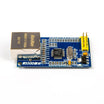
- W5500 SPI Ethernet Module
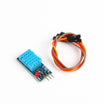
- DHT11 Temperature & Humidity Sensor
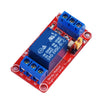
- 1-Channel 5V Relay Module
- Tactile Button Kit
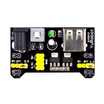
- MB102 Breadboard Power Supply - a proper 3.3 V rail for the W5500
- 830-Point Breadboard
- Dupont Jumper Wires
External
- An Ethernet cable and a spare port on your router or switch
Note: the W5500 is a 3.3 V part that draws up to about 130 mA while the link is up, which is more than the Nano's own 3V3 pin can supply (it comes from the USB chip's tiny regulator). Power the module from the MB102's 3.3 V rail (or any 3.3 V supply good for 300 mA) and share GND with the Nano. Its SPI inputs are 5 V tolerant, so the Nano's signals connect directly.
Step-by-Step Guide
Step 1 - Wire the W5500
Goal: Connect SPI plus stable 3.3 V power.
What to do: W5500 to Nano: MOSI to D11, MISO to D12, SCLK to D13, SCS (chip select) to D10, RST to D9 (optional), GND to GND. VCC (3.3 V) to the MB102 3.3 V rail, and MB102 GND to Nano GND. Plug the Ethernet cable into your router or switch.

Expected result: The module's link LED lights when the cable is plugged in.
Step 2 - Add the Sensor, Button, and Relay
Goal: Add inputs and an output for the web page to display and control.
What to do: DHT11: DATA to D2, VCC to 5V, GND to GND. Button: D3 to GND (use the internal pull-up). Relay module: IN to D7, VCC to 5V, GND to GND. Install the Adafruit DHT sensor library (plus Unified Sensor). The Ethernet library that supports the W5500 ships with the Arduino IDE.
Expected result: Hardware is ready for the server sketch upload.
Step 3 - Upload the Server Sketch
Goal: Serve a status page, accept relay control URLs, and expose a JSON endpoint.
What to do: Upload the sketch below. Then open the Serial Monitor, note the IP address, and open it in a browser on the same network.
Code:
#include <SPI.h>
#include <Ethernet.h>
#include <DHT.h>

byte mac[] = {0xDE, 0xAD, 0xBE, 0xEF, 0xFE, 0x01};   // any unique MAC on your LAN
IPAddress ip(192, 168, 1, 177);                     // used only if DHCP fails
EthernetServer server(80);
DHT dht(2, DHT11);
const int RELAY = 7, BTN = 3;
const int RELAY_ON = LOW;                           // most relay modules are active-LOW
bool relayOn = false;

void setup() {
  Serial.begin(9600);
  pinMode(RELAY, OUTPUT); digitalWrite(RELAY, !RELAY_ON);
  pinMode(BTN, INPUT_PULLUP);
  dht.begin();
  Ethernet.init(10);                                // W5500 chip select on D10
  if (Ethernet.begin(mac) == 0) Ethernet.begin(mac, ip);   // try DHCP, fall back to static
  server.begin();
  Serial.print(F("Server at http://")); Serial.println(Ethernet.localIP());
}

void loop() {
  EthernetClient client = server.available();
  if (!client) return;
  String req = client.readStringUntil('\n');        // first line: "GET /on HTTP/1.1"
  while (client.available()) client.read();         // discard the remaining headers
  if (req.indexOf("GET /on ") >= 0)  { relayOn = true;  digitalWrite(RELAY, RELAY_ON);  }
  if (req.indexOf("GET /off ") >= 0) { relayOn = false; digitalWrite(RELAY, !RELAY_ON); }

  float t = dht.readTemperature(), h = dht.readHumidity();
  bool pressed = digitalRead(BTN) == LOW;

  if (req.indexOf("GET /json") >= 0) {              // machine-readable endpoint
    client.println(F("HTTP/1.1 200 OK\r\nContent-Type: application/json\r\nConnection: close\r\n"));
    client.print(F("{\"temp\":"));   client.print(t, 1);
    client.print(F(",\"hum\":"));    client.print(h, 0);
    client.print(F(",\"button\":")); client.print(pressed ? F("true") : F("false"));
    client.print(F(",\"relay\":"));  client.print(relayOn ? F("true") : F("false"));
    client.println(F("}"));
  } else {                                          // human-readable page, refreshes every 5 s
    client.println(F("HTTP/1.1 200 OK\r\nContent-Type: text/html\r\nConnection: close\r\n"));
    client.println(F("<!DOCTYPE html><html><head><meta http-equiv='refresh' content='5;url=/'>"
                     "<meta name='viewport' content='width=device-width'><style>body{font-family:sans-serif;padding:20px}"
                     "a{display:inline-block;padding:12px 24px;margin:8px;background:#2a7;color:#fff;text-decoration:none;border-radius:6px}"
                     "</style></head><body><h2>Nano Ethernet Monitor</h2><p>"));
    client.print(F("Temperature: ")); client.print(t, 1); client.print(F(" C<br>Humidity: ")); client.print(h, 0);
    client.print(F(" %<br>Button: ")); client.print(pressed ? F("PRESSED") : F("released"));
    client.print(F("<br>Relay: "));   client.print(relayOn ? F("ON") : F("OFF"));
    client.println(F("</p><a href='/on'>Relay ON</a><a href='/off'>Relay OFF</a></body></html>"));
  }
  delay(1);
  client.stop();
}
Expected result: A simple page with temperature, humidity, the button state, and the relay state, refreshing every five seconds. Tap "Relay ON" and the relay clicks. Open /json to get something like {"temp":23.5,"hum":41,"button":false,"relay":true}.
Step 4 - Understand Why This Works Well on a Nano
Goal: Know when to reach for a cable instead of Wi-Fi.
What to do: The W5500 has the whole TCP/IP stack in silicon, so an 8-bit Nano with 2 KB of RAM can serve pages that would need an ESP32 over Wi-Fi, and it does it with no credentials, no reconnect logic, and no interference. Every line of the sketch that sends HTML is wrapped in F() to keep strings in flash; that discipline helps keep a Nano server stable. The 5-second meta refresh with url=/ means reloading never repeats an ON/OFF command.
Expected result: A server you can screw into a cabinet and forget.
Step 5 - Add a Second Nano as a Client (Board-to-Board Over the LAN)
Goal: Mirror the server's button on another board by fetching /json.
What to do: Wire a second W5500 to a second Nano the same way as the server. Upload the client sketch below, then press the button on the server board.

Code:
#include <SPI.h>
#include <Ethernet.h>

byte mac[] = {0xDE, 0xAD, 0xBE, 0xEF, 0xFE, 0x02};
IPAddress serverIp(192, 168, 1, 177);               // the server's address (see its Serial Monitor)
EthernetClient client;

void setup() {
  pinMode(13, OUTPUT);
  Ethernet.init(10);
  Ethernet.begin(mac);
}

void loop() {
  if (client.connect(serverIp, 80)) {
    client.println(F("GET /json HTTP/1.1\r\nHost: nano\r\nConnection: close\r\n"));
    String body;
    unsigned long t0 = millis();
    while (client.connected() && millis() - t0 < 3000) {
      if (client.available()) body += (char)client.read();
    }
    client.stop();
    int i = body.indexOf("\"button\":");                 // find the button field
    if (i >= 0) digitalWrite(13, body.charAt(i + 9) == 't'); // 't' of true -> LED on
  }
  delay(2000);
}
Expected result: Within two seconds the client's LED follows the server's button, which effectively extends a pin across your network with no computer in the loop. Replace D13 with a relay and you have remote switching over structured cabling.
Conclusion
With a W5500 Ethernet module, an Arduino Nano can serve a simple status page, expose a /json API, and let another board read it reliably over a wired LAN. This pattern scales from a workshop sensor to an industrial panel, and the W5500 approach works similarly on other boards when you want both radios and a cable.
Photo and schematic credits: adapted from Viorel Racoviteanu on Hackster.io.
Want the exact parts used in this build? Grab them from ShillehTek.com. If you want help customizing this project or building something for your product, check out our IoT consulting services.






.png?v=25000753014097803521791168436)

.png?v=68677308723310773341791168436)


