

Project Overview
Arduino Nano + VL53L1X Time-of-Flight Sensor: Mount a 4-meter ToF laser distance sensor on a sweeping micro servo to build a mini scanning radar that measures distance at every angle across a 60° arc and triggers an alert when something gets too close.
The original build patrolled for social distancing; yours can guard a doorway, a workbench, or a robot's path.
- Time: 1 to 2 hours
- Skill level: Intermediate
- What you will build: A servo-swept VL53L1X scanner that maps distances across an arc and fires an alert when anything crosses your threshold.

Parts List
From ShillehTek
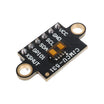
- VL53L1X Pre-Soldered Time-of-Flight Laser Distance Sensor (400cm) - the distance sensor used for each angle measurement
- Arduino Nano V3.0 Pre-Soldered - controller for servo sweep, I2C reads, and alert logic (the original used a Teensy 4.0)
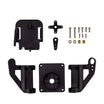
- Pan-Tilt Servo Bracket Kit - a ready-made mount for the sweeping sensor
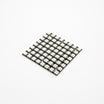
- 8x8 WS2812 RGB LED Matrix - optional visual alert display
- 400-Point Breadboard - quick prototyping and wiring
- Dupont Jumper Wires - connections between the Nano, sensor, servo, and optional parts
External
- SG90 micro servo - the sweep motor
- Optional: piezo buzzer - audible alert output
Note: The VL53L1X is the long-range member of the ToF family (up to 4 m). It is less affected by ambient light issues than ultrasonic sensors, and its narrow laser beam gives you useful angular resolution when swept.
Step-by-Step Guide
Step 1 - Understand the swept ToF radar concept
Goal: Understand the radar concept.
What to do: A fixed distance sensor watches one point. Put that sensor on a servo and step it across an arc, measuring at each angle, and you get a distance map of everything in front of you like a radar sweep.
The original build swept plus or minus 30° around center (60° total coverage) and flagged anything closer than 2 meters. Narrow laser beam plus repeatable servo angles makes this a low-cost LIDAR-style scanner.
Expected result: You know the architecture: servo steps, sensor reads, logic decides.
Step 2 - Wire the VL53L1X, servo, and optional buzzer
Goal: Connect the sensor (I2C), the servo, and an optional alert output to one Arduino Nano.
What to do: Wire the VL53L1X over I2C: VIN to 5V (the breakout regulates), GND to GND, SDA to A4, and SCL to A5. Wire the servo signal to D9, and power the servo from 5V with a shared ground (for continuous sweeping, give the servo its own 5V feed). If you are using a buzzer, connect it to D8.
Mount the VL53L1X on the servo horn. The pan-tilt bracket kit pan stage works well as a ready-made turret.

Expected result: The VL53L1X is readable over I2C and the servo sweeps on command.
Step 3 - Upload the radar sweep loop
Goal: Sweep, measure, and react.
What to do: Install the VL53L1X library (Pololu) and Servo, then upload the sketch below. It steps the servo across the arc, reads distance at each position, and alerts when anything breaches the threshold.
Code:
#include <Wire.h>
#include <VL53L1X.h>
#include <Servo.h>

VL53L1X sensor;
Servo sweep;

const int SERVO_PIN   = 9;
const int BUZZER_PIN  = 8;
const int CENTER      = 90;     // sweep +/-30 degrees around center
const int HALF_ARC    = 30;
const int THRESHOLD   = 2000;   // alert distance in mm (2 m)

int angle = CENTER - HALF_ARC;
int dir   = 1;

void setup() {
  Serial.begin(115200);
  Wire.begin();
  sensor.setTimeout(500);
  sensor.init();
  sensor.setDistanceMode(VL53L1X::Long);      // 4 m mode
  sensor.setMeasurementTimingBudget(50000);
  sensor.startContinuous(50);

  sweep.attach(SERVO_PIN);
  pinMode(BUZZER_PIN, OUTPUT);
}

void loop() {
  sweep.write(angle);
  delay(60);                                  // let the servo settle

  int mm = sensor.read();                     // distance at this angle
  Serial.print(angle); Serial.print(",");
  Serial.println(mm);                         // "angle,distance" for plotting

  digitalWrite(BUZZER_PIN, (mm > 0 && mm < THRESHOLD) ? HIGH : LOW);

  angle += dir * 2;                           // 2-degree steps
  if (angle >= CENTER + HALF_ARC || angle <= CENTER - HALF_ARC) dir = -dir;
}
Expected result: The sensor sweeps back and forth, streaming angle,distance pairs over serial, and the buzzer activates whenever something enters the 2 m zone.
Step 4 - Add a visual alert (optional)
Goal: Show status at a glance.
What to do: The original displayed messages on an LED matrix depending on proximity. With the WS2812 8x8 matrix and the FastLED library, a simple approach is to fill the matrix green when clear and red when the threshold is breached.
Expected result: A glanceable green/red proximity indicator driven by the same threshold check.
Step 5 - Tune threshold, arc width, and step size
Goal: Fit the scanner to your use case.
What to do: Adjust three values: THRESHOLD (2000 mm for personal space, 500 mm for a workbench guard, 3500 mm for a driveway), HALF_ARC (wider for room coverage, narrower for a doorway beam), and the step size (finer steps means higher angular resolution but slower sweeps).
Plot the serial angle,distance stream in the Arduino Serial Plotter to watch objects move through the arc.
Expected result: A tuned scanner for a doorway guard, robot obstacle scanner, or proximity alert.
Conclusion
Using an Arduino Nano, a VL53L1X ToF sensor, and a micro servo, you built a scanning radar that maps distance across an arc and triggers an alert when an object crosses your threshold. The VL53L1X long-range mode and narrow beam are what make the swept measurements useful.
Want the exact parts used in this build? Grab them from ShillehTek.com. If you want help customizing this project or building something for your product, check out our IoT consulting services.
Credits
All photos and images in this tutorial are credited to Evan Rust on Hackster.io. The original "Social Distancing Radar" by Evan Rust served as the reference for this ShillehTek version. We thank him for his excellent work in the maker community.





.png?v=25000753014097803521791168436)

.png?v=68677308723310773341791168436)


