

Project Overview
Arduino Nano + JSN-SR04T waterproof ultrasonic sensor: Build a rugged distance and water-level measurement setup with a live SSD1306 I2C OLED readout, suitable for outdoor use and tanks.
- Time: ~45 minutes
- Skill level: Beginner
- What you will build: A weatherproof distance meter on an Arduino Nano with an OLED readout, usable for water-level, parking, or proximity projects.

Parts List
From ShillehTek
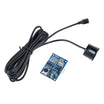
- JSN-SR04T Waterproof Ultrasonic Distance Sensor Module - sealed transducer for distance and water-level sensing in wet or outdoor locations
- Arduino Nano V3.0 Pre-Soldered - compact Arduino board to read TRIG/ECHO and drive the display
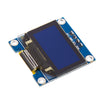
- SSD1306 0.96" I2C OLED Display - live distance readout over I2C (A4/A5 on the Nano)
- 400-Point Breadboard - quick prototyping (use perfboard for a permanent build)
- Dupont Jumper Wires - easy breadboard wiring for sensor, OLED, and power
External
- Status LED (optional threshold indicator)
- 12V supply if you run it standalone (the Nano's VIN regulator handles it)
Note: The JSN-SR04T has a blind zone and cannot measure closer than about 25 cm, and it reads reliably out to about 4.5 m. Mount it above a tank's maximum water line so the blind zone does not matter.
Step-by-Step Guide
Step 1 - How It Works
Goal: Understand the measurement principle before wiring.
What to do: The sealed transducer both transmits and receives. It fires a short ~40 kHz ultrasonic pulse, the pulse travels until it hits a surface, and the echo returns to the same transducer. The control board times that round trip and outputs an echo pulse whose width is proportional to distance. Since sound travels about 343 m/s, distance = duration × 0.034 / 2 (in cm). Unlike the classic two-eye HC-SR04, the single waterproof head is on a cable, so only the transducer needs to face the weather.
Expected result: You understand why one sealed transducer can both transmit and receive for distance measurement.
Step 2 - Wire the Sensor and OLED
Goal: Connect the JSN-SR04T and SSD1306 OLED to the Arduino Nano.
What to do: Wire the sensor to the Nano as follows: 5V to 5V, GND to GND, TRIG to D9, ECHO to D8. Wire the OLED on I2C: SDA to A4, SCL to A5. If you want a threshold alarm light, add an LED to a digital pin. The circuit and schematic below show the full hookup, including the optional 12V standalone supply into VIN.


Expected result: The hardware is wired and powered, with the transducer aimed at the surface you want to measure.
Step 3 - Upload the Code
Goal: Read distance and show it on the OLED.
What to do: Install the Adafruit GFX and Adafruit SSD1306 libraries in the Arduino IDE, then upload the sketch below.
Code:
#include <Wire.h>
#include <Adafruit_GFX.h>
#include <Adafruit_SSD1306.h>

#define TRIG_PIN 9
#define ECHO_PIN 8

Adafruit_SSD1306 display(128, 64, &Wire, -1);

void setup() {
  Serial.begin(9600);
  pinMode(TRIG_PIN, OUTPUT);
  pinMode(ECHO_PIN, INPUT);
  display.begin(SSD1306_SWITCHCAPVCC, 0x3C);
  display.clearDisplay();
}

void loop() {
  // fire a 10 s trigger pulse
  digitalWrite(TRIG_PIN, LOW);  delayMicroseconds(2);
  digitalWrite(TRIG_PIN, HIGH); delayMicroseconds(10);
  digitalWrite(TRIG_PIN, LOW);

  // time the echo and convert to centimeters
  long duration = pulseIn(ECHO_PIN, HIGH, 30000);
  float distance = duration * 0.034 / 2;

  Serial.println(distance);

  display.clearDisplay();
  display.setTextColor(SSD1306_WHITE);
  display.setTextSize(1);
  display.setCursor(0, 0);
  display.print("Distance:");
  display.setTextSize(3);
  display.setCursor(10, 25);
  display.print(distance, 0);
  display.print(" cm");
  display.display();

  delay(250);
}
Expected result: You see live distance in centimeters on the OLED and in the Serial Monitor.
Step 4 - Point It at a Real Job
Goal: Turn a distance reading into a useful measurement for your application.
What to do: Use the same reading in different projects. Mount the transducer at the top of a water tank and calculate level as tank depth minus measured distance (this pairs well with a water-level alarm or pump control). Aim it across a driveway for parking guidance. Use it outdoors for proximity sensing where rain would damage a non-waterproof sensor. If you added an LED threshold indicator, light it when distance drops below your set point for a simple alarm.
Expected result: You have a weather-resistant distance measurement core that can be adapted to tank monitoring and other outdoor sensing projects.
Conclusion
The JSN-SR04T waterproof ultrasonic sensor lets an Arduino Nano measure distance in environments where typical ultrasonic modules fail, and the SSD1306 OLED provides a clear live readout. With the wiring and sketch in this guide, you can reuse the same approach for tank level calculations, parking guidance, and outdoor proximity sensing.
Want the exact parts used in this build? Grab them from ShillehTek.com. If you want help customizing this project or building something for your product, check out our IoT consulting services.
Credits
All photos and images in this tutorial are credited to jack100 on Hackster.io. The original guide by jack100 served as the reference for this ShillehTek version. We thank them for their excellent work in the maker community.





.png?v=25000753014097803521791168436)

.png?v=68677308723310773341791168436)


