

Project Overview
Arduino Leonardo USB HID foot pedal keyboard: Using the Leonardo (ATmega32U4) and the Arduino Keyboard HID library, you will turn a basic foot switch into a hands-free USB keyboard that sends real keystrokes like Page Down and Page Up to a computer or tablet.
The Leonardo has native USB built into the chip, so it can present itself to a host as a standard keyboard. This guide wires two pedals that send Page Down and Page Up and works on Windows, Linux, and Android.
- Time: 1 to 2 hours (mostly cable-making)
- Skill level: Easy to Intermediate (basic soldering and crimping)
- What you will build: A USB foot pedal that types real keystrokes into anything with a USB port.

Parts List
From ShillehTek
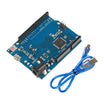
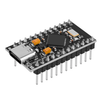
- Leonardo R3 ATmega32U4 Development Board - the native-USB HID board used for keyboard emulation (the compact Pro Micro ATmega32U4 works too)
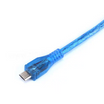
- Micro USB Cable - connects the Leonardo to the computer/tablet
- Dupont Jumper Wires - for easy connections (or crimp your own as shown)
External
- Foot switch / sustain pedal (for example, a keyboard sustain pedal with a 6.35mm TS plug, set to normally-open)
- Female 1/4 in (6.35mm) TS mono jack, hookup wire, Dupont crimp connectors
- Soldering iron, crimper, pliers, multimeter (optional)
Warning: A regular Arduino UNO cannot do this. Its main chip has no native USB, so it cannot act as an HID keyboard. You need an ATmega32U4 board (Leonardo, Pro Micro) or similar.
Step-by-Step Guide
Step 1 - Gather Components and Tools
Goal: Everything staged for a clean build.
What to do: Gather the Leonardo, a micro USB cable, two short wires, a female TS jack for the pedal plug, Dupont connectors, and the pedal itself. Tools: soldering iron, crimper, and pliers. A multimeter helps verify the pedal is normally-open.


Expected result: Parts and tools are ready to assemble.
Step 2 - Plan the Wiring
Goal: Map each pedal to a Leonardo input pin.
What to do: Each pedal is a simple switch between ground and a digital pin: pedal 1 between GND and D2, and an optional pedal 2 between GND and D3. The sketch enables internal pull-ups, so a press pulls the pin LOW and no external resistors are needed. Use normally-open switches.
Pedal 1: GND <-> D2
Pedal 2: GND <-> D3 (optional)
Expected result: You know exactly which two pins and wires you need.
Step 3 - Crimp the Custom Cable
Goal: Create a clean, detachable link from the jack to the board headers.
What to do: Cut two wires (about 10 cm), strip about 4 mm, and crimp Dupont male connectors. Seat the wire in the connector, fold the strain relief with pliers, crimp, and click the connector into its housing.


Expected result: A robust two-wire cable with header-friendly ends.
Step 4 - Solder the TS Jack
Goal: Give the pedal something to plug into.
What to do: Solder the two wires to the female TS jack terminals (tip and sleeve). This lets the pedal plug in like it would to a keyboard or amp.


Expected result: A pedal connection chain: pedal to jack to Dupont pins to D2/GND (and D3/GND if using a second pedal).
Step 5 - Upload the Keyboard Sketch
Goal: Make pedal presses type keys.
What to do: Paste this sketch into the Arduino IDE, select Arduino Leonardo and its port, and upload. It watches both pedal pins with internal pull-ups and sends Page Down and Page Up on press.
#include "Keyboard.h"

#define PEDAL1_PIN 2
#define PEDAL2_PIN 3

// Works on ATmega32U4 boards (Leonardo/Pro Micro) - native USB HID

static void Pedal1Down(void)
{
  Keyboard.press(KEY_PAGE_DOWN);
}

static void Pedal2Down(void)
{
  Keyboard.press(KEY_PAGE_UP);
}

void setup(void)
{
  Keyboard.begin();

  pinMode(PEDAL1_PIN, INPUT);
  digitalWrite(PEDAL1_PIN, HIGH); // enable pull-up

  pinMode(PEDAL2_PIN, INPUT);
  digitalWrite(PEDAL2_PIN, HIGH); // enable pull-up
}

void loop(void)
{
  static uint8_t pedal1StateLast = 0;
  static uint8_t pedal2StateLast = 0;
  uint8_t pedalState;

  pedalState = digitalRead(PEDAL1_PIN);
  if (pedalState != pedal1StateLast) {
    pedal1StateLast = pedalState;
    if (pedalState == 0) {
      Pedal1Down();
      delay(100);
      Keyboard.releaseAll();
    }
  }

  pedalState = digitalRead(PEDAL2_PIN);
  if (pedalState != pedal2StateLast) {
    pedal2StateLast = pedalState;
    if (pedalState == 0) {
      Pedal2Down();
      delay(100);
      Keyboard.releaseAll();
    }
  }

  delay(50);
}
Want more pedals and modifier keys? This table-driven variant scales to any number of switches, including shifted keys.
#include <Keyboard.h>

typedef struct {
  uint8_t pin;
  bool shift;
  uint8_t key;
  uint8_t pinStateLast;
} pinKey_t;

pinKey_t pinKey[] = {
  { 2, false, KEY_PAGE_DOWN, 0 }, // Pin 2 sends page down
  { 3, false, KEY_PAGE_UP,   0 }, // Pin 3 sends page up
  { 6, false, 'a',           0 }, // Pin 6 sends a
  { 7, true,  'a',           0 }  // Pin 7 sends SHIFT + a
};

void setup()
{
  Keyboard.begin();
  for (uint8_t i = 0; i < sizeof(pinKey) / sizeof(pinKey_t); i++) {
    pinMode(pinKey[i].pin, INPUT_PULLUP);
    pinKey[i].pinStateLast = digitalRead(pinKey[i].pin);
  }
}

void loop()
{
  uint8_t pinState;
  for (uint8_t i = 0; i < sizeof(pinKey) / sizeof(pinKey_t); i++) {
    pinState = digitalRead(pinKey[i].pin);
    if (pinKey[i].pinStateLast != pinState) {
      pinKey[i].pinStateLast = pinState;
      if (pinState == 0) {
        if (pinKey[i].shift) {
          Keyboard.press(KEY_LEFT_SHIFT);
        }
        Keyboard.press(pinKey[i].key);
        delay(100);
        Keyboard.releaseAll();
      }
    }
  }
  delay(50);
}
Expected result: The Leonardo enumerates as a USB keyboard.
Step 6 - Test on a Computer
Goal: Verify the pedal triggers the keystrokes.
What to do: Plug in the pedal and confirm it is set to normally-open (some pedals have a polarity switch underneath). Connect the Leonardo over USB, open any PDF (or any app that reacts to Page Up/Page Down), and press the pedal. With only one pedal, you can move the signal wire from D2 to D3 to test Page Up.


Expected result: Hands-free page turns on Windows or Linux.
Step 7 - Test on Android
Goal: Use the pedal as a keyboard on a phone or tablet.
What to do: Connect the Leonardo to a phone or tablet through a USB-OTG cable, open a browser or PDF reader, and press the pedal. Android treats it as a keyboard the same way a desktop does.


Expected result: A universal foot controller that works with Android devices that support USB OTG.
Conclusion
You used the Arduino Leonardo (ATmega32U4) and the USB HID Keyboard library to build a keyboard-emulating foot pedal. With internal pull-ups and a simple switch-to-ground input, each stomp reliably sends Page Down or Page Up to your device.
Want the exact parts used in this build? Grab them from ShillehTek.com. If you want help customizing this project or building something for your product, check out our IoT consulting services.



.png?v=25000753014097803521791168436)

.png?v=68677308723310773341791168436)


