

Project Overview
DIY Capacitive Touch on Any Arduino - A Coin, a Resistor, and the CapacitiveSensor Library: Build an Arduino CapacitiveSensor touch button using a coin (or foil) electrode and a single high-value resistor, then use it to toggle an LED or relay like a lamp switch. With a bigger resistor, the same circuit becomes a proximity sensor that reacts before you touch it. This guide builds a touch-toggled lamp, explains why it works, and shows how to make it stable enough to hide behind a panel.
- Time: ~30 minutes
- Skill level: Beginner
- What you will build: A foil touch switch with auto-calibration and debounce that toggles an LED or relay, plus a proximity-lamp variant.

Parts List
From ShillehTek
- Arduino Uno R3 Super Starter Kit - Uno, LEDs, and jumpers
- Resistor Kit - the 1MΩ sensing resistor and 220Ω for the LED
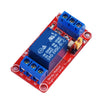
- 1-Channel 5V Relay Module - to make it a real lamp switch
- 400-Point Breadboard
- Dupont Jumper Wires
External
- A coin, aluminum foil, or copper tape for the electrode
- Optional: a 10MΩ resistor for proximity mode
Note: The library toggles a "send" pin and times how long a "receive" pin takes to follow it through the resistor. Your finger adds capacitance to the electrode, so the receive pin lags longer - that extra time is the reading. Bigger resistor or bigger electrode means more sensitivity, up to and including sensing a hand a few centimeters away.
Step-by-Step Guide
Step 1 - Wire the Sensor
Goal: Set up a send pin, a receive pin, and an electrode.
What to do: Wire a 1MΩ resistor between D2 (send) and D4 (receive). Clip or tape the electrode to the D4 side of the resistor.
For the indicator LED, wire: D8 → 220Ω → LED → GND. Power the Uno from a laptop or wall adapter, since the sensor works best when the board has a solid ground reference.

Expected result: The simplest sensor you'll ever wire.
Step 2 - Install the Library and Look at the Numbers
Goal: Identify your idle and touched readings so you can set a reliable threshold.
What to do: Install CapacitiveSensor by Paul Badger from the Arduino Library Manager. Print cs.capacitiveSensor(30) to the Serial Plotter.
Idle typically sits low (tens to a few hundred), and a touch often jumps to thousands. The idle value depends on wire length and what's near the electrode, which is why the sketch calibrates itself.
Expected result: A big, obvious jump when you touch the coin.
Step 3 - Upload the Sketch
Goal: Toggle an output once per touch using auto-calibration and debounce.
Code:
#include <CapacitiveSensor.h>

CapacitiveSensor cs(2, 4);            // send pin 2, receive (electrode) pin 4
const int OUT = 8;                    // LED now, relay IN later
long baseline = 0;
bool state = false, wasTouched = false;
unsigned long lastToggle = 0;

long readTouch() { return cs.capacitiveSensor(30); }   // 30 samples per reading

void setup() {
  Serial.begin(9600);
  pinMode(OUT, OUTPUT);
  cs.set_CS_AutocaL_Millis(0xFFFFFFFF); // we'll do our own calibration
  delay(500);
  long sum = 0;
  for (int i = 0; i < 20; i++) { sum += readTouch(); delay(10); }
  baseline = sum / 20;                // idle reading with nobody near
  Serial.print("baseline "); Serial.println(baseline);
}

void loop() {
  long v = readTouch();
  bool touched = v > baseline * 4 + 200;             // well above idle
  Serial.println(v);

  if (touched && !wasTouched && millis() - lastToggle > 300) {   // rising edge + debounce
    state = !state;
    digitalWrite(OUT, state);
    lastToggle = millis();
  }
  wasTouched = touched;

  if (!touched) baseline = (baseline * 99 + v) / 100;  // slowly track drift while idle
  delay(10);
}
What to do: Upload with your hands away from the electrode, wait for the baseline print, then tap the coin.
Expected result: One toggle per tap, no chatter, and it keeps working as humidity and temperature drift because the baseline follows along.
Step 4 - Hide It and Switch Something Real
Goal: Turn the circuit into an invisible switch that can control a lamp.
What to do: Tape a foil square to the underside of a wooden or plastic panel so it senses through a few millimeters of non-conductive material.
Move the output to the relay module input (VCC → 5V, GND → GND, and Arduino output pin → IN). Keep the electrode wire short and away from mains cables to avoid false triggers.
Expected result: A touch lamp with no visible switch.
Step 5 - Proximity Mode
Goal: Sense a hand before it touches the electrode.
What to do: Swap the 1MΩ resistor for a 10MΩ resistor and use a larger foil sheet. The reading now rises smoothly as a hand approaches from several centimeters away.
Map it to LED brightness with analogWrite for a lamp that fades up as you reach for it, exactly as the original author's proximity-lamp project does.
Expected result: A lamp that glows brighter the closer your hand gets.
Conclusion
One resistor turns an Arduino pin into a touch or proximity sensor, and a self-tracking baseline makes it dependable. Once you've seen a coin work as a button, you'll find uses for it in enclosures where you want a sealed, invisible input.
Reference credit: Photos and original inspiration come from Amal Mathew on Hackster.io, which served as the source guide for this ShillehTek version.
Want the exact parts used in this build? Grab them from ShillehTek.com. If you want help customizing this project or building something for your product, check out our IoT consulting services.






.png?v=25000753014097803521791168436)

.png?v=68677308723310773341791168436)


