Overview
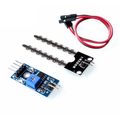
The Capacitive Soil Moisture Sensor V1.2 is a low-cost, hobby-friendly probe that measures how wet or dry your soil is. Unlike older resistive moisture sensors that use two exposed metal prongs, this one uses capacitive sensing, so there is no direct electrical contact between the probe and the soil. That single design change solves the biggest headache of resistive sensors: corrosion. Resistive probes literally electrolyze themselves into oblivion after a few weeks in damp soil, while capacitive probes can sit in a planter for months and keep reading.
Electrically the sensor is dead simple. It outputs an analog voltage on the AOUT pin. In dry air the output sits near ~2.5V, and when the probe is submerged in water it drops to around ~1.0V. The drier the soil, the higher the voltage; the wetter the soil, the lower the voltage. You read that voltage with any microcontroller ADC and either use the raw value or map it to a 0-100% scale after calibrating in air and water.
This makes it perfect for plant-watering reminders, automated irrigation projects, greenhouse data loggers, ESP32-based smart pots that ping your phone when the basil is thirsty, or just classroom electronics experiments. Power it from 3.3V or 5V, plug AOUT into an analog input, and you have a working soil sensor in under five minutes.
At a Glance
Specifications
| Parameter | Value |
| Operating Voltage | 3.3V - 5.5V DC |
| Operating Current | ~5 mA |
| Output Type | Analog voltage |
| Output Range (Dry) | ~2.5V (in open air) |
| Output Range (Wet) | ~1.0V (fully submerged) |
| Onboard Regulator | Yes (stabilizes 3.3V-5V input) |
| Connector | 3-pin JST / dupont header (VCC, GND, AOUT) |
| Probe Material | Corrosion-resistant PCB substrate |
| Operating Temp | 0°C to 60°C |
| PCB Length | ~98 mm |
| PCB Width | ~23 mm |
| Weight | ~15 g |
Pinout Diagram

Wiring Guide
Arduino Wiring
Arduino Uno/Nano/Mega have a 10-bit ADC built in, so wiring is as simple as it gets — three wires and you're reading soil moisture.
| Sensor Pin | Arduino Pin |
|---|---|
| VCC | 5V |
| GND | GND |
| AOUT | A0 |
ESP32 Wiring
ESP32 has multiple ADC-capable pins. GPIO34 is input-only and a great pick for analog sensors because there's no risk of accidentally driving it as an output.
| Sensor Pin | ESP32 Pin |
|---|---|
| VCC | 3.3V |
| GND | GND |
| AOUT | GPIO34 (ADC1_CH6) |
Raspberry Pi Wiring
The Raspberry Pi has no built-in ADC, so you need an external analog-to-digital converter like the MCP3008 (SPI) or ADS1115 (I2C). Below is wiring with an MCP3008.
| Sensor Pin | Connection |
|---|---|
| VCC | Pi 3.3V (pin 1) |
| GND | Pi GND (pin 6) |
| AOUT | MCP3008 CH0 |
And the MCP3008 to Pi:
| MCP3008 Pin | Pi Pin |
|---|---|
| VDD / VREF | 3.3V |
| AGND / DGND | GND |
| CLK | GPIO11 (SCLK) |
| DOUT | GPIO9 (MISO) |
| DIN | GPIO10 (MOSI) |
| CS | GPIO8 (CE0) |
sudo raspi-config before wiring.Raspberry Pi Pico Wiring
The Pico has three usable ADC channels on GP26, GP27, and GP28. Pick any of them.
| Sensor Pin | Pico Pin |
|---|---|
| VCC | 3V3 (OUT) — pin 36 |
| GND | GND — pin 38 |
| AOUT | GP26 / ADC0 — pin 31 |
Code Examples
Arduino
// Capacitive Soil Moisture Sensor V1.2 - Arduino
// AOUT -> A0, VCC -> 5V, GND -> GND

const int SOIL_PIN = A0;

// Calibrate these for your sensor + soil:
const int DRY_VALUE = 590;  // raw ADC reading in dry air
const int WET_VALUE = 250;  // raw ADC reading fully submerged

void setup() {
  Serial.begin(9600);
}

void loop() {
  int raw = analogRead(SOIL_PIN);

  // Constrain and map to 0-100% (higher = wetter)
  int clamped = constrain(raw, WET_VALUE, DRY_VALUE);
  int percent = map(clamped, DRY_VALUE, WET_VALUE, 0, 100);

  Serial.print("Raw: ");
  Serial.print(raw);
  Serial.print("  Moisture: ");
  Serial.print(percent);
  Serial.println("%");

  delay(1000);
}
ESP32
// Capacitive Soil Moisture Sensor V1.2 - ESP32
// AOUT -> GPIO34, VCC -> 3.3V, GND -> GND

const int SOIL_PIN = 34;

// 12-bit ADC: 0-4095. Calibrate these:
const int DRY_VALUE = 3000;
const int WET_VALUE = 1200;

void setup() {
  Serial.begin(115200);
  analogReadResolution(12);
  analogSetAttenuation(ADC_11db); // full 0-3.3V range
}

void loop() {
  int raw = analogRead(SOIL_PIN);
  int clamped = constrain(raw, WET_VALUE, DRY_VALUE);
  int percent = map(clamped, DRY_VALUE, WET_VALUE, 0, 100);

  Serial.printf("Raw: %d  Moisture: %d%%\n", raw, percent);
  delay(1000);
}
Raspberry Pi (Python)
# Capacitive Soil Moisture Sensor V1.2 - Raspberry Pi
# Requires an MCP3008 ADC over SPI.
# pip install adafruit-circuitpython-mcp3xxx

import time
import board
import busio
import digitalio
from adafruit_mcp3xxx.mcp3008 import MCP3008
from adafruit_mcp3xxx.analog_in import AnalogIn

spi = busio.SPI(clock=board.SCK, MISO=board.MISO, MOSI=board.MOSI)
cs = digitalio.DigitalInOut(board.D8)
mcp = MCP3008(spi, cs)
chan = AnalogIn(mcp, 0)  # MCP3008 CH0

# Calibrate (0-65535 scale from adafruit lib)
DRY_VALUE = 48000
WET_VALUE = 20000

while True:
    raw = chan.value
    clamped = max(WET_VALUE, min(DRY_VALUE, raw))
    percent = int((DRY_VALUE - clamped) * 100 / (DRY_VALUE - WET_VALUE))
    print(f"Raw: {raw}  Voltage: {chan.voltage:.2f}V  Moisture: {percent}%")
    time.sleep(1)
Raspberry Pi Pico (MicroPython)
# Capacitive Soil Moisture Sensor V1.2 - Pico (MicroPython)
# AOUT -> GP26 (ADC0), VCC -> 3V3, GND -> GND

from machine import ADC, Pin
import time

soil = ADC(Pin(26))

# 16-bit value on Pico (read_u16). Calibrate:
DRY_VALUE = 50000
WET_VALUE = 22000

while True:
    raw = soil.read_u16()
    clamped = max(WET_VALUE, min(DRY_VALUE, raw))
    percent = int((DRY_VALUE - clamped) * 100 / (DRY_VALUE - WET_VALUE))
    print("Raw:", raw, " Moisture:", percent, "%")
    time.sleep(1)