

Video Tutorial
Watch first if you want to follow the full AWS setup and MicroPython code flow in real time.
Project Overview
Raspberry Pi Pico W + MPU6050: In this project, you publish MPU6050 acceleration data from a Raspberry Pi Pico W to AWS IoT Core over MQTT, route it through a Lambda function, and store it in an AWS DynamoDB table.
This architecture is mostly about connecting AWS services, so do not be intimidated if you are a beginner.
If you want to support the creator, here are the original links:
- Subscribe: Youtube
- Support: https://www.buymeacoffee.com/mmshilleh
- Hire on UpWork: https://www.upwork.com/freelancers/~017060e77e9d8a1157
- Time: 60 to 120 minutes
- Skill level: Intermediate
- What you will build: A secure MQTT pipeline from Pico W sensor data into DynamoDB using AWS IoT Core and Lambda
Parts List
From ShillehTek
- Raspberry Pi Pico 2 W + MPU6050 breadboard starter kit — Pico 2 W, MPU6050 module(s), 400-point breadboard, and jumper wires in one bundle (easiest way to match this build).
- Raspberry Pi Pico 2 W — Wi‑Fi Pico board alone if you already have the MPU6050, breadboard, and wires.
- MPU6050 (pre-soldered) IMU module — 6-axis accelerometer + gyro over I2C (if not using the bundle).
- 400-point solderless breadboard — for prototyping the I2C wiring (included in the starter kit).
- 120pcs 10 cm jumper wires — power, ground, SDA, and SCL between Pico and MPU6050 (included in the starter kit).
External
- AWS account: aws.amazon.com
- MicroPython file editor (example used: Thonny)
- MQTT library file: https://raw.githubusercontent.com/micropython/micropython-lib/master/micropython/umqtt.simple/umqtt/simple.py
Note: This tutorial uses TLS certificates with AWS IoT Core. You will download certificate/key files from AWS and upload them to the Pico W filesystem for the MQTT client to connect securely.
Step-by-Step Guide
Step 1 - Review the architecture
Goal: Understand how data flows from the Pico W into DynamoDB.
What to do: Use this architecture: Pico W publishes sensor values with MQTT to AWS IoT Core. An IoT Rule routes messages to a Lambda function. The Lambda function writes items into a DynamoDB table.

Expected result: You know which AWS services you will create and connect: DynamoDB, Lambda, IAM role/policy, IoT Core Thing/certs, and an IoT Rule.
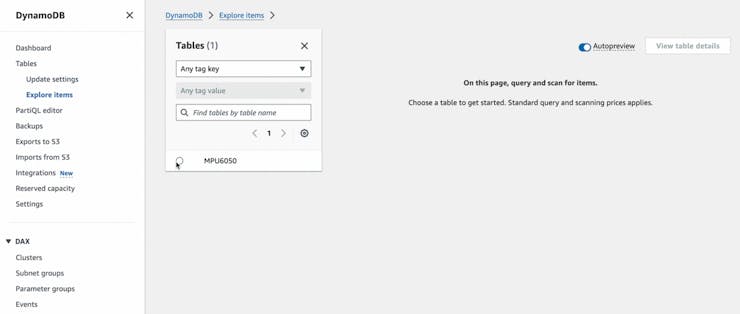
Step 2 - Create an AWS DynamoDB table
Goal: Create the DynamoDB table that will store your sensor records.
What to do:
- Go to aws.amamazon.com and create an account (AWS free tier is available to get started).
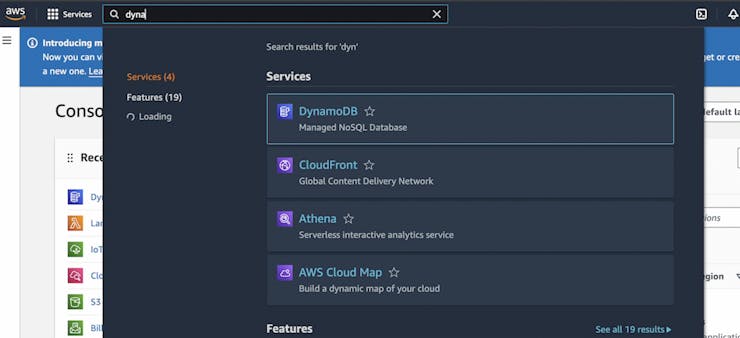
- In the AWS console, search for DynamoDB and open the service.
- Select Create table.
- Set a table name (any name you like). Set a partition key and make sure the partition key is a number.
- Create the table using default settings.

Expected result: A DynamoDB table exists and is ready for Lambda to write items into it.
Step 3 - Create an AWS Lambda function to write to DynamoDB
Goal: Create a Lambda function that receives IoT Core event data and inserts it into your DynamoDB table.
What to do:
- In the AWS console, search Lambda and open the service.
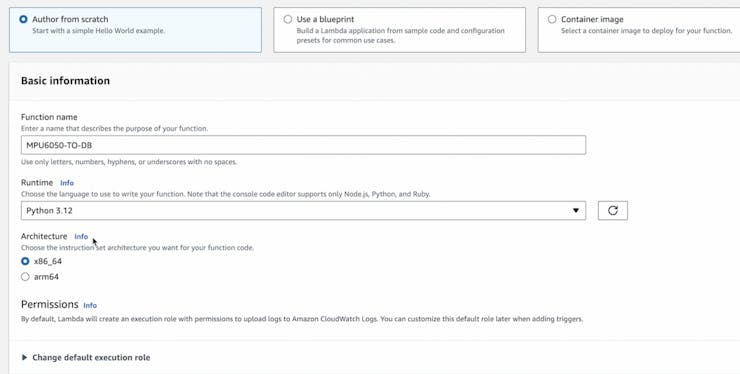
- Select Create function, choose Author from scratch, and select Python for the runtime.
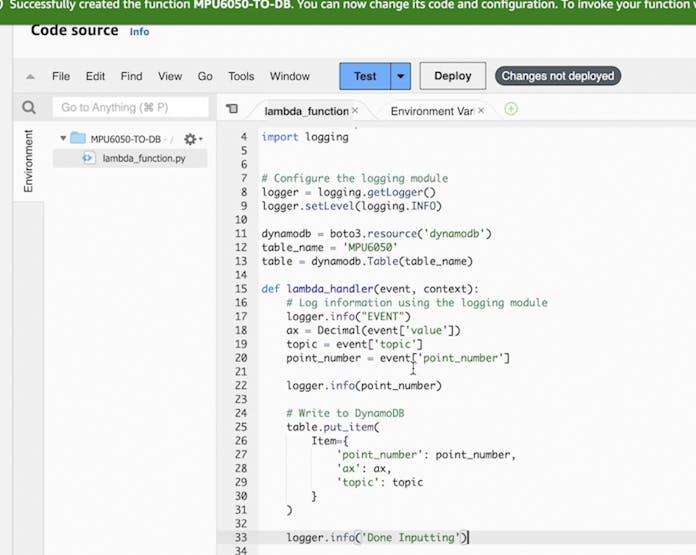
- Create the function, then scroll to lambda_function.py and replace the contents with the code below.
- After every change, click Deploy.

Code:
import boto3
from decimal import Decimal
import logging

# Configure the logging module
logger = logging.getLogger()
logger.setLevel(logging.INFO)

dynamodb = boto3.resource('dynamodb')
table_name = 'MPU6050'
table = dynamodb.Table(table_name)

def lambda_handler(event, context):
    # Log information using the logging module
    logger.info("EVENT")

    ax = Decimal(event['value'])
    topic = event['topic']
    point_number = event['point_number']

    logger.info(point_number)

    # Write to DynamoDB
    table.put_item(
        Item={
            'point_number': point_number,
            'ax': ax,
            'topic': topic
        }
    )

    logger.info('Done Inputting')
Expected result: Your Lambda function is created, updated with the provided Python code, and deployed.
Step 4 - Update IAM permissions for the Lambda role
Goal: Ensure the Lambda function role can write to your DynamoDB table.
What to do:
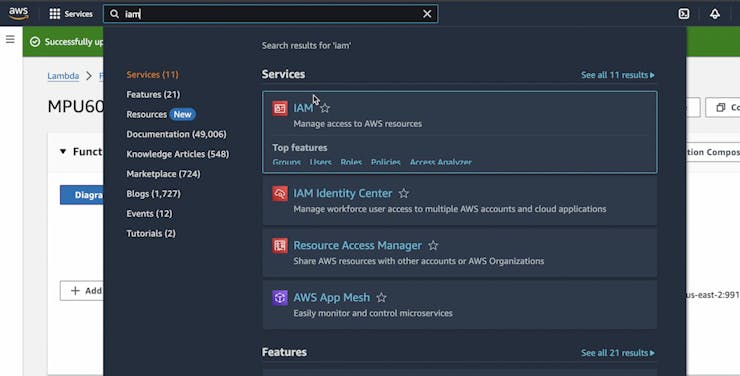
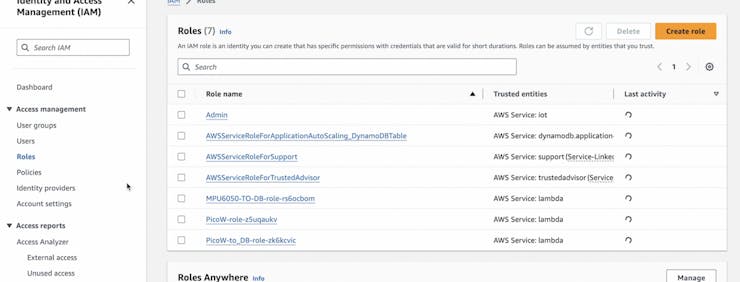
- In the AWS console, search IAM and open the service.
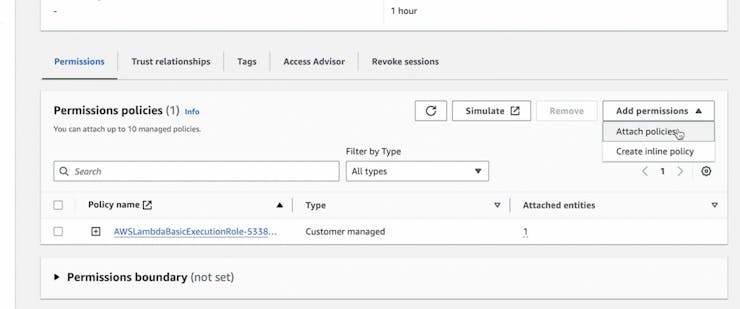
- Select the role that was created for your function (example shown: MPU6050-TO-DB-role).
- Select Add permissions and add the AdministratorAccess policy.
Note: The original tutorial uses AdministratorAccess for simplicity. Be cautious with this role in production.
Expected result: The Lambda role has permissions that allow it to write items to DynamoDB.
Step 5 - Configure AWS IoT Core (policy, Thing, certificates, and rule)
Goal: Create an IoT Core Thing and rule so MQTT messages from the Pico W trigger your Lambda function.
What to do:
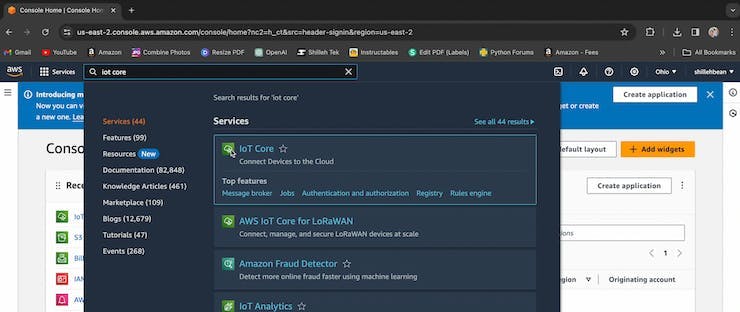
- In the AWS console, search IoT Core and open the service.
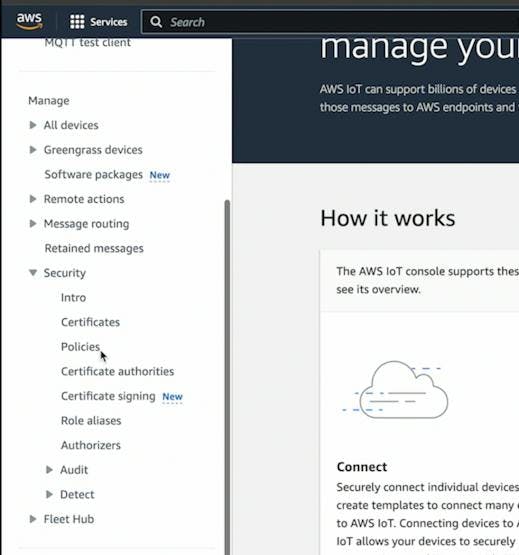
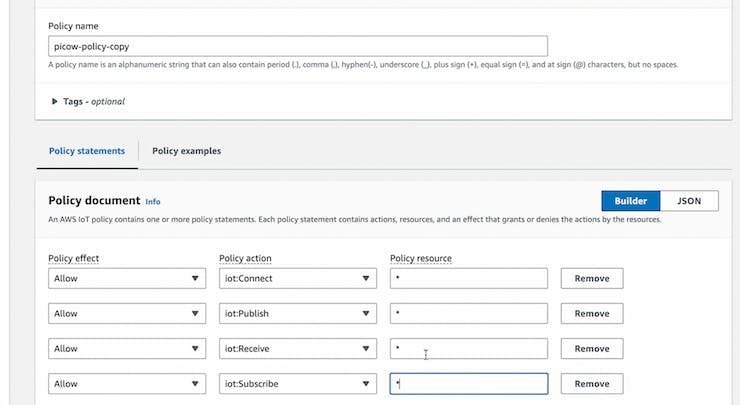
- Create an IoT policy under Security > Policies (customize as needed).
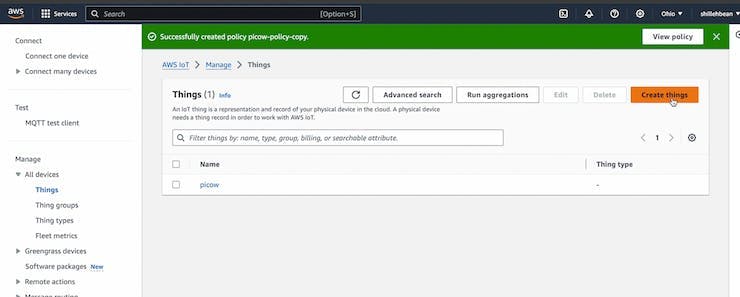
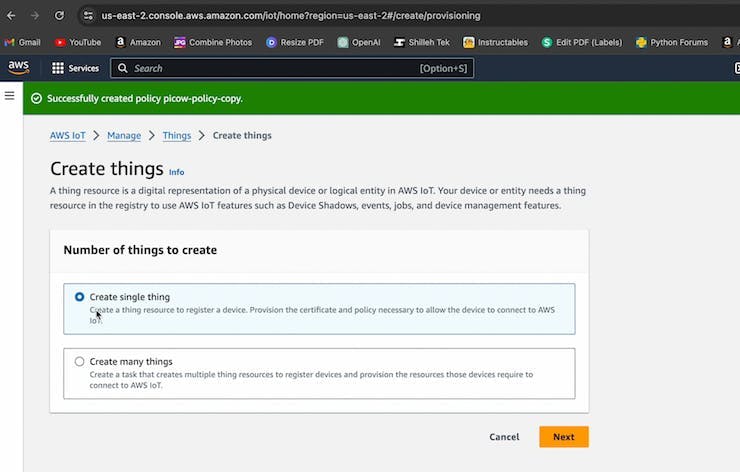
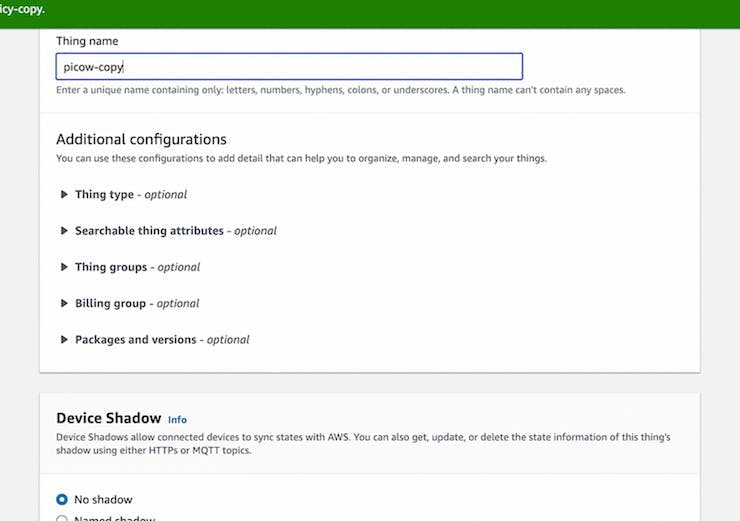
- Create a Thing under All devices > Things > Create things.
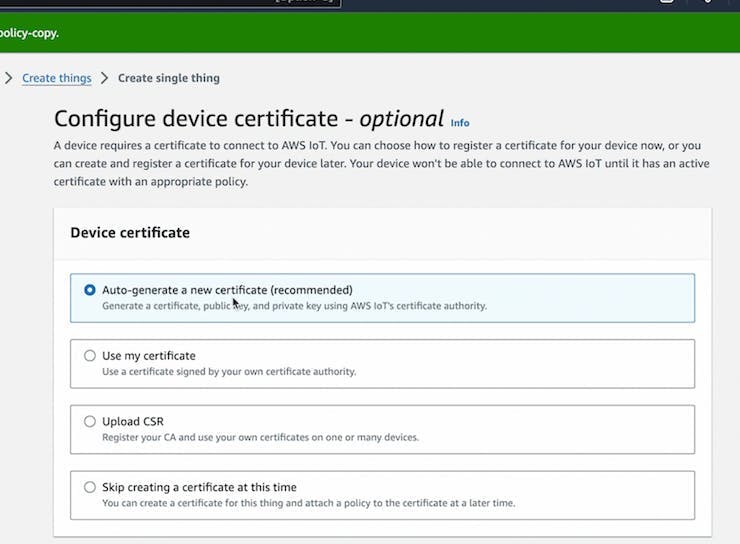
- Auto-generate certificates for the Thing.
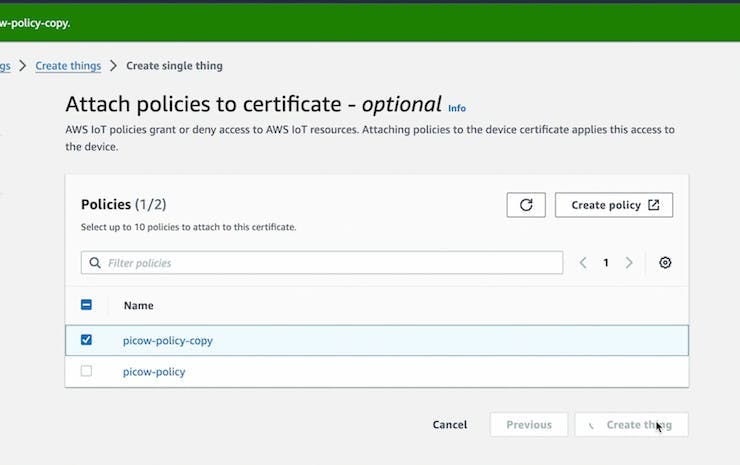
- Attach the policy you created to the Thing.
- Download the 4 files shown by AWS (device certificate, public key, private key, and Root CA 2048). You will upload these to the Pico W later.
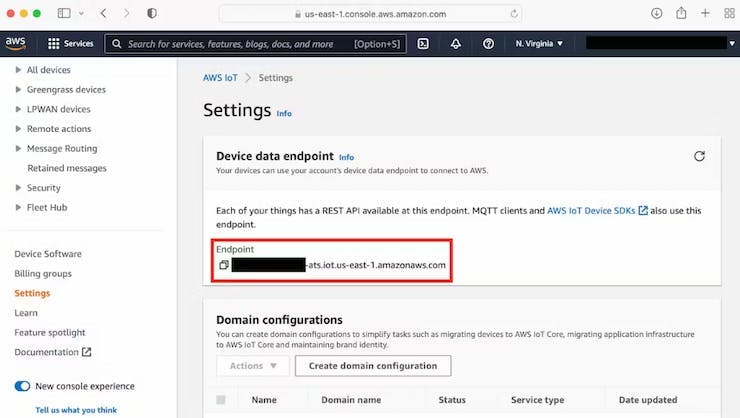
- Copy and save your AWS IoT Core endpoint from Settings. Keep this information private.
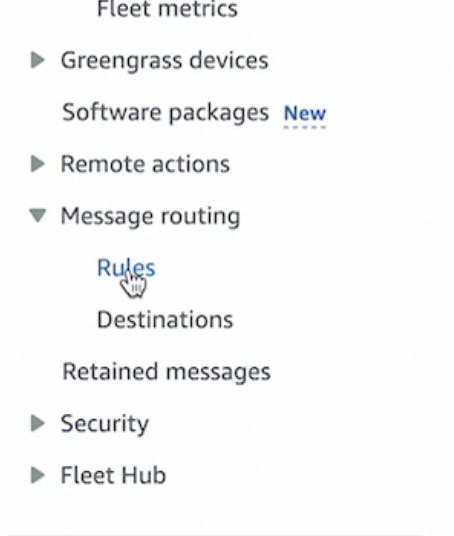
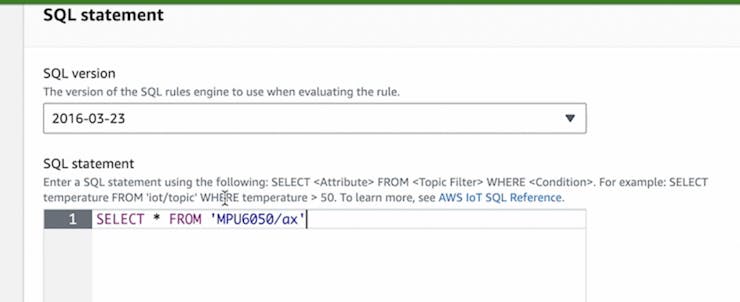
- Create an IoT Rule under Message routing > Rules.
- Define the rule to select all values on the MPU6050/ax topic.
- Set the rule action to invoke the Lambda function you created.

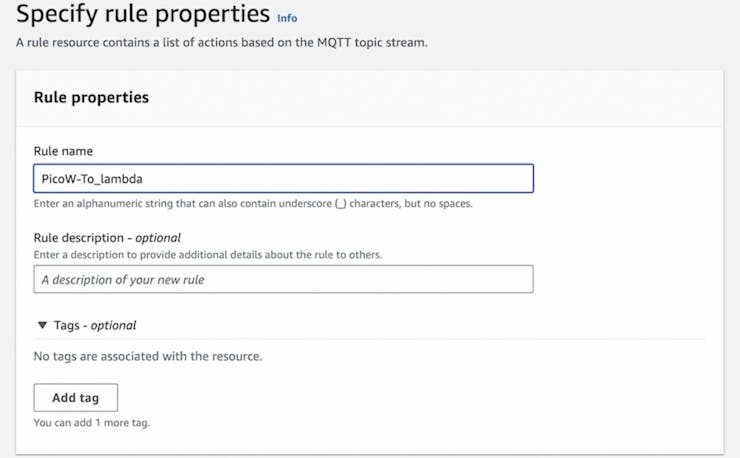
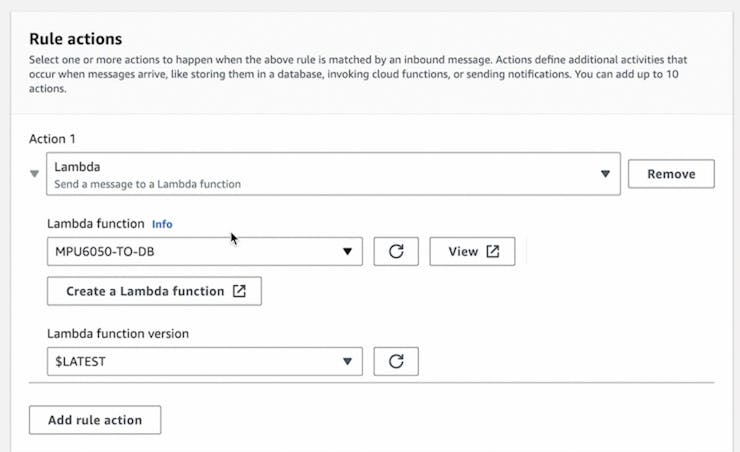
Expected result: An IoT Thing is created with certs, you have saved the IoT Core endpoint, and an IoT Rule routes messages on MPU6050/ax to your Lambda function.
Step 6 - Upload certificates and add the MQTT library on the Pico W
Goal: Prepare the Pico W filesystem with the required AWS IoT certificate files and the MicroPython MQTT client library.
What to do:
- Open your MicroPython editor (example used: Thonny) and upload the 4 downloaded AWS IoT files to the Pico W.
- Download the MicroPython umqtt library from: https://raw.githubusercontent.com/micropython/micropython-lib/master/micropython/umqtt.simple/umqtt/simple.py
- Create a file named simple.py inside your Pico W lib folder, and paste the library contents into that file.
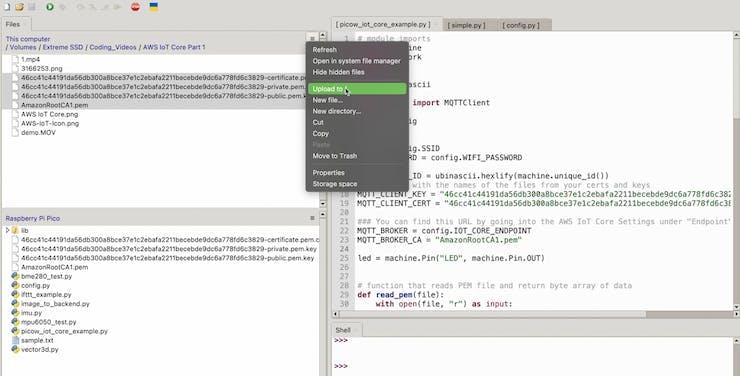
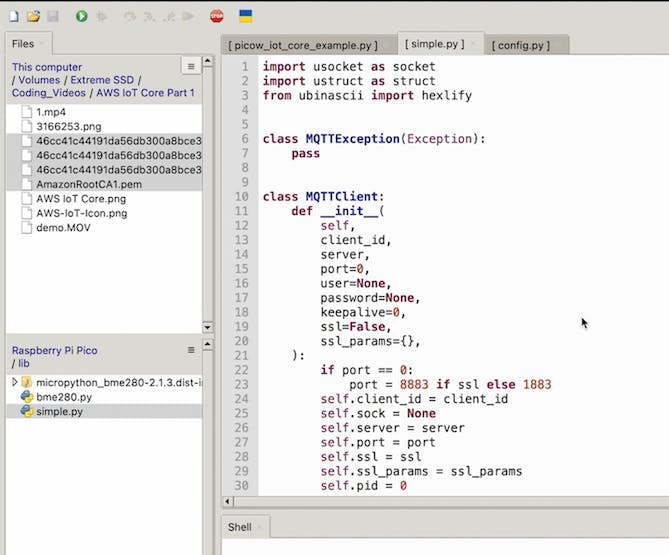
Expected result: Your Pico W has the AWS IoT certificate/key files and the simple.py MQTT library available to import.
Step 7 - Run the MicroPython MQTT publisher and verify DynamoDB items
Goal: Connect the Pico W to Wi-Fi and AWS IoT Core, publish MPU6050 acceleration data, and confirm it lands in DynamoDB through Lambda.
What to do: Create a new MicroPython file on the Pico W (name it as you like) and use the code pattern below. This code connects to Wi-Fi, sets up TLS using your certificate files, reads MPU6050 acceleration, and publishes JSON payloads to the MPU6050/ax topic.
Code:
import json
import machine
import network
import ssl
import time
import ubinascii

from simple import MQTTClient
from imu import MPU6050
from machine import Pin, I2C
import config

SSID = config.SSID
WIFI_PASSWORD = config.WIFI_PASSWORD
MQTT_CLIENT_ID = ubinascii.hexlify(machine.unique_id())
MQTT_CLIENT_KEY = "6912b69415aa106cb16c0d8008df840cd4e584f0a273cb66eb98e3941108eb98-private.pem.key"
MQTT_CLIENT_CERT = "6912b69415aa106cb16c0d8008df840cd4e584f0a273cb66eb98e3941108eb98-certificate.pem.crt"
MQTT_BROKER = config.IOT_CORE_ENDPOINT
MQTT_BROKER_CA = "AmazonRootCA1.pem"

i2c = I2C(0, sda=Pin(0), scl=Pin(1), freq=400000)
imu = MPU6050(i2c)

def read_pem(file):
    with open(file, "r") as input:
        text = input.read().strip()
    split_text = text.split("\n")
    base64_text = "".join(split_text[1:-1])
    return ubinascii.a2b_base64(base64_text)

def connect_internet():
    try:
        sta_if = network.WLAN(network.STA_IF)
        sta_if.active(True)
        sta_if.connect(SSID, WIFI_PASSWORD)
        for i in range(0, 10):
            if not sta_if.isconnected():
                time.sleep(1)
        print("Connected to Wi-Fi")
    except Exception as e:
        print('There was an issue connecting to WIFI')
        print(e)

def publish_mpu_values(x):
    ax = round(imu.accel.x, 2)
    payload = {
        "point_number": x,
        "value": str(ax),
        "topic": 'MPU6050/ax'
    }
    mqtt_client.publish('MPU6050/ax', json.dumps(payload))

connect_internet()

key = read_pem(MQTT_CLIENT_KEY)
cert = read_pem(MQTT_CLIENT_CERT)
ca = read_pem(MQTT_BROKER_CA)

mqtt_client = MQTTClient(
    MQTT_CLIENT_ID,
    MQTT_BROKER,
    keepalive=60,
    ssl=True,
    ssl_params={
        "key": key,
        "cert": cert,
        "server_hostname": MQTT_BROKER,
        "cert_reqs": ssl.CERT_REQUIRED,
        "cadata": ca,
    },
)

print(f"Connecting to MQTT broker")
mqtt_client.connect()
print("Done Connecting, sending Values")

for i in range(1, 101):
    print("Publishing point ", i)
    publish_mpu_values(i)
After running the script, go back to DynamoDB and check your table under Explore items.
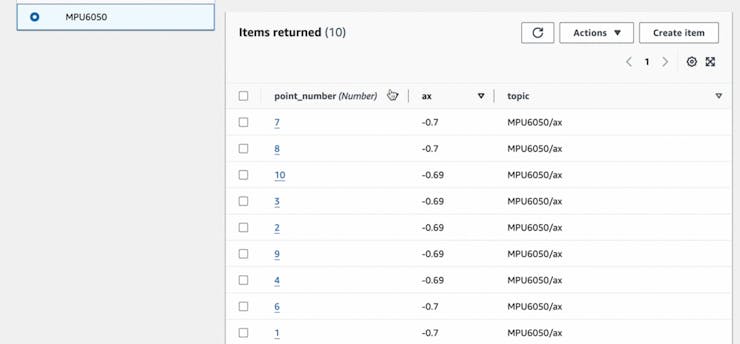
Expected result: You see new items in your DynamoDB table for point_number and ax values, created by Lambda from MQTT messages coming from the Pico W.
Note: If the MicroPython code runs but you do not see items, the original tutorial recommends checking Lambda logs in CloudWatch.
Conclusion
You built a full cloud ingest pipeline that sends Raspberry Pi Pico W MPU6050 acceleration data to AWS DynamoDB using MQTT to AWS IoT Core, an IoT Rule, and a Python AWS Lambda function.
Want parts for your next IoT build? Shop at ShillehTek.com. If you want help adapting this architecture to your product or use case, check out our IoT consulting services.
If you enjoyed the original creator’s content, you can also visit: https://www.youtube.com/@mmshilleh/videos and https://www.buymeacoffee.com/mmshilleh.


.png?v=25000753014097803521779072085)

.png?v=68677308723310773341779072085)


