

Video Tutorial
Watch first if you want to follow the full Arduino IDE setup for the Raspberry Pi Pico W in real time.
Project Overview
In this tutorial, you will set up the Arduino IDE for a Raspberry Pi Pico or Pico W (RP2040) so you can upload Arduino (C/C++) sketches and run an example like WiFi ScanNetworks on the Pico W.
This is useful if you prefer the Arduino workflow and tooling instead of other toolchains.
- Time: 10 to 20 minutes
- Skill level: Beginner
- What you will build: A working Arduino IDE setup that can detect your Pico/Pico W, upload sketches, and show output in Serial Monitor
Support links from the original post: Youtube and https://www.buymeacoffee.com/mmshilleh.
Parts List
From ShillehTek
- Raspberry Pi Pico 2W - the WiFi microcontroller board used in this build
External
- Arduino IDE installed on your computer
- USB cable to connect the Pico/Pico W to your computer
- RP2040 Arduino core (installed via Boards Manager using this URL): https://github.com/earlephilhower/arduino-pico/releases/download/global/package_rp2040_index.json
Note: The WiFi > ScanNetworks example used in this guide works with the Pico W (not the non-W Pico).
Step-by-Step Guide
Step 1 - Install the 3rd party RP2040 board manager
Goal: Add the Raspberry Pi Pico/Pico W board definitions to Arduino IDE.
What to do: In Arduino IDE Preferences, add this URL to Additional Boards Manager URLs:
Link: https://github.com/earlephilhower/arduino-pico/releases/download/global/package_rp2040_index.json
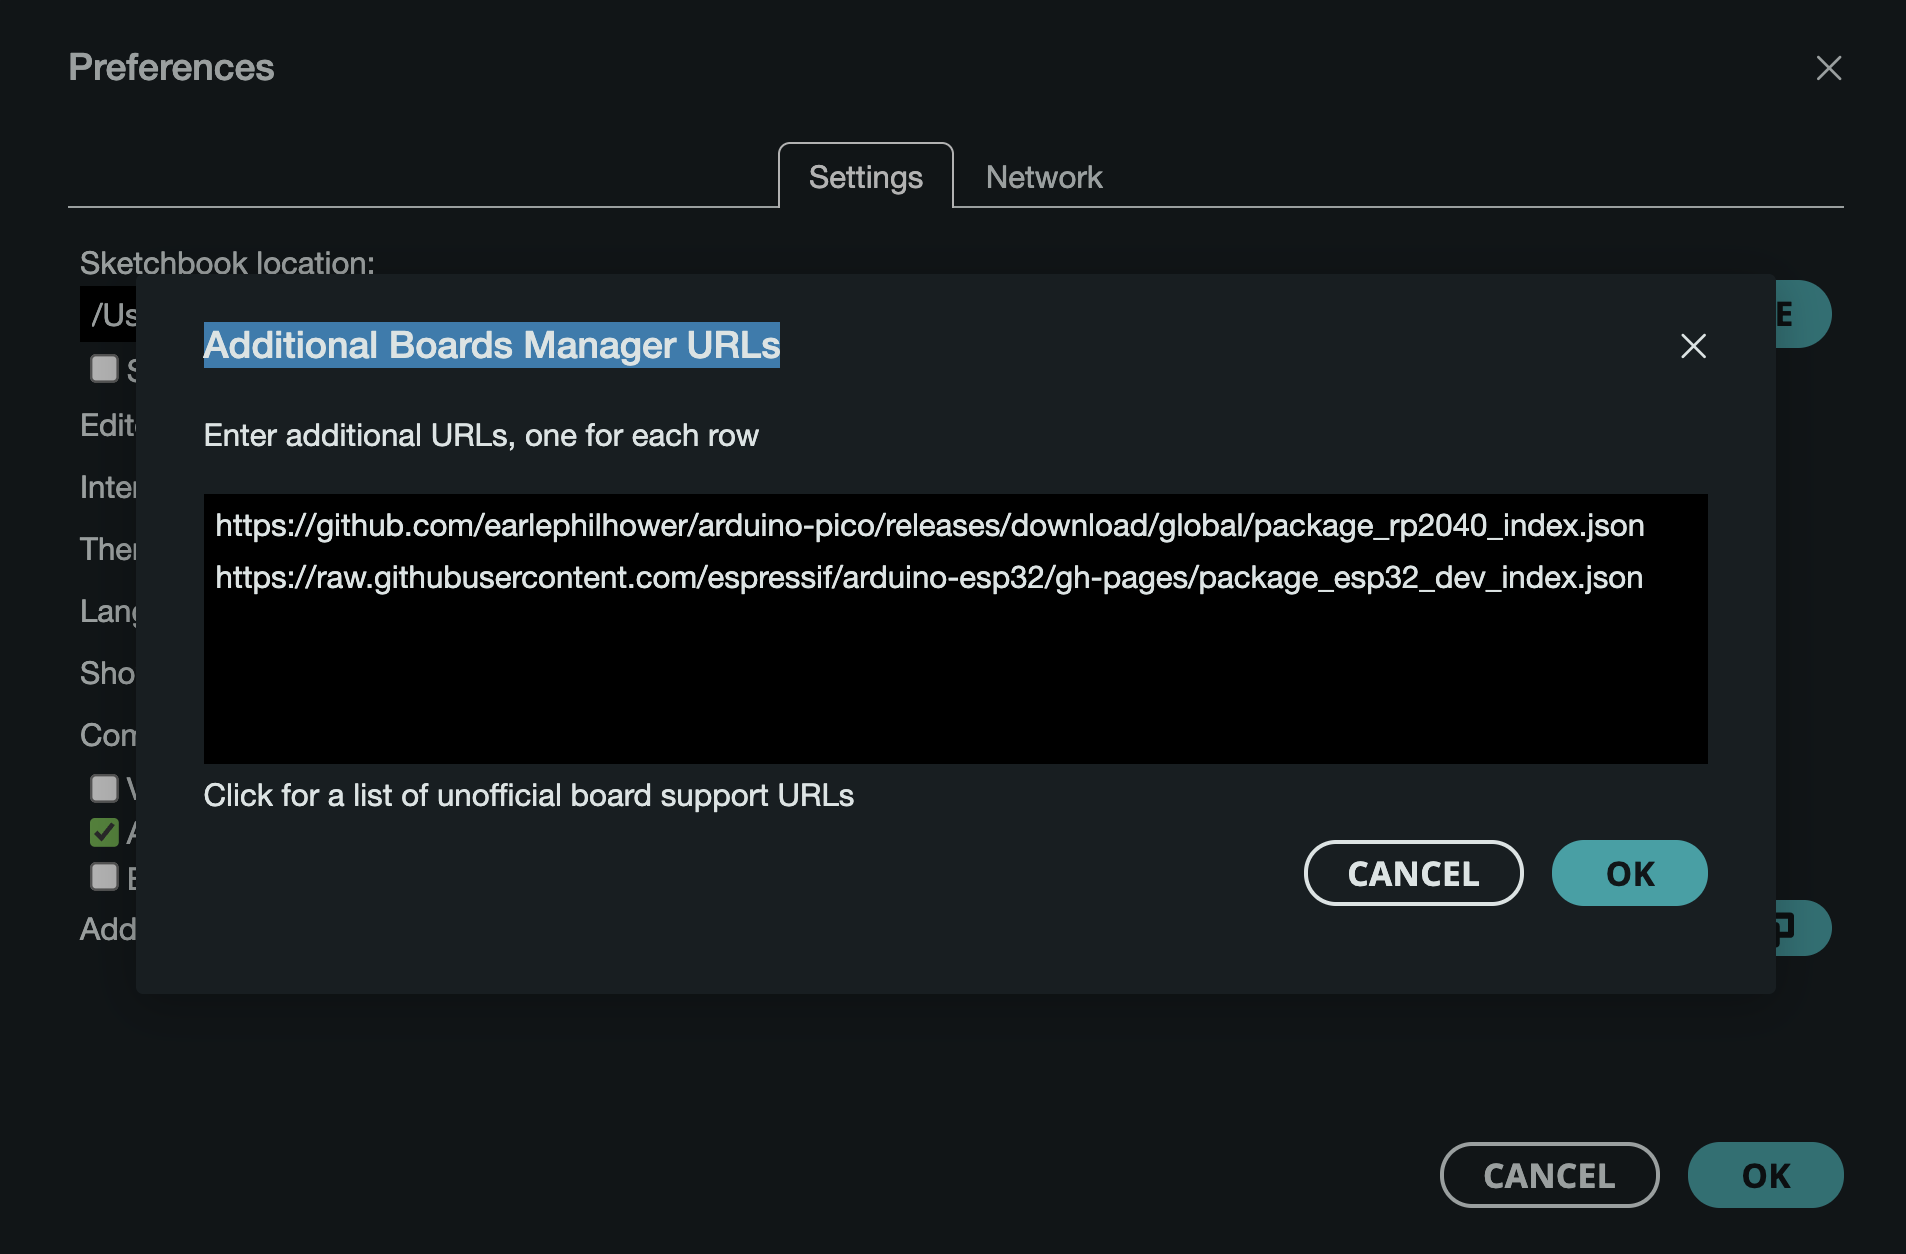
On macOS, you can find this setting in Preferences as shown below.

Expected result: Arduino IDE is configured to download and install the RP2040 (Pico/Pico W) board package.
Step 2 - Install the Raspberry Pi Pico board package
Goal: Install the board definitions so Pico/Pico W shows up in the Boards Manager.
What to do: After clicking OK, open Boards Manager, search for the Raspberry Pi Pico/RP2040 package, and install it.
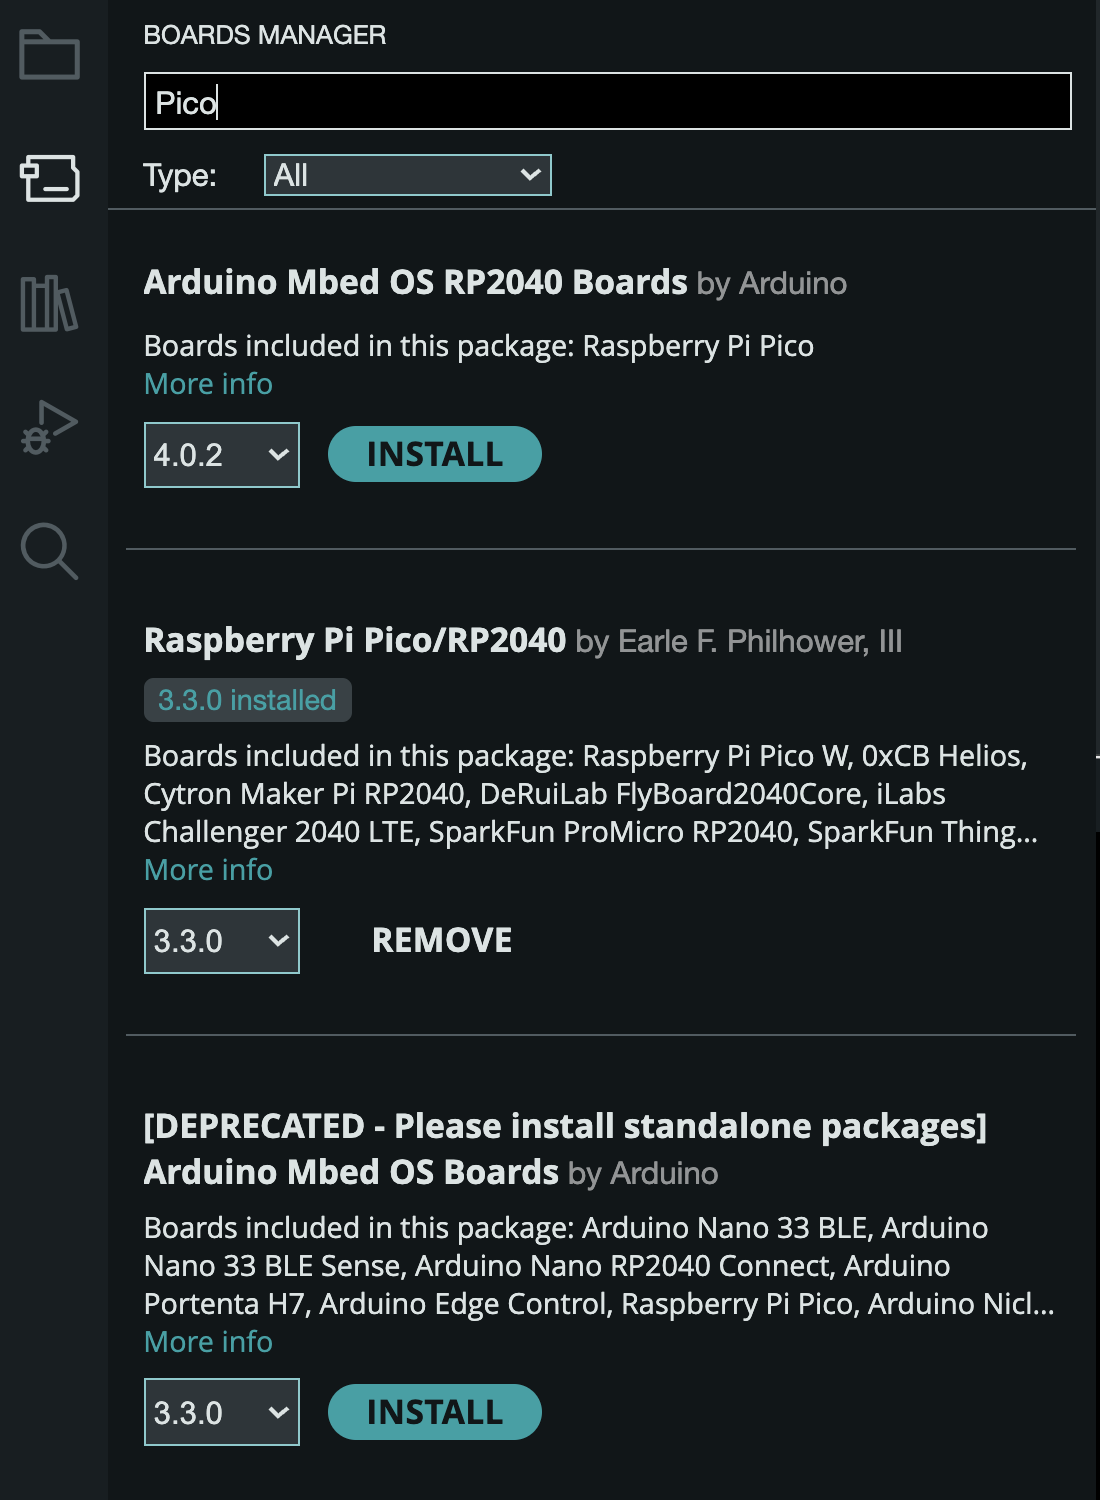
Expected result: You can select Raspberry Pi Pico or Pico W from Tools > Board.
Step 3 - Select the Pico W board and open the example sketch
Goal: Use a known working example to confirm your Pico W toolchain is set up.
What to do:
- Select your board in Tools > Board (choose the Pico W you are working with).
- Open File > Examples > WiFi > ScanNetworks. You do not need to modify this code.
- Plug in your Pico W while holding the BOOTSEL button to mount the device the first time.
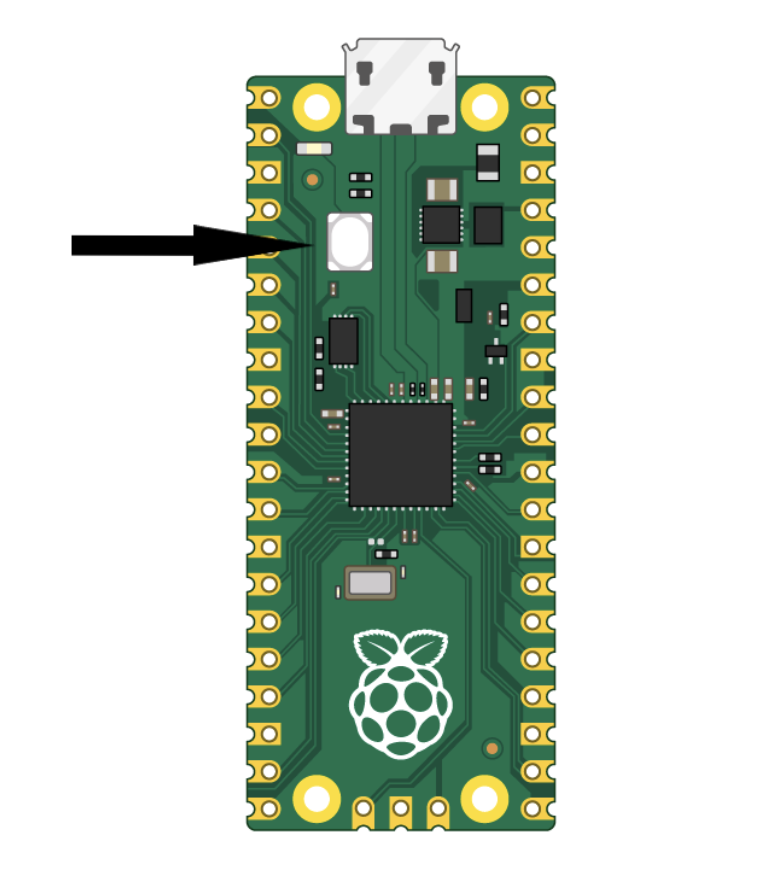
Expected result: The ScanNetworks example is open, and the Pico W is connected in BOOTSEL mode for initial detection.
Step 4 - Upload once to create the port, then re-upload to run
Goal: Get Arduino IDE to create and recognize the correct communication (COM) port, then upload the sketch successfully.
What to do:
- Select the appropriate port under Tools > Board > UF2 Board.
- Click the Upload button. The first upload may not work because Arduino IDE still needs to generate a COM port, but upload anyway to establish the port.
- Go back to Tools > Board > <Your New Comm Port>. Pick the new port that did not show up before.
- Upload the sketch again. Then open the Serial Monitor to see results if you selected the correct port.
Note: If you do not hold the BOOTSEL button and mount the device as stated, you will probably get a driver error.
Expected result: The sketch uploads successfully and the Serial Monitor shows the network scan output (on Pico W).
Conclusion
You now have Arduino IDE working with a Raspberry Pi Pico or Pico W using the RP2040 board package from Earle Philhower. With the board installed and the port recognized, you can start writing and uploading your own C/C++ Arduino sketches.
Want parts and project-ready hardware for your next build? Shop at ShillehTek.com. If you want help tailoring a Pico/Pico W project for a product, demo, or custom workflow, check out our IoT consulting services.
Original support links: Youtube and https://www.buymeacoffee.com/mmshilleh.


.png?v=25000753014097803521779072085)

.png?v=68677308723310773341779072085)


