Video Tutorial (Optional)
Watch first if you want to see the MB102 breadboard power module used to power a Raspberry Pi Pico W step by step.
Project Overview
Raspberry Pi Pico W + MB102 Power Supply Module: In this project, you power a Raspberry Pi Pico W from an MB102 breadboard power supply so it can run independently on a breadboard without staying plugged into your computer.
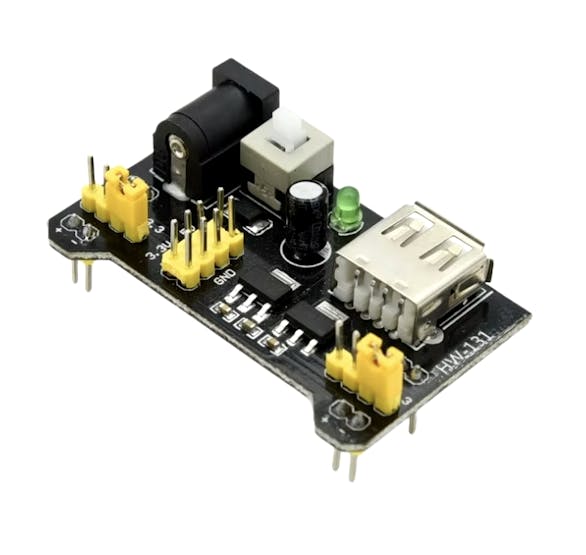
The MB102 is a compact breadboard-friendly power module that can provide steady 3.3V or 5V from USB or an external DC input. It is useful when you want flexible powering options, reduce cable clutter, and prototype with parts that need different voltage levels.

- Time: 15 to 25 minutes
- Skill level: Beginner
- What you will build: A breadboard power setup where the MB102 supplies 5V to the Pico W via VSYS and GND
Parts List
From ShillehTek
- MB102 ShillehTek Breadboard Power Supply - provides selectable 3.3V or 5V rails on a breadboard
- ShillehTek Jumper Wires - connects the breadboard rails to Pico W power pins
- ShillehTek Breadboard - provides a solderless platform for the MB102 and Pico W wiring
- https://shillehtek.com/collections/all - ShillehTek website (exclusive discounts)
External
- Raspberry Pi Pico W - the microcontroller being powered from the breadboard rails
- USB to DC Cable - powers the MB102 using a DC barrel input cable
Note: This guide powers the Pico W through VSYS (Pin 39) using the MB102 set to 5V, with GND (Pin 38) connected to the ground rail.
Step-by-Step Guide
Step 1 - Load a MicroPython LED blink test (main.py)
Goal: Confirm the Pico W boots and runs code when powered from the MB102.
What to do: Connect your Raspberry Pi Pico W to your computer and open your MicroPython editor (such as Thonny). Copy the script below and save it as main.py on the Pico W so it runs automatically on power-up.
Code:
import machine
import time

# Initialize the onboard LED (usually on pin 25 for Pico W)
led = machine.Pin("LED", machine.Pin.OUT)

# Blink the LED every 0.2 seconds
while True:
    led.on()        # Turn the LED on
    time.sleep(0.2) # Wait for 0.2 seconds
    led.off()       # Turn the LED off
    time.sleep(0.2) # Wait for 0.2 seconds
Expected result: When the Pico W is powered later from the breadboard, the onboard LED will blink every 0.2 seconds.
Step 2 - Set up the MB102 on the breadboard and power the Pico W
Goal: Use the MB102 breadboard power supply module to provide 5V and GND to the Pico W (VSYS and GND).
What to do: Follow the sequence shown in the photos below.
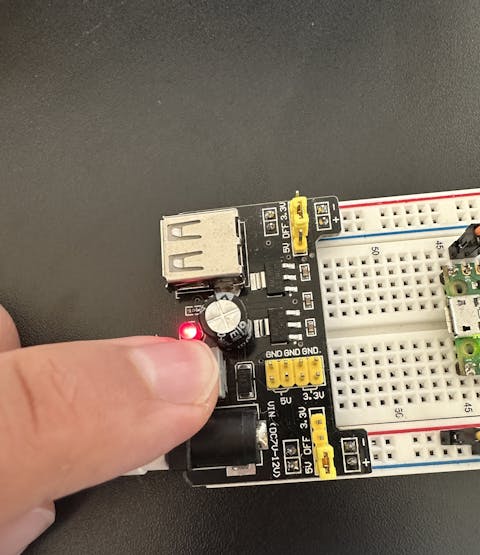
Attach the MB102 to the breadboard:
- Snap the MB102 Power Supply Module onto the top of the breadboard so it feeds the power rails.
- Set the voltage jumper to 5V on the rail you will use for the Pico W, because the Pico W requires 5V input through its VSYS pin to function.
- If you are using a DC input method, plug in the DC cable.

Connect the Raspberry Pi Pico W power pins:
- Connect the Pico W VSYS (Pin 39) to the breadboard 5V power rail powered by the MB102.
- Connect the Pico W GND (Pin 38) to the breadboard ground rail.

Turn on the MB102:
- Switch the MB102 to the ON position. The red LED on the module should light up.

Watch the blink test run:
- The Pico W should power up and begin blinking its onboard LED based on the main.py script from Step 1.

Expected result: The MB102 supplies power to the breadboard rails, and the Pico W runs independently without being plugged into your computer.
Conclusion
You powered a Raspberry Pi Pico W from an MB102 breadboard power supply module by setting the MB102 rail to 5V and wiring VSYS (Pin 39) plus GND (Pin 38). With a simple MicroPython blink test saved as main.py, you can quickly confirm the Pico W is receiving stable power.
Want the exact parts used in this build? Grab them from ShillehTek.com and check out the ShillehTek Amazon Store - US, ShillehTek Amazon Store - Canada, or ShillehTek Amazon Store - Japan.
If you want help customizing this power setup or building something for your product, ShillehTek also offers consulting services at https://shillehtek.com/. You can also subscribe at https://www.youtube.com/@mmshilleh, support at https://www.buymeacoffee.com/mmshilleh, or hire via https://www.upwork.com/freelancers/~017060e77e9d8a1157.


.png?v=25000753014097803521767701813)

.png?v=68677308723310773341767701813)


