

Project Overview
ESP32 Web Sliders: Dim an LED and Aim a Servo from Your Phone: This ESP32 project serves a web page with two range sliders so you can dim an LED with PWM and set a servo angle from your phone with instant updates and no page reloads.
Buttons are fine for on and off, but real control needs a slider. The ESP32 hosts the page, and each slider movement sends a quick request back to the board so the output changes immediately. It is the core pattern behind many smart dimmers and web-controlled mounts.
- Time: ~45 minutes
- Skill level: Intermediate
- What you will build: A phone-friendly slider page with live JavaScript updates, PWM dimming, and servo positioning.

Parts List
From ShillehTek
- ESP32 38-Pin Dev Board (CP2102, USB-C) - runs the web server, PWM, and servo control
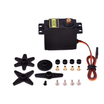
- MG995 Metal Gear Servo - servo output controlled by the slider (or use an SG90)
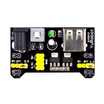
- MB102 Breadboard Power Supply - provides a 5 V rail for the servo
- Resistor Kit - use a 220 ohm resistor in series with the LED
- 400-Point Breadboard - quick prototyping and power distribution
- Dupont Jumper Wires - wiring between ESP32, LED, and servo
External
- An LED
- A 2.4 GHz Wi-Fi network
Note: The original used the ESPAsyncWebServer library. This version uses the WebServer library built into the ESP32 core plus the ESP32Servo library (the standard Servo library does not support the ESP32), and it works on both the 2.x and 3.x ESP32 board packages.
Step-by-Step Guide
Step 1 - Wire LED and Servo
Goal: One PWM output, one servo signal.
What to do: Wire the LED as GPIO 2 to 220 ohm resistor to LED to GND (the onboard LED is on GPIO 2 too). Wire the servo as signal to GPIO 13, red to 5 V from the MB102 rail, and brown to GND shared with the ESP32.
Never run an MG995 from the ESP32 3V3 pin.
Expected result: Outputs ready, with the servo powered from its own 5 V supply and a shared ground.
Step 2 - How the Page Talks to the Board
Goal: Understand the round trip from slider to hardware output.
What to do: The ESP32 serves one HTML page containing two <input type="range"> sliders and a few lines of JavaScript. Every time a slider moves, the script calls fetch("/set?led=128") (or servo=90) in the background. The board's /set handler reads the number and applies it. No form submit, no reload.
Expected result: You can picture the request each drag generates and how it maps to PWM and servo movement.
Step 3 - Upload the Sketch
Goal: Serve the slider UI and apply updates to the LED and servo.
What to do: Install the ESP32Servo library from the Arduino Library Manager, add your Wi-Fi SSID and password in the sketch, upload it to the ESP32, then open the IP address printed in the Serial Monitor on your phone.
Code:
#include <WiFi.h>
#include <WebServer.h>
#include <ESP32Servo.h>

const char* SSID = "YourNetwork";
const char* PASS = "YourPassword";
const int LED = 2, SERVO_PIN = 13;

WebServer server(80);
Servo servo;
int ledVal = 0, servoVal = 90;

const char PAGE[] PROGMEM = R"HTML(
<!DOCTYPE html><html><head><meta name='viewport' content='width=device-width,initial-scale=1'>
<style>body{font-family:sans-serif;text-align:center;padding:20px}
input{width:90%;height:40px}h2{margin:30px 0 5px}</style></head><body>
<h1>ESP32 Sliders</h1>
<h2>LED brightness: <span id='lv'>0</span></h2>
<input type='range' min='0' max='255' value='0' oninput='send("led",this.value,"lv")'>
<h2>Servo angle: <span id='sv'>90</span>°</h2>
<input type='range' min='0' max='180' value='90' oninput='send("servo",this.value,"sv")'>
<script>
function send(k,v,id){document.getElementById(id).textContent=v;fetch('/set?'+k+'='+v);}
</script></body></html>)HTML";

void handleSet() {
  if (server.hasArg("led"))   { ledVal   = server.arg("led").toInt();   analogWrite(LED, ledVal); }
  if (server.hasArg("servo")) { servoVal = server.arg("servo").toInt(); servo.write(servoVal); }
  server.send(200, "text/plain", "ok");
}

void setup() {
  Serial.begin(115200);
  pinMode(LED, OUTPUT);
  servo.attach(SERVO_PIN, 500, 2400);          // pulse range for most hobby servos
  servo.write(servoVal);

  WiFi.begin(SSID, PASS);
  while (WiFi.status() != WL_CONNECTED) delay(250);
  Serial.println("Open http://" + WiFi.localIP().toString());

  server.on("/",    []() { server.send_P(200, "text/html", PAGE); });
  server.on("/set", handleSet);
  server.begin();
}

void loop() { server.handleClient(); }
Expected result: Dragging the top slider fades the LED smoothly. Dragging the bottom slider moves the servo, and the displayed numbers update live on the page.
Step 4 - Make It Feel Solid
Goal: Improve behavior so it feels more like a finished product.
What to do: Have the page ask the board for the current values when it loads (add a /state route that returns JSON) so a second phone sees the same positions. Store the last values in Preferences so they survive a reboot. Add mDNS (MDNS.begin("sliders")) so the address is http://sliders.local.
Expected result: Multiple phones see consistent state, and the device has a memorable address.
Step 5 - Swap the Outputs
Goal: Reuse the same web slider pattern for other hardware.
What to do: The LED slider becomes a 12 V LED-strip dimmer with a MOSFET. The servo slider becomes a pan-tilt camera mount with two sliders. Three sliders driving a WS2812 can make a color mixer. The web page and the /set handler do not change, only what happens to the number.
Expected result: One template you can reuse for many "adjust it from my phone" projects.
Conclusion
A slider on a web page plus a tiny GET handler is a powerful control pattern for the ESP32: analog control from any phone, with no app store and nothing to install. Here, you used it to dim an LED with PWM and aim a servo in real time.
Photo credit: Pradeep (CETECH) on Hackster.io.
Want the exact parts used in this build? Grab them from ShillehTek.com. If you want help customizing this project or building something for your product, check out our IoT consulting services.






.png?v=25000753014097803521791168436)

.png?v=68677308723310773341791168436)


