

Project Overview
YouTube Subscriber Counter: Build an ESP8266 D1 Mini + I2C LCD desk display that pulls your YouTube channel statistics from the YouTube Data API and shows live subscriber and view counts.
Every creator has refreshed the Studio page one time too many. This build puts the number on your desk instead: an ESP8266 D1 Mini asks the YouTube Data API for your channel statistics once a minute and prints subscribers and total views on a 16x2 LCD.
It is a small project, but it walks through two skills that unlock every “live number” build: getting a free Google API key and parsing an HTTPS JSON response on a microcontroller.
- Time: ~30 minutes
- Skill level: Beginner to Intermediate
- What you will build: A Wi-Fi subscriber and view counter with comma-formatted numbers, auto-refreshing every 60 seconds.

Parts List
From ShillehTek
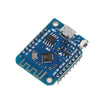
- ESP8266 D1 Mini - the Wi-Fi microcontroller that runs the sketch and calls the YouTube API.
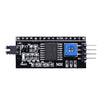
- LCD1602 16x2 Display + PCF8574 I2C Adapter - shows subscriber and view counts using just SDA/SCL.
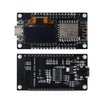
- NodeMCU with built-in OLED - alternative option: same sketch idea, OLED instead of LCD.
- 400-Point Breadboard - quick, solder-free prototyping.
- Dupont Jumper Wires - connects the D1 Mini to the I2C LCD module.
External
- A free Google Cloud project with the YouTube Data API v3 enabled, and your channel ID
Note: YouTube rounds public subscriber counts to three significant figures once a channel passes 1,000 (so 12,345 shows as 12,300). The API returns the same rounded number the world sees. The free quota is 10,000 units a day; a statistics request costs 1 unit, so one call a minute uses about 1,440.
Step-by-Step Guide
Step 1 - Get an API Key and Your Channel ID
Goal: Get the two strings the sketch needs.
What to do: Go to console.cloud.google.com, create a project, open “APIs & Services → Library”, enable YouTube Data API v3, then “Credentials → Create credentials → API key”. Copy it.
For the channel ID: YouTube Studio → Settings → Channel → Advanced settings, copy the 24-character ID starting with “UC” (a channel name or @handle will not work here).
Expected result: An API key and a “UC…” channel ID.
Step 2 - Wire the LCD
Goal: Connect the display with four wires.
What to do: I2C LCD → D1 Mini: SDA → D2, SCL → D1, VCC → 5V (the D1 Mini’s 5V pin comes from USB), GND → G.
The PCF8574 backpack is 5V but its I2C lines are typically fine with the ESP8266’s 3.3V signals in practice. If you want to be strict, add a level shifter.
Expected result: Backlight on. Turn the backpack’s blue potentiometer if you cannot see characters later.
Step 3 - Upload the Sketch
Goal: Connect to Wi-Fi, call the YouTube API, and print stats to the LCD.
Code:
#include <ESP8266WiFi.h>
#include <ESP8266HTTPClient.h>
#include <WiFiClientSecure.h>
#include <ArduinoJson.h>
#include <LiquidCrystal_I2C.h>
LiquidCrystal_I2C lcd(0x27, 16, 2);

const char* SSID    = "YourNetwork";
const char* PASS    = "YourPassword";
const char* API_KEY = "your_youtube_data_api_key";
const char* CHANNEL = "UCxxxxxxxxxxxxxxxxxxxxxx";     // 24-char channel id

String subs, views, videos;

String commas(String s) {                             // "1234567" -> "1,234,567"
  for (int i = s.length() - 3; i > 0; i -= 3) s = s.substring(0, i) + "," + s.substring(i);
  return s;
}

bool fetchStats() {
  WiFiClientSecure client; client.setInsecure();      // HTTPS without a stored certificate
  HTTPClient http;
  String url = String("https://www.googleapis.com/youtube/v3/channels")
             + "?part=statistics&fields=items/statistics&id=" + CHANNEL + "&key=" + API_KEY;
  http.begin(client, url);
  int code = http.GET();
  if (code != 200) { Serial.println("HTTP " + String(code)); http.end(); return false; }
  JsonDocument doc;
  DeserializationError e = deserializeJson(doc, http.getString());
  http.end();
  if (e || doc["items"].size() == 0) return false;
  JsonObject s = doc["items"][0]["statistics"];
  subs   = s["subscriberCount"].as<String>();          // numbers arrive as strings
  views  = s["viewCount"].as<String>();
  videos = s["videoCount"].as<String>();
  return true;
}

void setup() {
  Serial.begin(115200);
  lcd.init(); lcd.backlight(); lcd.print("Connecting...");
  WiFi.begin(SSID, PASS);
  while (WiFi.status() != WL_CONNECTED) delay(250);
  lcd.clear();
}

void loop() {
  static unsigned long last = 0; static bool first = true;
  if (first || millis() - last >= 60000) {            // refresh every minute
    first = false; last = millis();
    if (fetchStats()) {
      lcd.setCursor(0, 0); lcd.print("Subs: "); lcd.print(commas(subs));  lcd.print("      ");
      lcd.setCursor(0, 1); lcd.print("Views:"); lcd.print(commas(views)); lcd.print("      ");
      Serial.println(subs + " subs, " + views + " views, " + videos + " videos");
    } else {
      lcd.setCursor(0, 0); lcd.print("API error       ");
    }
  }
}
What to do: Install ArduinoJson (7.x) and LiquidCrystal_I2C, paste in your Wi-Fi details, API key, and channel ID, select “LOLIN(WEMOS) D1 R2 & mini”, and upload.
Expected result: “Connecting…”, then “Subs: 12,300” on the top line and “Views:1,234,567” on the bottom, refreshing every minute. The Serial Monitor prints the video count too.
Step 4 - Understand the Request
Goal: Know what to tweak safely.
What to do: The URL asks for the “statistics” part of one channel and, thanks to the fields= parameter, nothing else. This keeps the reply small for the ESP8266’s limited RAM.
Counts come back as strings, so the sketch keeps them as strings and just inserts commas. That also means a channel with billions of views never overflows an integer. Swap CHANNEL for any public channel’s ID to build a counter for a creator you follow.
Expected result: An HTTP 403 means the API is not enabled or the key is restricted. An HTTP 400 typically means a malformed channel ID.
Step 5 - Make It a Milestone Machine
Goal: Add simple milestone behavior.
What to do: Remember the last count and flash the backlight (lcd.noBacklight()/backlight()) when subscribers go up. Add a buzzer melody at round numbers. Use a 20x4 LCD to show videos and a “next milestone” line, or the NodeMCU-with-OLED board for a cable-free desk widget. For a big-number look, drive a 4-digit TM1637 or a MAX7219 8-digit module instead of the LCD.
Expected result: A counter that makes the next subscriber a little more fun.
Conclusion
With an API key, a channel ID, one HTTPS request, and a JSON parse, your ESP8266 D1 Mini can pull YouTube statistics and display subscriber and view counts on an I2C LCD. The same pattern works for many public APIs once you can authenticate and parse JSON.
Want the exact parts used in this build? Grab them from ShillehTek.com. If you want help customizing this project or building something for your product, check out our IoT consulting services.
Credits: Photos and the original reference build are credited to Nick Koumaris (nickthegreek82) on Hackster.io.





.png?v=25000753014097803521791168436)

.png?v=68677308723310773341791168436)


