

Project Overview
Arduino + Voice Recognition Module V3: In this project, you use an Arduino (Nano/UNO-class) with the Elechouse Voice Recognition Module V3 to train two custom commands and toggle an LED on and off by voice over serial.
The V3 module stores up to 80 recorded commands (you record them in any language, or even non-speech sounds) and reports a match to the Arduino. You will train an ON phrase and an OFF phrase, then load a sample sketch that listens for those command IDs and switches the LED.
- Time: About 1 hour
- Skill level: Beginner
- What you will build: An Arduino that recognizes your trained voice commands and toggles an LED on demand.

Parts List
From ShillehTek
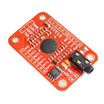
- Voice Recognition Module V3 for Arduino - stores and matches your recorded commands, then reports results over serial.
- Arduino Nano V3 - ATmega328P board used to read the module and control the LED (UNO/Pro Mini work similarly).
- Metal Film Resistor Kit - use a 470 ohm resistor in series with the LED.
- 120pcs 20cm Dupont Jumper Wires - for module power and serial wiring.
- 400-Point Solderless Breadboard - easy prototyping for the module and LED circuit.
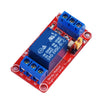
- 1-Channel 5V Relay Module - optional upgrade to switch higher-power loads after your LED test works.
External
- Electret microphone with 3.5mm plug (commonly included with the module; it can also be soldered directly to the mic pins)
- One LED
- USB cable for programming
Note: The module runs from 4.5 to 5V and draws under 40 mA, so the Arduino 5V pin can power it directly.
Step-by-Step Guide
Step 1 - Understand the V3 Module
Goal: Know what the module can and cannot do.
What to do: The V3 does not convert speech to text. Instead, it compares live audio against commands you recorded earlier, which is why it works in any language (and can even work with whistles, claps, or code words).
It stores up to 80 commands of about 1.5 seconds each. You can use it over serial (used in this tutorial for access to all 80 commands) or via its GPIO outputs (up to 7 loaded commands without a microcontroller). Recognition accuracy can be very high in good conditions, but microphone quality and background noise are the biggest factors.


Expected result: You understand that you will train commands first, then use them from an Arduino sketch.
Step 2 - Wire the Module to the Arduino
Goal: Connect power, serial, the LED, and the microphone.
What to do: Make these connections (the serial pins are user-definable in the sketch; the pins below match the library defaults):
V3 GND  ->  Arduino GND
V3 VCC  ->  Arduino 5V
V3 RXD  ->  Arduino D3 (sketch TX)
V3 TXD  ->  Arduino D2 (sketch RX)

LED (through 470 ohm resistor)  ->  Arduino D13
Microphone  ->  3.5mm jack on the module

Expected result: The module powers on, the serial lines are crossed (RXD to D3, TXD to D2), and the LED is connected to D13 through a 470 ohm resistor.
Step 3 - Train Your Voice Commands
Goal: Record an ON command and an OFF command into the module memory.
What to do: Install the VoiceRecognitionV3 Arduino library (open-source, by Elechouse). Then open File 1 Examples 1 VoiceRecognitionV3 1 vr_sample_train and upload it.
Open the Serial Monitor at 115200 baud with Newline selected. A command menu appears. Training stores each spoken command into an address from 0 to 79 using the train command:
train 20    // record your ON phrase into address 20
train 30    // record your OFF phrase into address 30
When the monitor says "speak now", say your command clearly into the mic. It will ask you to repeat it once to register. If there is background noise or the audio is weak, it may ask again, so train in a quiet room and use a decent microphone.


Expected result: Two trained commands saved in addresses 20 and 30 (or whichever addresses you chose).
Step 4 - Load the LED Control Sketch
Goal: Map your trained commands to LED actions.
What to do: Open File 1 Examples 1 VoiceRecognitionV3 1 vr_sample_control_led. Inside, two records are defined: onrecord and offrecord.
Set onrecord to the address where you trained your ON phrase, and set offrecord to the address where you trained your OFF phrase. Upload the sketch.
Expected result: The sketch loads your two commands into the recognizer at boot and waits for a match.
Step 5 - Speak
Goal: Voice-control the LED and plan the next upgrade.
What to do: Say your ON command and the D13 LED should light. Say your OFF command and it should turn off. Keep the Serial Monitor open: each recognized command prints its address, which helps confirm what the module is matching.
If recognition is inconsistent, reduce room noise or use a better microphone. After the LED test works, you can move on to switching larger loads by driving a relay module (listed in the parts list).
Expected result: A reliable personal voice switch trained on your voice, in your language.
Conclusion
You trained the Elechouse Voice Recognition Module V3 with your own commands and used an Arduino to act on them, switching an LED by voice over serial. Because the module matches recorded sounds instead of transcribing words, it can work in any language and even with non-speech audio cues.
Want the exact parts used in this build? Grab them from ShillehTek.com. If you want help customizing this project or building something similar for your product, check out our IoT consulting services.






.png?v=25000753014097803521791168436)

.png?v=68677308723310773341791168436)


