

Project Overview
Arduino Uno + DHT11 + micro SD module + DS3231 RTC data logger: Build a stand-alone Arduino Uno logger that records timestamped temperature and humidity readings to a CSV file on a micro SD card, so you can review and chart the data later in Excel or Google Sheets.
The Serial Monitor is great until you unplug the laptop. This guide wires the three parts every logger needs (a micro SD card module for storage, a DS3231 real-time clock for timestamps, and a DHT11 for something to log), writes one clean CSV row every five seconds, and uses habits that keep the file readable: a header written once, append-only writes, and a close after every row so you can pull the card at any time.
- Time: ~45 minutes
- Skill level: Beginner
-
What you will build: A stand-alone logger that writes
date,time,temp_c,humidityrows toDATA.CSVon a micro SD card, keeps time through power cuts, and charts in a spreadsheet in two clicks.

Parts List
From ShillehTek
- Arduino Uno R3 Super Starter Kit - the main microcontroller board for logging and SPI/I2C communication
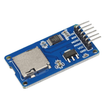
- Micro SD TF Card Adapter Module (SPI) - stores readings to a CSV file on a micro SD card
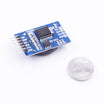
- DS3231 Precision RTC Module (with CR2032) - provides accurate date/time stamps that survive power loss
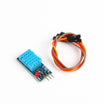
- DHT11 Temperature & Humidity Sensor - the sensor being logged to the SD card
- 400-Point Breadboard - makes prototyping the wiring quick and clean
- Dupont Jumper Wires - connects the Uno to the modules
External
- A micro SD card of 32 GB or less, formatted FAT32 (older, smaller cards are the most reliable), and a card reader for your computer
- A USB power bank or 9 V adapter for running the logger away from the PC
Note: The micro SD module has its own 3.3 V regulator and level shifting on board, so it runs from the Uno's 5 V pin and takes 5 V logic on the SPI lines. A bare micro SD socket without those parts would need 3.3 V everywhere. Check which one you have before wiring VCC.
Step-by-Step Guide
Step 1 - Prepare the Card
Goal: A card the Arduino SD library can mount reliably.
What to do: Format the micro SD card as FAT32 (on Windows use the official SD Memory Card Formatter or choose FAT32 in the format dialog; on a Mac use Disk Utility, then Erase, then MS-DOS (FAT)). The Arduino SD library understands FAT16/FAT32 with 8.3 file names, so the file will be called DATA.CSV, not my-long-log.csv. Put the card in the module with the contacts facing the board.
Expected result: An empty FAT32 card inserted in the module.
Step 2 - Wire the Three Modules

Goal: Connect SPI, I2C, and one GPIO input for the sensor.
What to do: Micro SD module: VCC to 5V, GND to GND, CS to D4, SCK to D13, MOSI to D11, MISO to D12. DS3231: VCC to 5V, GND to GND, SDA to A4, SCL to A5. DHT11 (three-pin module with cables): VCC to 5V, GND to GND, DATA to D2. Keep the SPI wires short. Long jumpers to the card module are a common cause of SD initialization failures.
Expected result: Six wires to the card module, four to the clock module, three to the sensor, and all modules sharing 5 V and GND.
Step 3 - Install the Libraries
Goal: Install the required libraries so the sketch compiles cleanly.
What to do: In the Arduino IDE Library Manager install RTClib (Adafruit), DHT sensor library (Adafruit), and Adafruit Unified Sensor (required by the DHT library). The SD and SPI libraries ship with the IDE. Insert the CR2032 battery into the DS3231 so the clock keeps running when the Uno is unplugged.
Expected result: The sketch in the next step compiles without errors.
Step 4 - Upload the Sketch and Start Logging
Goal: Append one timestamped reading row to DATA.CSV every 5 seconds.
What to do: Upload the sketch below, then open the Serial Monitor at 9600 baud.
Code:
#include <SPI.h>
#include <SD.h>
#include <Wire.h>
#include <RTClib.h>
#include <DHT.h>

const int SD_CS = 4;                    // micro SD module CS pin
const int DHT_PIN = 2;
const unsigned long PERIOD_MS = 5000;   // one row every 5 s

RTC_DS3231 rtc;
DHT dht(DHT_PIN, DHT11);

void setup() {
  Serial.begin(9600);
  dht.begin();

  if (!rtc.begin()) { Serial.println("DS3231 not found - check SDA/SCL"); while (1); }
  if (rtc.lostPower()) {                             // new module or dead coin cell:
    rtc.adjust(DateTime(F(__DATE__), F(__TIME__)));  // set it to the time this sketch was compiled
  }

  if (!SD.begin(SD_CS)) { Serial.println("SD init failed - card, format or wiring"); while (1); }
  if (!SD.exists("DATA.CSV")) {                      // write the header only once, ever
    File f = SD.open("DATA.CSV", FILE_WRITE);
    if (f) { f.println("date,time,temp_c,humidity"); f.close(); }
  }
  Serial.println("logging to DATA.CSV");
}

void loop() {
  static unsigned long last = 0;
  if (millis() - last < PERIOD_MS) return;
  last = millis();

  float t = dht.readTemperature();
  float h = dht.readHumidity();
  if (isnan(t) || isnan(h)) { Serial.println("DHT read failed"); return; }

  DateTime now = rtc.now();
  char stamp[20];
  snprintf(stamp, sizeof stamp, "%04d-%02d-%02d,%02d:%02d:%02d",
           now.year(), now.month(), now.day(), now.hour(), now.minute(), now.second());

  File f = SD.open("DATA.CSV", FILE_WRITE);          // FILE_WRITE opens at the end = append
  if (!f) { Serial.println("open failed"); return; }
  f.print(stamp); f.print(','); f.print(t, 1); f.print(','); f.println(h, 0);
  f.close();                                         // close = flushed to the card, safe to pull

  Serial.print(stamp); Serial.print("  "); Serial.print(t, 1);
  Serial.print(" C  "); Serial.print(h, 0); Serial.println(" %");
}
Expected result: You should see logging to DATA.CSV, then a line like 2026-09-24,14:03:15 → 23.4 C → 51 % every five seconds. If you see SD init failed, try a different card, re-format it, and shorten the SPI wires (in that order).
Step 5 - Set the Clock Properly
Goal: Get accurate timestamps from the DS3231.
What to do: The lostPower() approach sets the clock to the moment the sketch was compiled, which is typically 20 to 40 seconds early. For a one-time correction, upload once with the rtc.adjust(...) line moved outside the if, then upload again with it back inside. Otherwise, every reset would set the clock back to compile time. The DS3231 is temperature-compensated and typically drifts about two minutes per year, so you usually only do this once.
Expected result: The time shown in the Serial Monitor matches your phone or computer clock.
Step 6 - Read the Data
Goal: Open the CSV and chart the logged readings.
What to do: Let it run for an hour, then unplug the Uno, remove the micro SD card, and open DATA.CSV in Excel or Google Sheets. Select the temperature column and insert a line chart. The date and time columns become your x-axis. Because the sketch closes the file after every row, pulling the card at any moment loses at most one reading.
Expected result: A clean four-column table and a temperature curve you can chart immediately.
Step 7 - Make It Yours
Goal: Customize the logger for your sampling rate and sensors.
What to do: Change PERIOD_MS to 60000 for one row per minute (a week is only about 10,000 rows). If you want one file per day, build a name like 20260924.CSV from now.year() and the other date fields. Swap the DHT11 for a DHT22 or BME280 for better resolution. Add more sensors by appending more columns. Anything you can print can be logged. Power it from a USB power bank for longer unattended recording.
Expected result: A reusable logging pattern you can drop into other sensor projects.
Conclusion
This build combines an Arduino Uno, a micro SD card module, a DS3231 RTC, and a DHT11 to create a stand-alone CSV data logger with real timestamps. The SD card provides storage, the DS3231 keeps accurate time through power loss, and the append-then-close approach helps keep the file readable and safe to remove.
Want the exact parts used in this build? Grab them from ShillehTek.com. If you want help customizing this project or building something for your product, check out our IoT consulting services.
Credits
All photos and images in this tutorial are credited to the_electro_artist on Hackster.io (MIT license). The original guide by the_electro_artist served as the reference for this ShillehTek version. We thank them for their excellent work in the maker community.





.png?v=25000753014097803521791168436)

.png?v=68677308723310773341791168436)


