

Video Tutorial (Optional)
Watch first if you want a quick walkthrough of simulating Raspberry Pi Pico and Pico W projects in Wokwi.
Project Overview
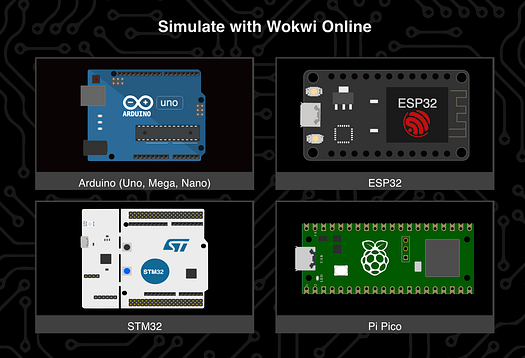
In this guide, you will use a Raspberry Pi Pico / Pico W with the Wokwi online simulator to run code and simulate peripherals, so you can prototype and test without physical hardware.
Wokwi (available at wokwi.com) lets you write and test code, add virtual peripherals (LEDs, resistors, accelerometers, and more), and simulate parts of a real setup to help you debug and iterate faster.
- Time: 10 to 25 minutes
- Skill level: Beginner
- What you will build: A working Pico MicroPython LED blink in Wokwi, plus a quick tour of peripheral simulation examples
Parts List
From ShillehTek
- Raspberry Pi Pico 2 W — the microcontroller board this series maps to when you build on real hardware (optional for this Wokwi-only walkthrough).
- Raspberry Pi Pico 2 W + MPU6050 breadboard starter kit — optional bundle (Pico 2 W, MPU6050, breadboard, jumper wires) if you later reproduce MPU6050-style projects from the simulator on a bench.
- MPU6050 (pre-soldered) IMU module — optional if you add a physical IMU instead of the starter kit.
- 400-point solderless breadboard — optional for I2C prototyping when you leave simulation.
- 120pcs 10 cm jumper wires — optional for wiring Pico to the MPU6050 on a breadboard.
- Browse all ShillehTek hardware — sensors, boards, and accessories in one catalog.
External
- Wokwi — free online simulator for Pico and other boards
- Wokwi NeoPixel ring example project — shows a peripheral demo you can explore
- Wokwi MPU6050 example project — demonstrates simulated accelerometer input and importing external code
Note: This tutorial focuses on simulation, so no physical wiring is required. If you later move to real hardware, check your Pico or Pico W LED pin mapping (some boards use GP25, while others define PICO_DEFAULT_LED_PIN).
Step-by-Step Guide
Step 1 - Access Wokwi
Goal: Open the Wokwi simulator and get comfortable with the interface.
What to do: Visit wokwi.com and create a free account if you want, or start without an account.
Explore the interface. You will see options to create new projects, view templates, and browse examples. You do not have to select the Pico because Wokwi supports other controllers too.
Expected result: You can navigate Wokwi, find templates/examples, and start a new project.
Step 2 - Create a project from a template
Goal: Start from a known-good example so you can confirm the simulator workflow.
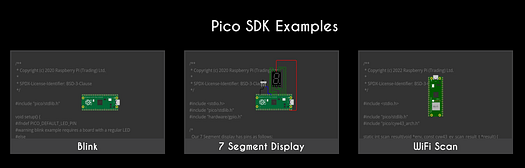
What to do: Choose a simple template project. One example is a Blink LED project using the Pico SDK for C. This is useful because setting up the Pico SDK for C can be daunting for beginners, and Wokwi provides an easily configurable environment.
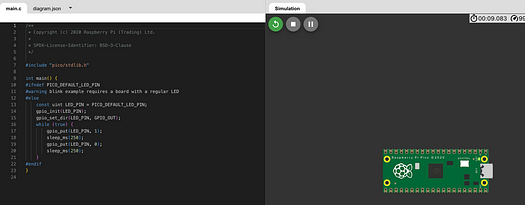
When you run the script, you should see the virtual Pico board blink periodically based on the code instructions.
Expected result: The Blink example runs in the simulator and the virtual board LED blinks.
Step 3 - Recreate the blink in MicroPython
Goal: Run the same basic blink behavior using MicroPython inside Wokwi.
What to do: Create or switch to a MicroPython project in Wokwi, then paste in the following code.
Code:
# MicroPython script for blinking an LED on the Raspberry Pi Pico

from machine import Pin
import time

# Check if the default LED pin is available
try:
    LED_PIN = Pin(Pin.PICO_DEFAULT_LED_PIN, Pin.OUT)
except AttributeError:
    # If PICO_DEFAULT_LED_PIN is not defined, use Pin 25 which is the default LED pin for the Pico
    LED_PIN = Pin(25, Pin.OUT)

# Blink the LED
while True:
    LED_PIN.value(1)  # Turn the LED on
    time.sleep(0.25)  # Wait for 250 milliseconds
    LED_PIN.value(0)  # Turn the LED off
    time.sleep(0.25)  # Wait for 250 milliseconds
Expected result: The simulated Pico LED blinks on and off every 250 ms.
Step 4 - Save the file with a .py extension
Goal: Ensure Wokwi treats your script as a MicroPython file.
What to do: Change the name of the file so it uses a .py extension.

After this, you can run and see the same outcome, while easily switching between coding languages in the same IDE.
Expected result: The project runs cleanly as MicroPython and produces the same blink behavior.
Step 5 - Explore peripherals and example projects
Goal: See how Wokwi can simulate common sensors and components.
What to do: Use the plus button to add parts (LEDs, resistors, accelerometers, and more), or open existing projects that already include them.

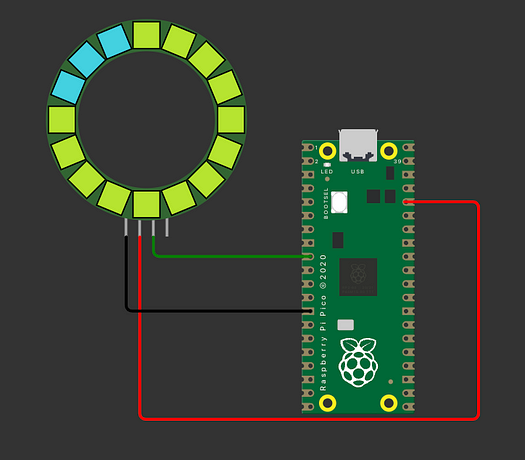
Example: open the NeoPixel ring project and run it to see the colors change:
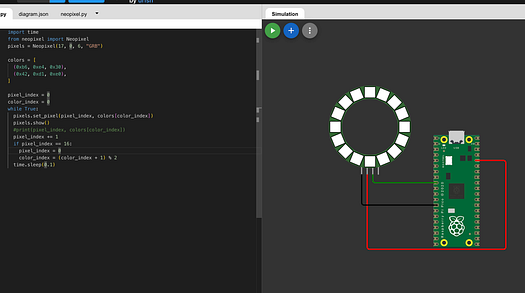
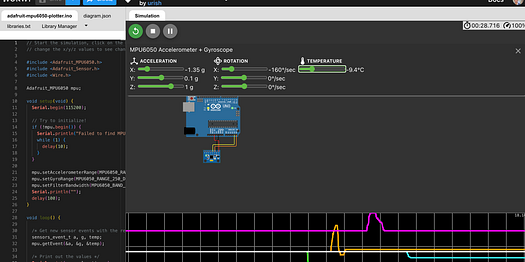
Another useful feature is simulating accelerometer input or physical input in general. Since accelerometers normally require movement, Wokwi provides controls (like a slider) to manually adjust the input while the code is running.
You can see an example using the MPU6050 here (this example also imports external code, a capability you can use in your own simulator projects):
Expected result: You can open example projects, run them, and observe simulated peripheral behavior such as color changes and adjustable accelerometer readings.
Conclusion
You now have a simple workflow for simulating Raspberry Pi Pico / Pico W projects in Wokwi, including running a MicroPython blink script and exploring how peripherals (like NeoPixels and accelerometers) can be tested virtually.
Want to move from simulation to a real build? Grab the parts you need from ShillehTek.com. If you want help planning a prototype, selecting modules, or building a custom IoT solution, check out our IoT consulting services.


.png?v=25000753014097803521779072085)

.png?v=68677308723310773341779072085)


