In this tutorial I will show how to use the MPU6050 acceleration sensor end to end, that is, I will show everything you need from the physical setup and code to start obtaining readings from your MPU6050 with your Raspberry Pi Pico W. The MPU6050 is a low-cost and accurate acceleration sensor you can use for any DIY project. It is especially useful in projects involving the Raspberry Pi Pico, Arduino, and other microcontrollers, arguably being the most popular choice of an accelerometer for those types of projects.
Step 1-) Gather the components required:
- MPU6050:
- Jumper Wires:
- Raspberry Pi Pico or Raspberry Pi Pico W (soldered) with MicroUSB:
- BreadBoard:
Step 2-) Attach Raspberry Pi to BreadBoard:
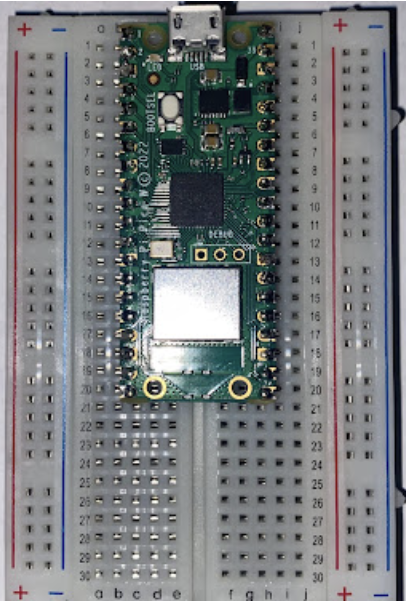
In this step you just have to attach your Raspberry Pi to the breadboard, it should sit nicely on the breadboard after applying some pressure. Do not worry if the pins go all the way into the board, that is actually better. Also, placement on the board, aside from the left and right regions where it indicates a plus/minus area, is trivial; I place it on the top and align it across the center for better practice and demonstration purposes.
Step 3-) Attach the jumper wires to the board and to the MPU6050:
Plug in your MicroUSB from your computer to your Raspberry Pi Pico
Next, take four male-to-female jumper wires. Attach the ends as follows:
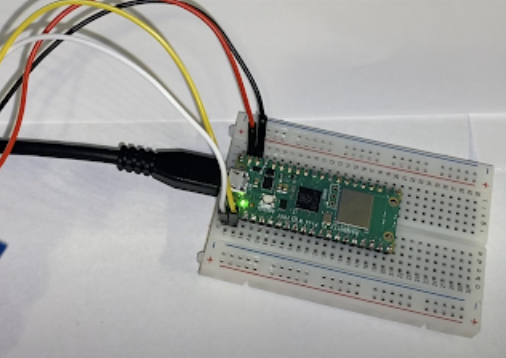
- Red Wire: Pin 39
- Black Wire: Pin 38
- White Wire: Pin 1
- Yellow Wire: Pin 2
The pins on the Pico are arranged like this:
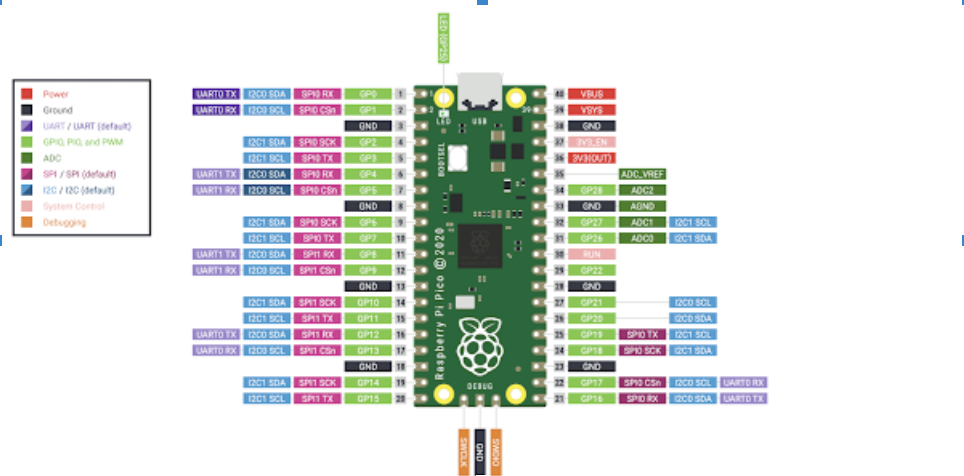
*Note that the color of the wire does not affect the transmission of any signals.
On the MPU6050 you want to attach the wires like this:
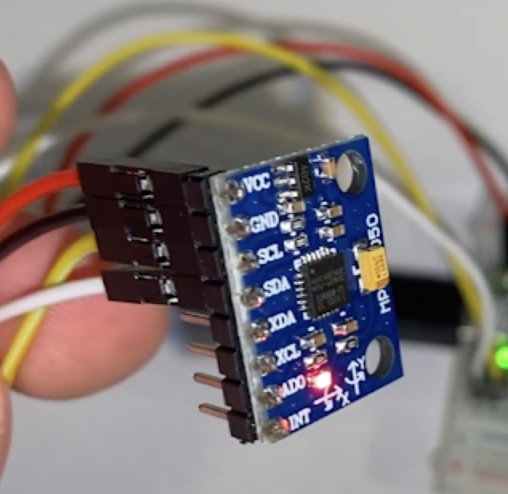
As you can see you are using VCC for transmitting power, while GND is simply the ground pin. SCL and SDA pertain to the means of communication between the Raspberry Pi and the Accelerometer, the specifics of that are beyond this tutorial.
Once you are done with this step you should see the MPU6050 light up red as you can see in the image. Now the only thing left is to get the code configured.
Step 4-) Setup the library and code scripts in your Pico in Thonny:
You can find the two scripts you need here:
I am assuming you have Thonny installed. If not, it is free and you can install it here:
- https://thonny.org/
If you set up Thonny properly with your Raspberry Pi Pico you should see a window that looks as follows:
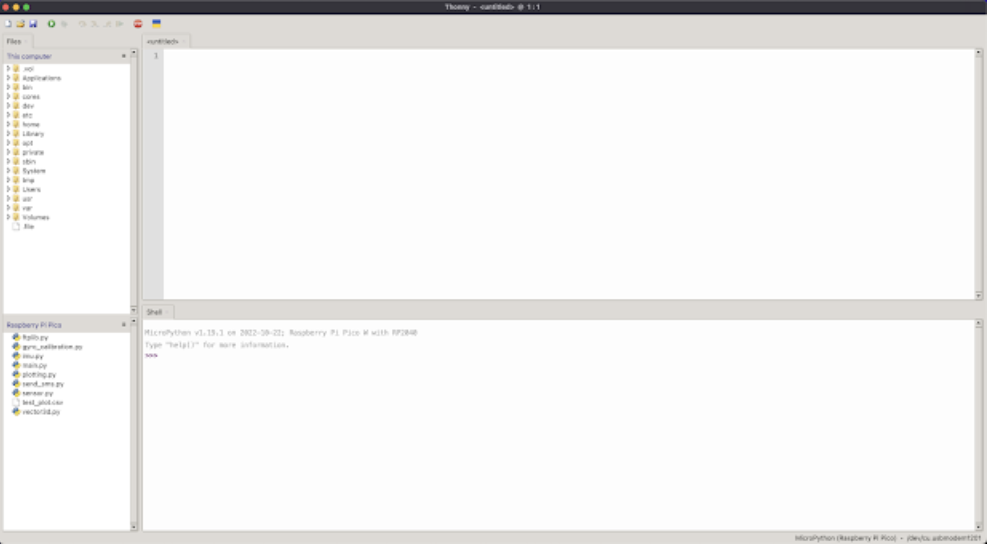
Where you see the files in your Pico on the bottom left. You can create two files, one for the library code (do not change the name of the library file) and the other for the main file (you can name this whatever you like), and just copy the code from the two links above into the corresponding files.
Now you can run the main file and start getting readings! If you did everything correctly you should start seeing MPU6050 readings for all 6 degrees of acceleration plus temperature in the console below.
Good luck!
Conclusion:
Hope you enjoyed the quick tutorial on how to get the MPU6050 setup with your Raspberry Pi Pico. If it helped you in any way please feel free to subscribe and comment on my Youtube Channel. Looking forward to making more content, helping more people, and developing new technology in the IoT space.
