-
Subscribe to our YouTube Channel: Stay updated with our latest tutorials and project insights by subscribing to our channel at YouTube — Shilleh.
-
Support Us: Your support is invaluable. Consider buying me a coffee at Buy Me A Coffee to help us continue creating quality content.
1-) Install the Required Libraries
We need to install flask, opencv, and picamera2 using the apt installer on our Raspberry Pi. Go into a terminal and run the following commands.
sudo apt update
sudo apt install python3-opencv python3-flask python3-picamera2 ffmpeg
2-) Timelapse Code
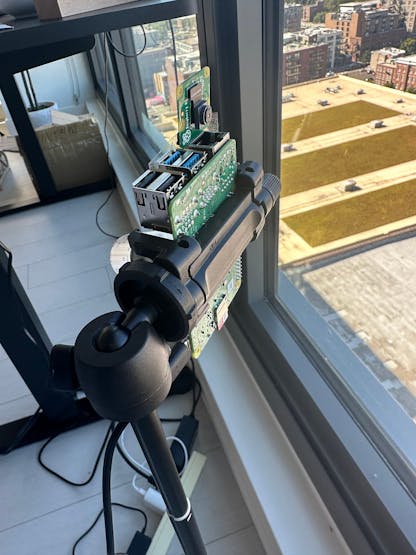
Now that you have the packages installed go ahead and create a Python file with the following content, running this code will generate the timelapse, make sure it is stationary when running to have a smooth lapse.”Suggestion: “Create a Python file with the following content. Running this code will generate the timelapse. Make sure the camera is stationary during capture to ensure a smooth timelapse.
import cv2
from datetime import datetime
import time
import os
from picamera2 import Picamera2
# Initialize the camera
camera = Picamera2()
camera.configure(camera.create_preview_configuration(main={"format": 'XRGB8888', "size": (1920, 1080)}))
camera.start()

# Timelapse settings
capture_interval = 10  # seconds between each frame
duration = 60 * 60 * 25  # duration of the timelapse capture in seconds (25 hours for this example)

# Create a new output directory with a timestamp
timestamp = datetime.now().strftime("%Y%m%d_%H%M%S")
output_dir = f"timelapse_frames_{timestamp}"
os.makedirs(output_dir, exist_ok=True)

start_time = time.time()

while time.time() - start_time < duration:
    frame = camera.capture_array()

    # Get the current time in hour:minute format
    current_time = datetime.now().strftime("%H:%M")

    # Define the position and font for the time overlay
    position = (frame.shape[1] - 200, 50)  # Adjust the position (x, y)
    font = cv2.FONT_HERSHEY_SIMPLEX
    font_scale = 1
    color = (0, 0, 0)  # Black color
    thickness = 3

    # Overlay the time on the frame
    cv2.putText(frame, current_time, position, font, font_scale, color, thickness, cv2.LINE_AA)

    # Save frame to disk
    filename = f"{output_dir}/frame_{int(time.time())}.jpg"
    cv2.imwrite(filename, frame)

    # Wait for the next capture
    time.sleep(capture_interval)

camera.stop()
High Level Overview:
Import Libraries: The script uses cv2 for image processing, datetime for timestamping, time for handling intervals, os for file operations, and Picamera2 to control the Raspberry Pi camera.
import cv2
from datetime import datetime
import time
import os
from picamera2 import Picamera2
Initialize and Configure the Camera: An instance of Picamera2 is created, configured for preview mode with a specific format and resolution, and started.
camera = Picamera2()
camera.configure(camera.create_preview_configuration(main={"format": 'XRGB8888', "size": (1920, 1080)}))
camera.start()
Set Timelapse Parameters: The capture interval is set to 10 seconds, and the total duration is set to 25 hours (in seconds).
capture_interval = 10  # seconds
duration = 60 * 60 * 25  # 25 hours
Create Output Directory: A unique output directory is created using the current timestamp to store captured frames.
timestamp = datetime.now().strftime("%Y%m%d_%H%M%S")
output_dir = f"timelapse_frames_{timestamp}"
os.makedirs(output_dir, exist_ok=True)
Capture Frames in a Loop: The script enters a loop that runs until the specified duration is reached. It captures a frame, overlays the current time, saves the frame to disk, and waits for the next interval.
while time.time() - start_time < duration:
    frame = camera.capture_array()
    current_time = datetime.now().strftime("%H:%M")
    cv2.putText(frame, current_time, (frame.shape[1] - 200, 50), cv2.FONT_HERSHEY_SIMPLEX, 1, (0, 0, 0), 3, cv2.LINE_AA)
    filename = f"{output_dir}/frame_{int(time.time())}.jpg"
    cv2.imwrite(filename, frame)
    time.sleep(capture_interval)
Stop the Camera: After capturing all frames, the camera is stopped to free up resources.
camera.stop()This script captures images at regular intervals, overlays the current time, and saves them, allowing you to compile these frames into a time-lapse video later.
3-) Test Camera Angle with Flask App (Optional)
If you’d like to preview the camera angle before capturing your timelapse, you can set up a live stream using Flask. This step is optional but recommended for first-time setups.
Create another Python file with the following code and run it.
from flask import Flask, Response
from picamera2 import Picamera2
import cv2
from datetime import datetime

app = Flask(__name__)
camera = Picamera2()
camera.configure(camera.create_preview_configuration(main={"format": 'XRGB8888', "size": (1920, 1080)}))
camera.start()

def generate_frames():
    while True:
        frame = camera.capture_array()

        # Get the current time in hour:minute format
        current_time = datetime.now().strftime("%H:%M")

        # Define the position and font for the time overlay
        position = (frame.shape[1] - 200, 50)  # Adjust the position (x, y)
        font = cv2.FONT_HERSHEY_SIMPLEX
        font_scale = 1
        color = (255, 255, 255)  # White color
        thickness = 2

        # Overlay the time on the frame
        cv2.putText(frame, current_time, position, font, font_scale, color, thickness, cv2.LINE_AA)

        # Encode the frame as a JPEG image
        ret, buffer = cv2.imencode('.jpg', frame)
        frame = buffer.tobytes()

        # Yield the frame to the response stream
        yield (b'--frame\r\n'
               b'Content-Type: image/jpeg\r\n\r\n' + frame + b'\r\n')

@app.route('/video_feed')
def video_feed():
    return Response(generate_frames(), mimetype='multipart/x-mixed-replace; boundary=frame')

if __name__ == '__main__':
    app.run(host='0.0.0.0', port=5000)
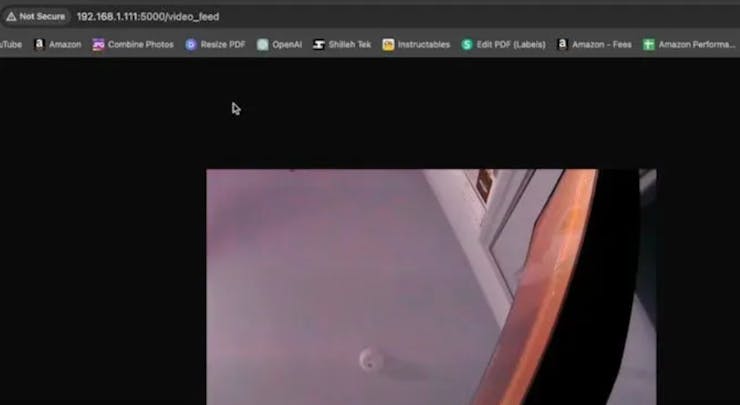
If your Raspberry Pi is connected to your local WiFi you should be able to access the camera view through the following link.
http://<Your Raspberry Pi IP>:5000/video_feed
You can get your IP address of your Raspberry Pi by entering a terminal on the Raspberry Pi and typing the command ifconfig. You can then find the IP address in the inet section.
Once this is done you will see a video stream in your chrome browser!
Adjust the camera angle as you see fit before initiating the time-lapse code so you do not regret running a bad-angled time lapse so long.


4-) Putting Frames Together
Once the code finishes running, you will see a directory filled with.jpg files. These are the frames of your time-lapse that you will stitch together using ffmpeg.
What is ffmpeg ?
ffmpeg is a powerful command-line tool used for processing video and audio files. It's a key utility in multimedia handling that allows you to:
- Convert between different video and audio formats (e.g., MP4, AVI, MP3).
- Edit videos by cutting, joining, or applying filters.
- Compress videos to reduce file size.
- Extract audio from video files.
- Create multimedia content, such as timelapse videos or GIFs from image sequences.
Essentially, ffmpeg is the Swiss Army knife for multimedia files—it's versatile and can perform almost any task you need related to video and audio.
To use it in this context, navigate into the directory where all of your frames are stored in a terminal and run the following command.
ffmpeg -framerate 30 -pattern_type glob -i 'frame_*.jpg' -c:v libx264 -pix_fmt yuv420p timelapse.mp4The -framerate 30 option sets the playback speed to 30 frames per second, which is a standard rate for smooth video. The -c:v libx264 specifies the use of the H.264 codec, which is widely supported and efficient for compression.
This should begin producing the final mp4 file for your timelapse, depending on the length of the timelapse this may take 10–30 minutes to run so be patient.
5-) Transfer File to Local Computer with SCP (Optional)
Once you have created your timelapse video (timelapse.mp4) on your Raspberry Pi, you might want to transfer it to your local computer for further editing or sharing. This is where the scp (Secure Copy Protocol) command comes in handy, allowing you to securely transfer files over the network.
Before You Begin:
-
Ensure SSH is Enabled: To use
scp, SSH must be enabled on your Raspberry Pi. If it isn't already enabled, you can turn it on through the Raspberry Pi Configuration tool or by adding an emptysshfile to the boot directory of your SD card if you’re setting up headlessly.
Before you can use scp to transfer files, ensure that SSH is enabled on your Raspberry Pi. Here’s how to do it:
Enable SSH via Raspberry Pi Configuration:
Option 1: Using the Desktop Interface:
- Open the Start Menu on your Raspberry Pi.
- Navigate to Preferences > Raspberry Pi Configuration.
- Go to the Interfaces tab.
- Enable SSH by selecting the Enabled radio button.
- Click OK to apply the changes.
Option 2: Using the Command Line:
- Open the terminal on your Raspberry Pi and run the following command:
sudo raspi-config- In the configuration tool, navigate to Interfacing Options > SSH and select Enable.
- Press Enter and then Finish to exit the configuration tool.
Enable SSH on a Headless Setup:
If you are setting up your Raspberry Pi without a monitor (headless setup), you can enable SSH by placing an empty file named ssh (with no file extension) in the boot directory of your SD card.
- Insert the SD card into your computer.
-
Open the
bootpartition of the SD card. -
Create a new empty file named
ssh(no file extension). - Safely eject the SD card, insert it into your Raspberry Pi, and boot it up.
Transferring the File:
Open the terminal on your local computer and run the following command to transfer the timelapse.mp4 file from your Raspberry Pi to your local computer:
scp mshilleh@raspberrypi:~/Desktop/timelapse_frames_20240903_040101/timelapse.mp4 ~/Desktop/Explanation of the Command:
-
scp: This stands for Secure Copy Protocol, a command used to securely transfer files between two computers over a network. -
mshilleh@raspberrypi:: This part specifies the user (mshilleh) and the hostname (raspberrypi) of your Raspberry Pi. You may need to replaceraspberrypiwith the actual IP address of your Raspberry Pi (e.g.,192.168.1.5) if your network configuration does not resolveraspberrypito the correct device. -
~/Desktop/timelapse_frames_20240903_040101/timelapse.mp4: This is the path to thetimelapse.mp4file on your Raspberry Pi. Make sure this path matches the location of your file. The~symbol represents the home directory of the usermshilleh. -
~/Desktop/: This specifies the destination directory on your local computer where you want thetimelapse.mp4file to be copied. In this example, it will be copied to the Desktop of your local machine.
If this command runs successfully, you should see the MP4 file on your local computer. Congratulations, you’re done!
