
The Seeed Studio XIAO RP2040 is a compact and powerful development board based on the RP2040 microcontroller chip, which is designed by the Raspberry Pi Foundation. The RP2040 chip is a dual-core microcontroller that is optimized for low-power applications and offers high-performance computing capabilities. The XIAO RP2040 is a small form-factor board that measures just 20mm x 17.5mm and features a range of communication protocols, including UART, SPI, I2C, and PWM, making it ideal for a variety of projects such as robotics, IoT, and DIY electronics. It also has built-in power management features, which help to reduce power consumption, making it suitable for battery-powered applications.
The XIAO RP2040 is easy to use and supports a range of programming languages, including C++, Python, and MicroPython. Additionally, it features a programmable RGB LED that can be used for status indication or other creative purposes. Overall, the XIAO RP2040 is a versatile and powerful development board that offers a range of features and capabilities in a compact and affordable package.
In this tutorial, I will show how to connect it to the popular MPU6050 accelerometer to start getting accelerometer readings in MicroPython.
Link to Youtube Video, don't forget to subscribe if you learned something!
You will need:
- Seeed Studio RP2040 Soldered With USB Cable
- MPU6050 Pre Soldered
- DIYables Jumper Wires
- DIYables Breadboard
Step 1-) Wire Jumper Wires as Follows:
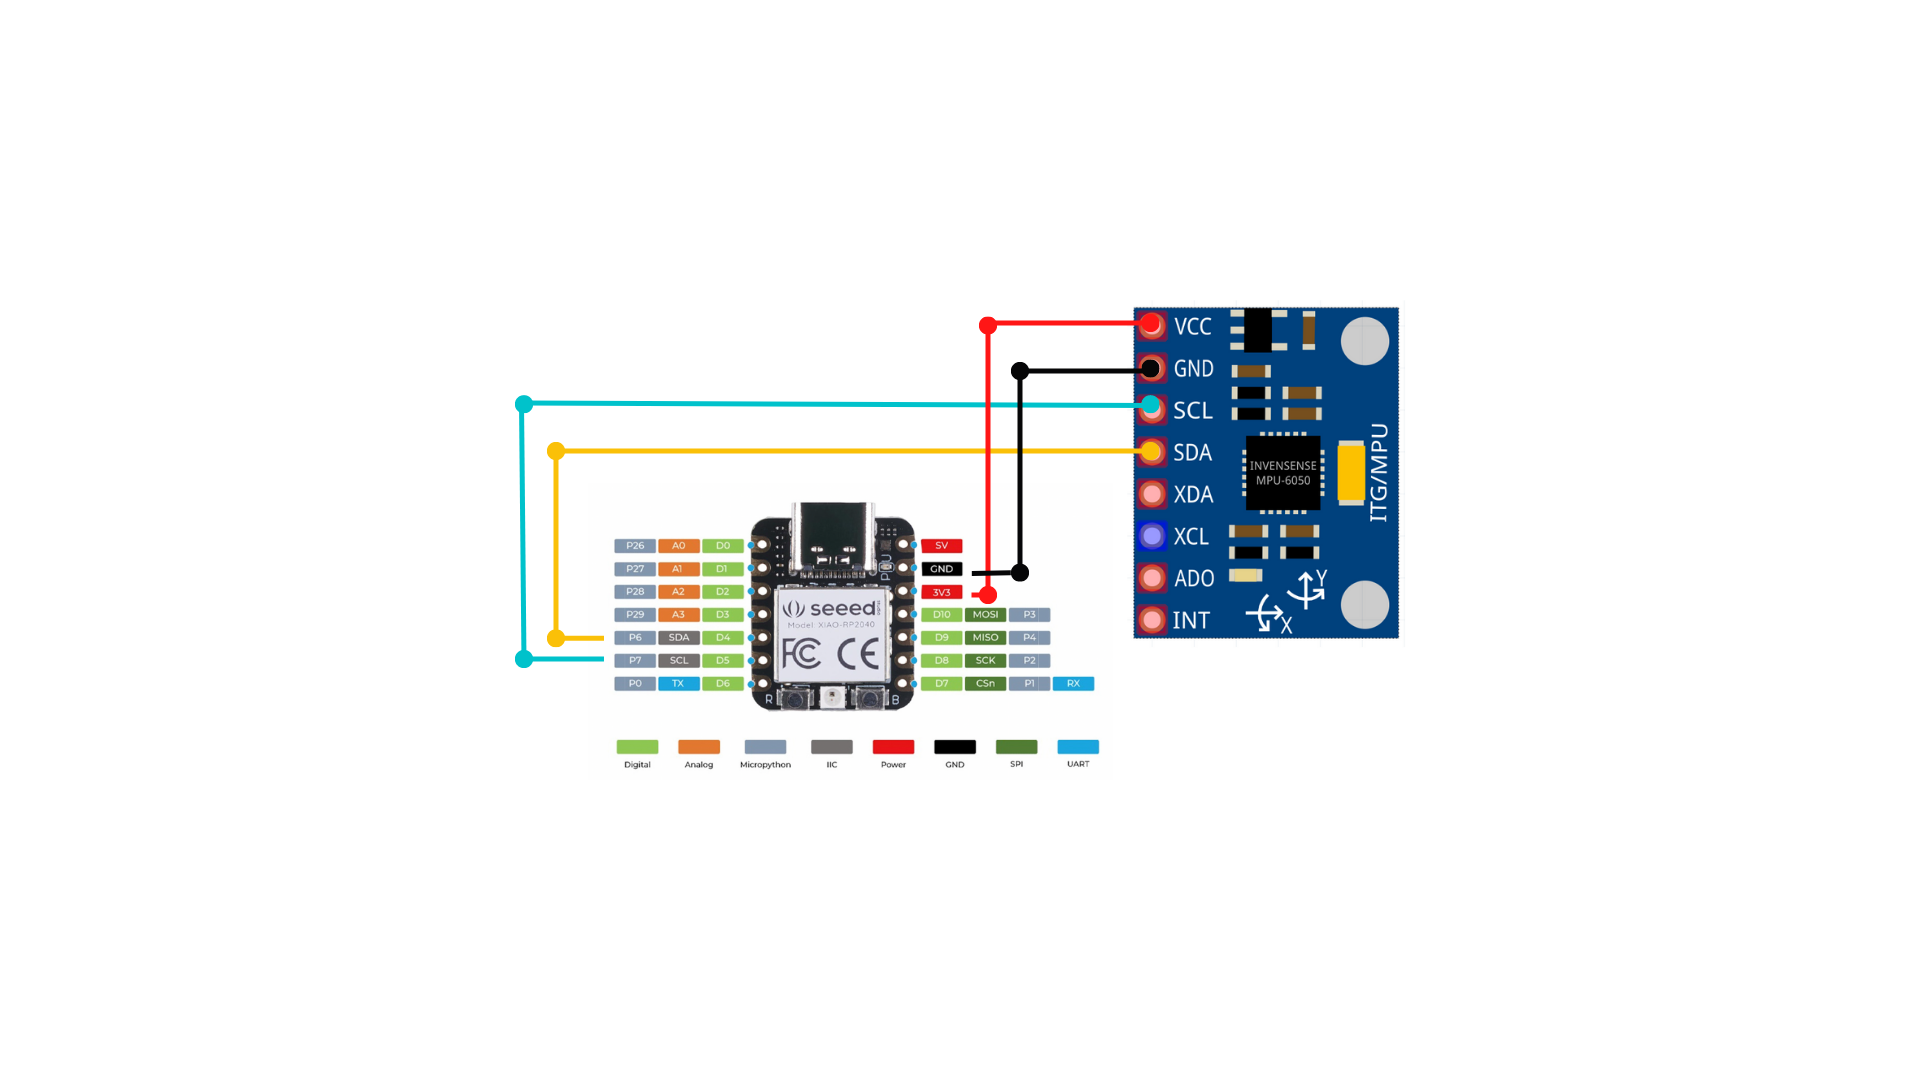
You just need four jumper wires mimicking the connections in the diagram.
Step 2-) Download Thonny
Step 3-) Install MicroPython on Device
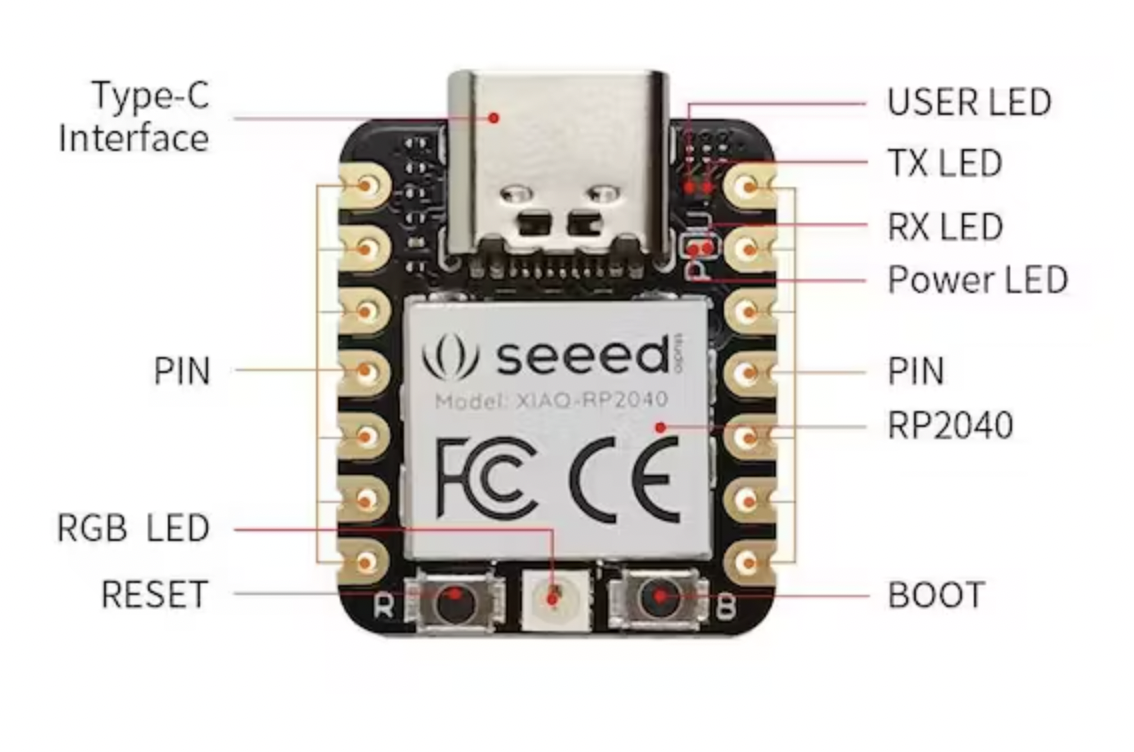
Before you plug in your RP2040 to your computer, hold the "boot" button (shown below) on the device as you plug in the USB-C.
Once plugged in, you need to click Tools in the menu above and go to Interpreter.
Click install on the bottom right, and select the target volume and the variant you would like, the Pico H variant is fine for this project.
Should be installed after you click Install.
You can now select the device from the bottom right of the screen in Thonny to start creating files!
Step 4-) Copy Library Files onto your RP2040 Directory
https://github.com/shillehbean/youtube-channel
You need two library files, vector3d.py and imu.py both found on my GitHub page. These are libraries I found on other pages but I just centralized them to my GitHub page. I do not take credit for that code.
You can then copy the following file into your device as well https://github.com/shillehbean/youtube-channel/blob/main/main_mpu6050_xiao.py
Once everything is copied you can run this script and start getting values!
Conclusion:
Thanks for following the tutorial. If this helped in any way please subscribe to the channel would mean a lot to show your support. As always let me know if you have any questions.


