
In this tutorial, I will talk about the new HCSR04+ which allows you to interface with 3.3V interfaces without a voltage regulator as opposed to the regular HCSR04. Both sensors are available at our Amazon Store Front at ShillehTek.
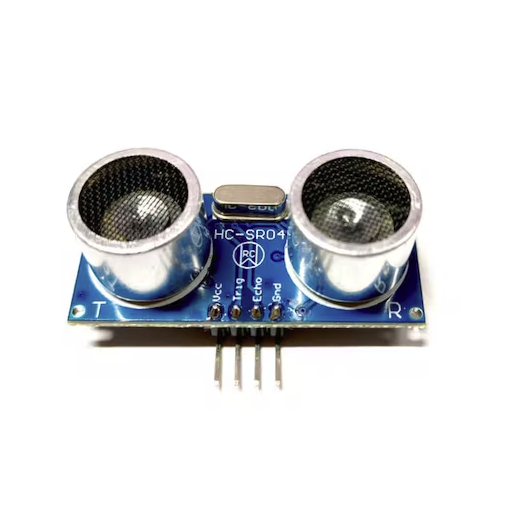
HCSR04+ (Compatible with 3.3 and 5V logic)
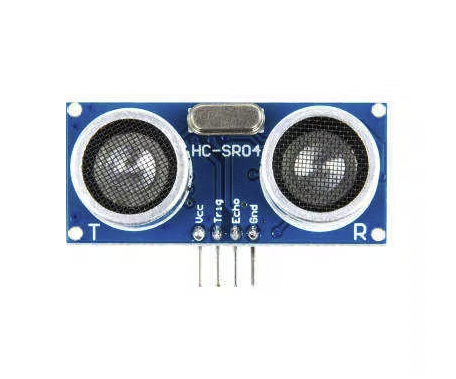
Regular HCSR04 (Compatible with only 5V logic)
Those of you who have been playing around with Arduino and Raspberry Pi electronics are most definitely familiar with the HC-SR04 ultrasonic sensor. The HC-SR04 is a popular ultrasonic distance sensor that is useful for measuring distances up to several meters. It works by emitting an ultrasonic pulse and then measuring the time it takes for the pulse to bounce off an object and return to the sensor. This time measurement can then be used to calculate the distance to the object.
The HC-SR04 is commonly used in robotics, automation, and other applications where distance measurement is important. For example, it can be used to build a robot that can navigate autonomously and avoid obstacles. The sensor itself is very easy to use and set up.
There are multiple versions of the HC-SR04 sensor: In this project, I show one that operates at 3.3-5V volts and one that only operates at 5 volts. The main difference between the two versions is of course the voltage level at which they operate. The setup of using either sensor is the same. I have another tutorial where I show how to use these with the Raspberry Pi Pico (here). However, in that tutorial, I used the 5V version, which should not be used with the Pico...
The Plus version is useful in applications where the microcontroller or microprocessor operates at 3.3 volts. It can be directly connected to the microcontroller's GPIO pins without the need for level shifting or voltage regulation. This makes it easier to integrate into projects that use 3.3V logic. This is great for the Pico, Pico W, versions of the Arduino, ESP32, and more!
The 5V version you see in the second photo is more common and is useful in applications where the microcontroller or microprocessor operates at 5 volts. It can also be directly connected to the microcontroller's GPIO pins without the need for level shifting or voltage regulation. Level shifting refers to the process of converting a signal from one voltage level to another. This is often necessary when connecting two circuits that operate at different voltage levels. For example, if you have a circuit that operates at 3.3V and you need to connect it to a circuit that operates at 5V, you would need to use a level shifter to convert the 3.3V signal to a 5V signal. Note that the Plus version can also be plugged into the 5V microcontrollers because it has a built-in voltage regulator that makes your life a lot easier!
In summary, the HC-SR04 is a useful ultrasonic distance sensor that can be used in a wide range of applications. The new HCSR04+ can ease setup if you do not want to deal with level shifting or voltage regulation, and it is relatively the same price as its ancestor.
I hope people are more familiar with the new Plus version and can find use cases for their applications. Finally, you can learn how to get readings from either version by watching my Youtube Video. Thanks for reading and I hope you learned something.


