

Project Overview
WiFi Fish Bite Alarm with ESP8266 and SW-420: Build a WiFi vibration alarm using a NodeMCU ESP8266 (or D1 Mini) and an SW-420 vibration sensor module so your Android phone can vibrate and ring when a fish strikes.
The sensor detects bumps on the rod holder, the ESP8266 serves the bite status over HTTP, and a phone app polls the device to trigger notifications. The same approach also works for any vibration-triggered IoT alert (machines, doors, mailboxes, and more).
- Time: About 2 hours
- Skill level: Intermediate
- What you will build: A WiFi vibration alarm that notifies an Android phone the instant the SW-420 detects a strike.

Parts List
From ShillehTek
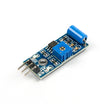
- SW-420 Vibration Sensor Module - detects vibration and provides a digital trigger output.
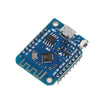
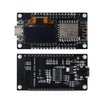
- ESP8266 D1 Mini V3 or the NodeMCU ESP8266 board - runs the WiFi web server and reads the sensor.
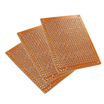
- 5x7cm Prototype PCB - a solderable base for a rugged outdoor build.
- 120pcs 20cm Dupont Jumper Wires - quick wiring between the ESP8266, sensor, and LED.
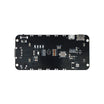
- 2x18650 Battery Shield - a tidy battery alternative to a power bank.
External
- One LED - armed-state indicator.
- Android smartphone - runs the MIT App Inventor app that polls the ESP8266 and triggers alerts.
Note: The SW-420 is a normally-closed vibration switch with an LM393 comparator, runs on 3.3 to 5V, and has an onboard sensitivity potentiometer, which is ideal for battery-powered ESP8266 projects.
Step-by-Step Guide
Step 1 - Meet the Two Main Parts
Goal: Know the roles before wiring.
What to do: The NodeMCU (ESP-12E module) provides WiFi and runs a tiny web server. The SW-420 outputs a digital pulse whenever it feels vibration. Its onboard potentiometer sets sensitivity, and an onboard LED shows triggers.
Expected result: You understand the alarm flow: rod bumps holder, holder bumps sensor, sensor pulses, ESP8266 reports status for your phone app to read.
Step 2 - Set Up the Arduino IDE for ESP8266
Goal: Make the IDE support NodeMCU/ESP8266 boards.
What to do: In Preferences, add http://arduino.esp8266.com/stable/package_esp8266com_index.json to Additional Boards Manager URLs. Install esp8266 by ESP8266 Community from Boards Manager. Install your USB driver (CH340 for most NodeMCU V3 boards). Then select NodeMCU 1.0 (ESP-12E Module), 80 MHz CPU, 115200 upload speed, and your COM port.
Expected result: The IDE compiles and uploads to the NodeMCU without errors.
Step 3 - Wire the Circuit
Goal: Make three sensor connections plus an LED indicator.
What to do: Wire per the diagram: SW-420 digital output to vibsensorPin (GPIO5 / D1), VCC to 3V3, GND to GND. Add an indicator LED on ledPin (GPIO13 / D7).

Expected result: A compact ESP8266 + SW-420 rig that can be mounted near your rod holder.
Step 4 - Upload the Alarm Sketch
Goal: Run a web server that reports bites.
What to do: Upload the sketch below. It connects to a WiFi hotspot (set ssid and password), measures vibration pulse lengths with pulseIn(), and answers HTTP requests with !!!BITE!!! or no bite.
Code:
#define vibsensorPin 5
#define ledPin 13
#include <ESP8266WiFi.h>

const char* ssid = "Redmi";
const char* password = "";
boolean bite = false;
WiFiServer server(80);

void setup() {
  Serial.begin(115200);
  delay(10);
  pinMode(ledPin, OUTPUT);
  pinMode(vibsensorPin, INPUT);
  digitalWrite(ledPin, LOW);

  Serial.print("Connecting to ");
  Serial.println(ssid);
  WiFi.begin(ssid);
  while (WiFi.status() != WL_CONNECTED) {
    delay(500);
    Serial.print(".");
  }
  Serial.println("");
  Serial.println("WiFi connected");

  server.begin();
  Serial.println("Server started");
  Serial.println(WiFi.localIP());
}

void loop() {
  long fishAlarm = pulseIn(vibsensorPin, HIGH);
  if (fishAlarm > 100) {
    bite = true;
    Serial.println(fishAlarm);
    Serial.println(bite);
  }

  WiFiClient client = server.available();
  if (!client) { return; }

  while (!client.available()) { delay(1); }

  String req = client.readStringUntil('\r');
  Serial.println(req);
  client.flush();

  int val;
  if (req.indexOf("/stop/0") != -1)
    val = 0;
  else if (req.indexOf("/start/1") != -1)
    val = 1;
  else {
    Serial.println("invalid request");
    client.stop();
    return;
  }

  digitalWrite(ledPin, val);
  client.flush();

  String s = "HTTP/1.1 200 OK\r\n Content-Type: text/html\r\n\r\n<!DOCTYPE HTML>\r\n";
  if (bite == true) {
    s += "!!!BITE!!!";
    bite = false;
  } else {
    s += "no bite";
  }

  client.print(s);
  delay(1);
  Serial.println("Client disconnected");
}
Expected result: The serial monitor shows the module joining your hotspot and printing its IP address.
Step 5 - Set Up the Phone Side
Goal: Get bite alerts on your Android phone.
What to do: The original author built the companion app in MIT App Inventor and shares both the ready-to-install APK and the editable AIA project on the credited page below: Hackster.io.
Create a WiFi hotspot on your phone matching the sketch SSID, install the app, and enter the NodeMCU IP address from the serial monitor. In the app, tap the green fish to arm the alarm (LED lights and polling starts, every 1.5 s by default). When a bite is detected, the phone vibrates and rings and the red fish lights up. Tap it to disarm while you fight the fish.
Expected result: Your phone is armed and polling the rig, including with the screen locked, from up to about 100 m.
Step 6 - Tune the Sensitivity
Goal: Catch subtle bites without false alarms.
What to do: Adjust two things: the potentiometer on the SW-420 (how much physical vibration registers) and the sketch threshold if (fishAlarm > 100) (how long a pulse must be to count as a bite). Raise either to ignore wind and waves. Lower them for delicate biters.
Expected result: An alarm dialed in for your rod, water conditions, and fish.
Conclusion
You combined an SW-420 vibration sensor and an ESP8266 NodeMCU into a WiFi fish bite alarm. The ESP8266 measures vibration pulse lengths, serves the result over HTTP, and the App Inventor phone app turns your Android device into the alert pager.
Want the exact parts used in this build? Grab them from ShillehTek.com. If you want help customizing this project or building something for your product, check out our IoT consulting services.



.png?v=25000753014097803521791168436)

.png?v=68677308723310773341791168436)


