

Project Overview
ESP32 Web Server LED/Relay Control: Use an ESP32 Dev Board and its built-in WebServer library to host a simple phone-friendly page that turns an LED or relay on and off over your local Wi-Fi.
Connect the ESP32 to your network, open its IP address in a browser, and two big buttons switch an output on and off with no app, no cloud account, and no subscription.
- Time: ~30 minutes
- Skill level: Beginner
- What you will build: A phone-friendly ON/OFF web page served by the ESP32 itself, driving an LED first and a relay second.

Parts List
From ShillehTek
- ESP32 38-Pin Dev Board (CP2102, USB-C) - runs the Wi-Fi web server and drives the output pin
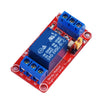
- 1-Channel 5V Relay Module - switches a real load in Step 5
- Uno Starter Kit - provides LEDs and 220Ω resistors for the first test
- 400-Point Breadboard - for quick prototyping
- Dupont Jumper Wires - for wiring between the ESP32 and LED/relay
External
- A 2.4 GHz Wi-Fi network and its password (the ESP32 does not join 5 GHz networks)
Note: The original project used the ESPAsyncWebServer library. This version uses the WebServer library that ships with the ESP32 board package, so there is nothing extra to install - the URLs and behavior are the same.
Step-by-Step Guide
Step 1 - Wire the LED
Goal: Something visible to switch.
What to do: The onboard LED on GPIO 2 works for a first test. For an external one: GPIO 2 → 220Ω → LED anode, LED cathode → GND. Later you will move this same pin to the relay's IN terminal.
Expected result: An output you can see.
Step 2 - How a Web Server Works in 3 Sentences
Goal: Demystify HTTP.
What to do: A browser asks for a path like /led/on; the ESP32 runs the function you registered for that path; whatever that function sends back is what the browser displays. Buttons are just links to paths. That is the whole protocol as far as this project is concerned.
Expected result: You can predict what each route in the code does before reading it.
Step 3 - The Sketch
Goal: Upload a web server sketch that serves a page with ON/OFF buttons and toggles GPIO 2.
Code:
#include <WiFi.h>
#include <WebServer.h>

const char* SSID = "YourNetwork";
const char* PASS = "YourPassword";
const int   LED  = 2;                  // later: the relay's IN pin

WebServer server(80);
bool ledOn = false;

String page() {
  String s = "<!DOCTYPE html><html><head><meta name='viewport' content='width=device-width,initial-scale=1'>";
  s += "<style>body{font-family:sans-serif;text-align:center;margin-top:40px}";
  s += "a{display:inline-block;padding:18px 40px;margin:10px;font-size:24px;color:#fff;border-radius:8px;text-decoration:none}";
  s += ".on{background:#2e7d32}.off{background:#c62828}</style></head><body>";
  s += "<h1>ESP32 LED Control</h1><p>LED is <b>" + String(ledOn ? "ON" : "OFF") + "</b></p>";
  s += "<a class='on' href='/led/on'>ON</a><a class='off' href='/led/off'>OFF</a></body></html>";
  return s;
}

void backHome() {                      // redirect to "/" so the page refreshes
  server.sendHeader("Location", "/");
  server.send(303);
}

void setup() {
  Serial.begin(115200);
  pinMode(LED, OUTPUT);

  WiFi.begin(SSID, PASS);
  Serial.print("Connecting");
  while (WiFi.status() != WL_CONNECTED) { delay(500); Serial.print("."); }
  Serial.println("\nOpen http://" + WiFi.localIP().toString());

  server.on("/",        []() { server.send(200, "text/html", page()); });
  server.on("/led/on",  []() { ledOn = true;  digitalWrite(LED, HIGH); backHome(); });
  server.on("/led/off", []() { ledOn = false; digitalWrite(LED, LOW);  backHome(); });
  server.begin();
}

void loop() {
  server.handleClient();               // answer requests as they arrive
}
What to do: Put your Wi-Fi name and password in, upload, and read the IP address from the Serial Monitor (115200 baud). Type it into a browser on any device on the same network.
Expected result: A page with green ON and red OFF buttons; the LED follows, and the status line updates after each tap.
Step 4 - Make the Address Stick
Goal: No more hunting for the IP.
What to do: Reserve the ESP32's IP in your router's DHCP settings, or add mDNS so it answers at http://esp32led.local (include ESPmDNS.h and call MDNS.begin("esp32led") after connecting). Bookmark it on your phone's home screen and it behaves like an app.
Expected result: One tap from the home screen to the control page.
Step 5 - Switch Something Real
Goal: From LED to lamp.
What to do: Move the signal wire from the LED to the relay's IN pin, power the relay module from the 5V (VIN) pin and GND, and wire the lamp through the relay's NO and COM contacts. Most relay boards are active-LOW - if the lamp behaves backwards, swap HIGH and LOW in the two routes. Mains wiring is only for those qualified to do it safely; a 12 V LED strip is a great first load.
Expected result: A lamp, fan, or strip that you control from your phone over your own Wi-Fi.
Conclusion
You built an ESP32 WebServer project that serves a simple control page and toggles an LED, then reuses the same output pin to drive a relay. The result is local control from any phone on your Wi-Fi using a browser and a couple of HTTP routes.
Want the exact parts used in this build? Grab them from ShillehTek.com. If you want help customizing this project or building something for your product, check out our IoT consulting services.
Credits
All photos and images in this tutorial are credited to Pradeep (CETECH) on Hackster.io. The original guide by Pradeep served as the reference for this ShillehTek version. We thank him for his excellent work in the maker community.






.png?v=25000753014097803521791168436)

.png?v=68677308723310773341791168436)


