

Project Overview
ESP32 BLE UART: In this project, you use an ESP32 with the Nordic UART Service (NUS) to connect from a phone app over Bluetooth Low Energy, send text commands to switch an output, and receive a live analog sensor reading every second via notifications.
Classic Bluetooth Serial is easy, but it only works with Android. Bluetooth Low Energy works with iPhones too, uses less power, and is what most modern wearables and smart locks use. Once you understand services, characteristics, and notifications, the rest of BLE becomes much easier to approach.
- Time: ~45 minutes
- Skill level: Intermediate
- What you will build: A BLE server with the standard Nordic UART Service, phone-to-board commands, and board-to-phone notifications.

Parts List
From ShillehTek
- ESP32 38-Pin Dev Board (CP2102, USB-C) - the microcontroller that hosts the BLE UART service
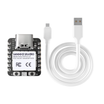
- XIAO ESP32-C6 - BLE-capable alternative board; same sketch approach
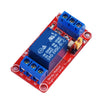
- 1-Channel 5V Relay Module - an external output you can switch from your phone (optional if using the onboard LED)
- 400-Point Breadboard - for quick prototyping
- Dupont Jumper Wires - for wiring the output and analog input
External
- A phone with a BLE terminal app: "nRF Connect" (Android/iOS) or "Serial Bluetooth Terminal" (Android, BLE mode)
- A potentiometer or any analog sensor on GPIO 32 for the live reading
Note: BLE data is organized as services containing characteristics. The Nordic UART Service (NUS) is a common pattern with one RX characteristic (phone writes to it) and one TX characteristic (board notifies through it). Using its well-known UUIDs means off-the-shelf terminal apps can recognize your board quickly.
Step-by-Step Guide
Step 1 - Wire an Output and an Input
Goal: Create something to control (output) and something to report (input).
What to do: Use the onboard LED on GPIO 2 (or a relay IN pin) as your output.
For the input, wire a potentiometer wiper to GPIO 32, with the other ends going to 3V3 and GND. Any suitable sensor voltage works for the analog read.
Expected result: One GPIO output and one ADC input are ready.
Step 2 - Install a BLE Terminal App
Goal: Get a way to send and view BLE data from your phone.
What to do: Install nRF Connect (works on both iOS and Android). It can scan for BLE devices, connect, browse services, write to characteristics, and subscribe to notifications.
Expected result: The app can scan for nearby BLE devices.
Step 3 - Upload the Sketch and Test NUS
Goal: Turn the ESP32 into a BLE UART server (NUS) that accepts commands and sends sensor updates.
What to do: Upload the following sketch, then open your BLE terminal app to connect and interact with the characteristics.
Code:
#include <BLEDevice.h>
#include <BLEServer.h>
#include <BLEUtils.h>
#include <BLE2902.h>

// Nordic UART Service UUIDs (recognized by most BLE terminal apps)
#define SERVICE_UUID "6E400001-B5A3-F393-E0A9-E50E24DCCA9E"
#define RX_UUID      "6E400002-B5A3-F393-E0A9-E50E24DCCA9E"   // phone -> board (write)
#define TX_UUID      "6E400003-B5A3-F393-E0A9-E50E24DCCA9E"   // board -> phone (notify)

const int OUT = 2, SENSOR = 32;
BLECharacteristic* tx;
bool connected = false;

class ServerCB : public BLEServerCallbacks {
  void onConnect(BLEServer*)    { connected = true;  Serial.println("phone connected"); }
  void onDisconnect(BLEServer* s) { connected = false; s->startAdvertising(); }   // be findable again
};

class RxCB : public BLECharacteristicCallbacks {
  void onWrite(BLECharacteristic* c) {
    String msg = c->getValue().c_str();          // works on ESP32 core 2.x and 3.x
    msg.trim(); msg.toLowerCase();
    Serial.println("got: " + msg);
    if (msg == "on"  || msg == "a") digitalWrite(OUT, HIGH);
    if (msg == "off" || msg == "b") digitalWrite(OUT, LOW);
  }
};

void setup() {
  Serial.begin(115200);
  pinMode(OUT, OUTPUT);

  BLEDevice::init("ShillehTek-ESP32");           // the name you'll see in the app
  BLEServer* server = BLEDevice::createServer();
  server->setCallbacks(new ServerCB());
  BLEService* svc = server->createService(SERVICE_UUID);

  tx = svc->createCharacteristic(TX_UUID, BLECharacteristic::PROPERTY_NOTIFY);
  tx->addDescriptor(new BLE2902());              // lets the phone subscribe to notifications

  BLECharacteristic* rx = svc->createCharacteristic(RX_UUID, BLECharacteristic::PROPERTY_WRITE);
  rx->setCallbacks(new RxCB());

  svc->start();
  server->getAdvertising()->addServiceUUID(SERVICE_UUID);
  server->startAdvertising();
  Serial.println("advertising...");
}

void loop() {
  if (connected) {
    char buf[24];
    snprintf(buf, sizeof buf, "sensor=%d\n", analogRead(SENSOR));
    tx->setValue(buf);
    tx->notify();                                // push to the phone
  }
  delay(1000);
}
In nRF Connect, scan and connect to ShillehTek-ESP32. Expand the Nordic UART Service.
Tap the down-arrow on the TX characteristic to subscribe, then tap the up-arrow on RX, choose text, and send on.
Expected result: The LED turns on; sensor=... values arrive once a second under TX and change as you turn the potentiometer. Send off to turn it off.
Step 4 - Understand What You Just Built
Goal: Connect the code to core BLE concepts.
What to do: Advertising is the board broadcasting its name and service so the phone can find it. Connecting stops advertising, which is why the disconnect callback restarts it.
A characteristic with WRITE is a mailbox the phone can write bytes into. A characteristic with NOTIFY is a stream the phone can subscribe to. The 2902 descriptor is the subscribe toggle.
Expected result: You can browse a BLE device's services and characteristics and make informed guesses about what they do.
Step 5 - Make It Yours
Goal: Extend the pattern beyond a basic terminal demo.
What to do: You can send JSON like {"t":23.5,"h":41} and parse it on the phone, build a small Web Bluetooth page (Chrome on Android/desktop), or add a second characteristic for another control like a servo angle.
For battery builds, lower the advertising interval and sleep between notifications. BLE is designed for low-power devices.
Expected result: A BLE gadget with your own protocol built on the NUS pattern.
Conclusion
You built an ESP32 BLE Nordic UART Service that accepts phone commands via a write characteristic and sends sensor updates via notifications. With advertising, services, characteristics, and descriptors mapped to real behavior, you now have a reusable template for many BLE projects.
Want the exact parts used in this build? Grab them from ShillehTek.com. If you want help customizing this project or building something for your product, check out our IoT consulting services.
Credits
All photos and images in this tutorial are credited to Timothy Woo (Botletics) on Hackster.io. The original guide by Timothy Woo served as the reference for this ShillehTek version (shared under CC BY-SA). We thank him for his excellent work in the maker community.





.png?v=25000753014097803521791168436)

.png?v=68677308723310773341791168436)


