

Project Overview
Arduino Uno + potentiometer: In this project, you will read a potentiometer on an Arduino Uno analog pin, then use that value to control LED brightness and servo angle, plus use the knob as a simple mode selector.
A potentiometer is a classic analog input: turn the knob and the voltage on the wiper changes. You will practice the core pattern behind dials, sliders, and joysticks by using analogRead() and map() to translate one input into multiple outputs.
- Time: ~30 minutes
- Skill level: Beginner
-
What you will build: A knob that controls three different outputs, and a solid understanding of
analogRead()andmap().

Parts List
From ShillehTek
- Arduino Uno R3 Super Starter Kit - includes potentiometers, LEDs, resistors, and an SG90 servo
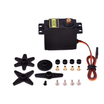
- MG995 Metal Gear Servo - for the knob-controlled servo step when you need real torque
- Resistor Kit - 220Ω for the LED
- 400-Point Breadboard
- Dupont Jumper Wires
External
- None
Note: A potentiometer is a voltage divider you can turn. Outer legs go to 5V and GND, and the middle leg (the wiper) goes to an analog pin. The wiper reads anywhere from 0 to 5 V depending on the knob position.
Step-by-Step Guide
Step 1 - Wire the Pot and Read It
Goal: See the analog reading change as you turn the knob.
What to do: Connect the potentiometer outer legs to 5V and GND, and connect the wiper to A0. Upload a sketch that prints analogRead(A0) every 100 ms and open the Serial Plotter. Turn the knob and watch the value sweep from 0 to 1023.

Expected result: Near 0 at one end, near 1023 at the other, and smooth values in between.
Step 2 - Knob to LED Brightness
Goal: Build your first analog-in, analog-out control loop.
What to do: Wire an LED to D9 (a PWM pin) through a 220Ω resistor. The ADC produces a 10-bit number (0 to 1023) and PWM takes an 8-bit number (0 to 255), so use map() to scale the potentiometer reading.
Code:
#include <Servo.h>

const int POT = A0, LED = 9, SERVO_PIN = 10;
Servo knobServo;

void setup() {
  Serial.begin(9600);
  pinMode(LED, OUTPUT);
  knobServo.attach(SERVO_PIN);
}

void loop() {
  int raw = analogRead(POT);                     // 0-1023

  int brightness = map(raw, 0, 1023, 0, 255);    // LED dimmer
  analogWrite(LED, brightness);

  int angle = map(raw, 0, 1023, 0, 180);         // servo position
  knobServo.write(angle);

  Serial.print(raw); Serial.print(" -> LED ");
  Serial.print(brightness); Serial.print(", servo ");
  Serial.println(angle);
  delay(20);
}
Expected result: The LED brightness changes smoothly as you turn the knob.
Step 3 - Knob to Servo Angle
Goal: Make a manual servo tester controlled by the potentiometer.
What to do: Connect the servo signal wire to D10 and connect servo power to 5V and GND. If you are using an MG995, use its own 5V supply. The same sketch already maps the potentiometer value to 0 to 180 degrees, so turning the knob moves the servo horn.
Expected result: Knob position matches servo position immediately.
Step 4 - Knob to Modes
Goal: Use the potentiometer as a selector instead of a continuous control.
What to do: Divide the analog range into zones, for example if (raw < 341) mode A, else if (raw < 682) mode B, else mode C. This generalizes the idea of selecting red, green, or blue with one knob into a simple menu selector.
Expected result: A three-position selector using a single analog knob.
Conclusion
You used an Arduino Uno potentiometer input to read an analog value, map it to LED PWM brightness, map it to a servo angle, and split the same range into simple modes. Once map() is second nature, joysticks, sliders, and many sensors follow the same pattern.
Want the exact parts used in this build? Grab them from ShillehTek.com. If you want help customizing this project or building something for your product, check out our IoT consulting services.
Credits: Photos and images are credited to Lucas Fernando on Hackster.io. The original guide by Lucas Fernando served as the reference for this ShillehTek version.






.png?v=25000753014097803521791168436)

.png?v=68677308723310773341791168436)


