

Project Overview
Connect Two Arduinos Over I2C - Send Sensor Data From One Board to Another With Three Wires: This project connects an Arduino Nano (with a DHT11 temperature and humidity sensor) to an Arduino Uno over I2C so the Uno can request the readings and display them on an SSD1306 I2C OLED, using only SDA, SCL, and GND.
One Arduino may run out of pins, or you may need one board near a sensor while another sits next to a display. I2C solves both: two wires (plus ground) link the boards, one acts as the controller that asks questions and the other as the peripheral that answers. This guide wires a Nano and an Uno together, has the Nano read a DHT11, and has the Uno request the temperature and humidity and show them on an OLED, with a command going the other way to toggle an LED so you see both directions of the bus.
- Time: ~45 minutes
- Skill level: Beginner-Intermediate
- What you will build: A two-board I2C link: a peripheral that measures, a controller that displays, and a reusable pattern for splitting any project across boards.

Parts List
From ShillehTek
- Arduino Nano V3.0 Pre-Soldered - the peripheral (sensor side)
- Arduino Uno R3 Super Starter Kit - the controller (display side), plus an LED and resistor
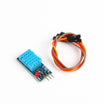
- DHT11 Temperature & Humidity Sensor - sensor read by the Nano
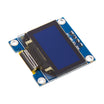
- 0.96" I2C OLED (SSD1306) - display driven by the Uno
- Resistor Kit - 220Ω for the LED, 4.7kΩ x2 optional pull-ups
- 830-Point Breadboard - prototyping the wiring
- Dupont Jumper Wires - making the connections between boards and modules
External
- Two USB cables (one per board)
Note: I2C only works between boards that share a ground. Connecting SDA and SCL without GND often results in random data or no communication. Both boards here are 5 V, so no level shifter is needed; mixing in a 3.3 V board (ESP32, Pico) would need one.
Step-by-Step Guide
Step 1 - Wire the Bus
Goal: Connect the two boards with three wires and attach the sensor and display.
What to do: Wire Nano A4 to Uno A4 (SDA). Wire Nano A5 to Uno A5 (SCL). Wire Nano GND to Uno GND. The OLED also goes on the Uno's A4/A5 (it is another device on the same bus), with VCC to 5V and GND to GND.
On the Nano, connect the DHT11: DATA to D2, VCC to 5V, and GND to GND. Add an LED with a 220Ω resistor from Nano D13 (or use the onboard LED) as the command target.
Keep wires under ~50 cm with the internal pull-ups. For longer runs, add 4.7kΩ pull-ups from SDA and SCL to 5V.
Expected result: Two boards physically linked, each with its own USB cable for power and programming.
Step 2 - Understand Who Talks When
Goal: Understand the controller and peripheral roles on I2C.
What to do: The controller (Uno) owns the bus: only it starts a transaction. It can write bytes to a peripheral (Wire.beginTransmission(addr) c5 Wire.endTransmission()) or request bytes from it (Wire.requestFrom(addr, n)).
The peripheral (Nano) never speaks first. It registers two callbacks: onReceive runs when bytes arrive, and onRequest runs when the controller asks for data. Give the peripheral an address that nothing else uses; 0x08 is a safe pick (the OLED is at 0x3C).
Expected result: You know which board does the asking, and why the peripheral sketch uses callbacks to respond on the bus.
Step 3 - Peripheral Sketch (Nano: Reads the DHT11)
Goal: Make the Nano read the DHT11 and respond to I2C requests with temperature and humidity.
What to do: Install the Adafruit DHT and Adafruit Unified Sensor libraries. Select the Nano board (Old Bootloader if uploads fail), then upload this sketch.
Code:
#include <Wire.h>
#include <DHT.h>                 // "DHT sensor library" by Adafruit (+ Adafruit Unified Sensor)

#define MY_ADDR 0x08
#define DHTPIN  2
DHT dht(DHTPIN, DHT11);

volatile int16_t temp10 = 0, hum10 = 0;   // tenths of a degree / percent
volatile byte ledCmd = 0;

void onRequest() {                         // controller asked: send 4 bytes
  byte out[4] = { highByte(temp10), lowByte(temp10), highByte(hum10), lowByte(hum10) };
  Wire.write(out, 4);
}
void onReceive(int n) {                    // controller wrote: first byte is a command
  while (Wire.available()) ledCmd = Wire.read();
  digitalWrite(LED_BUILTIN, ledCmd ? HIGH : LOW);
}

void setup() {
  pinMode(LED_BUILTIN, OUTPUT);
  dht.begin();
  Wire.begin(MY_ADDR);                     // join the bus AS A PERIPHERAL at 0x08
  Wire.onRequest(onRequest);
  Wire.onReceive(onReceive);
}

void loop() {
  static unsigned long last = 0;
  if (millis() - last >= 2000) {           // DHT11 needs e5 2 s between reads
    last = millis();
    float t = dht.readTemperature(), h = dht.readHumidity();
    if (!isnan(t) && !isnan(h)) { temp10 = t * 10; hum10 = h * 10; }
  }
}
Expected result: Nothing visible yet. The Nano is measuring and waiting for I2C requests from the Uno.
Step 4 - Controller Sketch (Uno: Asks and Displays)
Goal: Make the Uno request data from the Nano, show it on the OLED, and send back an LED command.
What to do: Install Adafruit GFX and Adafruit SSD1306. Select the Uno board, upload this sketch, and open the Serial Monitor.
Code:
#include <Wire.h>
#include <Adafruit_GFX.h>
#include <Adafruit_SSD1306.h>
Adafruit_SSD1306 oled(128, 64, &Wire, -1);
#define PERIPHERAL 0x08
int16_t t10 = 0, h10 = 0;                  // last values received, in tenths

void setup() {
  Serial.begin(9600);
  Wire.begin();                            // no address = controller
  oled.begin(SSD1306_SWITCHCAPVCC, 0x3C);
  oled.setTextColor(SSD1306_WHITE);
}

void loop() {
  // 1) request 4 bytes: temperature and humidity in tenths
  int n = Wire.requestFrom(PERIPHERAL, 4);
  if (n == 4) {
    t10 = (Wire.read() << 8) | Wire.read();
    h10 = (Wire.read() << 8) | Wire.read();
    oled.clearDisplay();
    oled.setTextSize(1); oled.setCursor(0, 0);  oled.print("From Nano @0x08");
    oled.setTextSize(2); oled.setCursor(0, 16); oled.print(t10 / 10.0, 1); oled.print(" C");
    oled.setCursor(0, 40);                      oled.print(h10 / 10.0, 1); oled.print(" %");
    oled.display();
    Serial.print(t10 / 10.0); Serial.print(" C  "); Serial.print(h10 / 10.0); Serial.println(" %");
  } else {
    Serial.println("no answer from 0x08 - check SDA/SCL/GND");
  }

  // 2) send a command the other way: light the Nano's LED above 25.0 C
  Wire.beginTransmission(PERIPHERAL);
  Wire.write((n == 4 && t10 > 250) ? 1 : 0);
  Wire.endTransmission();

  delay(1000);
}
Expected result: The OLED shows the Nano's temperature and humidity, updating every second. Warm the DHT11 in your hand: the OLED follows, and above 25 °C the Nano's LED turns on from a command sent by the Uno.
Step 5 - Make It a Pattern
Goal: Turn this into a reusable two-board communication pattern.
What to do: Two rules keep I2C peripherals reliable: keep the callbacks tiny (copy bytes, set flags, never read sensors or print inside them), and agree on a fixed byte layout for each message so both sides pack and unpack it the same way.
Need more data? Send a struct with Wire.write((byte*)&s, sizeof s). Need more peripherals? Give each a different address, up to about 100 devices on one bus. Need a 3.3 V board in the mix? Put a level shifter on SDA/SCL, or make the 3.3 V board the controller and run the bus at 3.3 V (the 5 V AVR boards read 3.3 V as HIGH).
Expected result: A clean way to split projects across boards, for example sensors on one board and a display or radio on another.
Conclusion
Three wires and two sketches turn an Arduino Uno and Arduino Nano into a team over I2C. The Uno (controller) requests DHT11 sensor readings from the Nano (peripheral), displays them on an SSD1306 OLED, and sends a command back to toggle an LED.
Want the exact parts used in this build? Grab them from ShillehTek.com. If you want help customizing this project or building something for your product, check out our IoT consulting services.
Credits
All photos and images in this tutorial are credited to ronfrtek on Hackster.io. The original guide by ronfrtek served as the reference for this ShillehTek version. We thank them for their excellent work in the maker community.







.png?v=25000753014097803521791168436)

.png?v=68677308723310773341791168436)


