

Project Overview
Arduino Smart Dustbin: A Lid That Opens When You Wave and Closes When You Leave: This Arduino Uno build uses an HC-SR04 ultrasonic sensor and a servo to create a touchless dustbin lid that opens when your hand is near and closes a few seconds after you step away. Wave a hand (or a handful of trash) over the bin and the lid swings open; step away and it closes a few seconds later. The ultrasonic sensor spots the hand, a servo lifts the lid, and a little logic keeps the lid from slamming while you are still using it. It is one of the most-built beginner projects for a reason: cheap parts, a satisfying mechanical result, and a real appliance you will use every day.
- Time: ~1 hour
- Skill level: Beginner
- What you will build: A hands-free bin with a servo-driven lid, hand detection under 30 cm, a hold-open timer, and a smooth open/close motion.

Parts List
From ShillehTek
- Arduino Uno R3 Super Starter Kit - includes the HC-SR04 and an SG90 servo for a small bin
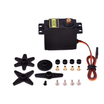
- MG995 Metal Gear Servo - for a full-size kitchen bin lid
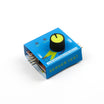
- Servo Tester - find the exact open and closed angles before coding
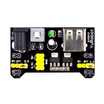
- MB102 Breadboard Power Supply - a proper 5 V rail for the servo
- 400-Point Breadboard
- Dupont Jumper Wires
External
- A bin with a hinged lid, a stiff wire or popsicle-stick linkage, hot glue
- A 5 V USB supply or 4xAA pack for the servo
Note: The original sketch opens for a fixed three seconds and closes even if your hand is still there. This version keeps the lid open as long as something is in range and starts the close timer only once the sensor is clear - the difference between a demo and a bin your family will tolerate.
Step-by-Step Guide
Step 1 - Wire Sensor and Servo
Goal: Eyes on top, muscle on the hinge.
What to do: HC-SR04: VCC -> 5V, GND -> GND, TRIG -> D10, ECHO -> D11. Servo: signal -> D9, red -> 5 V rail (MB102 or the Uno's 5V pin for an SG90 only), brown -> GND shared with the Uno.

Expected result: Both parts connected and powered.
Step 2 - Mount the Mechanism
Goal: Rotation that lifts the lid.
What to do: Hot-glue the servo to the back of the bin beside the hinge, and link the servo horn to the lid with a stiff wire or stick. Put the ultrasonic sensor on the front of the lid (or the front rim) facing forward and slightly up, where a hand naturally approaches. Use the servo tester to find two angles: CLOSED (lid resting) and OPEN (lid fully up without straining).
Expected result: Turning the tester knob opens and closes the lid cleanly.
Step 3 - The Sketch
Goal: Read distance, open on presence, and close after a clear delay.
What to do: Set CLOSED and OPEN to your measured angles, upload, and wave.
Code:
#include <Servo.h>

const int TRIG = 10, ECHO = 11, SERVO_PIN = 9;
const int CLOSED = 0, OPEN = 100;          // angles from the servo tester
const int TRIGGER_CM = 30;                 // hand closer than this opens the lid
const unsigned long HOLD_MS = 3000;        // stay open this long after the hand leaves
Servo lid;
bool isOpen = false;
unsigned long lastSeen = 0;

long readCm() {
  digitalWrite(TRIG, LOW);  delayMicroseconds(2);
  digitalWrite(TRIG, HIGH); delayMicroseconds(10);
  digitalWrite(TRIG, LOW);
  long us = pulseIn(ECHO, HIGH, 25000);
  return us == 0 ? 999 : us * 0.034 / 2;
}

void moveLid(int from, int to) {            // sweep slowly so the lid doesn't slam
  int step = (to > from) ? 2 : -2;
  for (int a = from; a != to; a += step) { lid.write(a); delay(8); }
  lid.write(to);
}

void setup() {
  pinMode(TRIG, OUTPUT); pinMode(ECHO, INPUT);
  lid.attach(SERVO_PIN); lid.write(CLOSED);
  Serial.begin(9600);
}

void loop() {
  long cm = readCm();
  if (cm > 2 && cm < TRIGGER_CM) {          // something is in front of the bin
    lastSeen = millis();
    if (!isOpen) { moveLid(CLOSED, OPEN); isOpen = true; }
  }
  if (isOpen && millis() - lastSeen > HOLD_MS) {   // clear for 3 s: close
    moveLid(OPEN, CLOSED); isOpen = false;
  }
  delay(60);
}
Expected result: The lid opens smoothly when a hand comes within 30 cm, stays open while you are there, and closes three seconds after you step away.
Step 4 - Power It Properly
Goal: No resets, no twitching.
What to do: An MG995 lifting a real lid pulls over an amp - feed it from the MB102 rail or a separate 5 V supply, never from the Uno's regulator, and join the grounds. Add a 470 µF capacitor across the servo's power pins if it jitters. For a battery bin, a 4xAA pack runs the servo and a 9 V or USB bank runs the Uno.
Expected result: A bin that works reliably without random resets.
Step 5 - Upgrades (Optional)
Goal: Beyond the lid.
What to do: Put a second HC-SR04 inside the lid pointing down and you have a "bin full" indicator (distance to the trash shrinks as it fills) - light an LED or, on an ESP32, send a notification. Add a pedal button as a manual override, or a sound sensor so a whistle opens it, as another version of this project does.
Expected result: A more capable smart bin concept you can extend.
Conclusion
This Arduino Uno smart dustbin uses an HC-SR04 ultrasonic sensor and a servo to open the lid when a hand is nearby and close it after a short clear delay. The same presence-and-timer pattern shows up in real products like automatic doors, faucets, and hand dryers.
Want the exact parts used in this build? Grab them from ShillehTek.com. If you want help customizing this project or building something for your product, check out our IoT consulting services.
Credits
All photos and images in this tutorial are credited to Mohammad Sohail on Hackster.io. The original guide by Mohammad Sohail served as the reference for this ShillehTek version. We thank him for his excellent work in the maker community.





.png?v=25000753014097803521791168436)

.png?v=68677308723310773341791168436)


