

Project Overview
Arduino Reed Switch Door Alarm: In this project, you will wire a normally open reed switch magnetic sensor to an Arduino and trigger a buzzer when the door opens. A reed switch is a sealed contact that closes when a magnet is nearby (typically within about 13 mm) and opens when the magnet moves away.
This is the same simple sensor concept used in many commercial door and window security contacts, and you can build a working alarm in about fifteen minutes.
- Time: 15 to 30 minutes
- Skill level: Beginner (a perfect first sensor project)
- What you will build: A door-open alarm using a reed switch and buzzer.

Parts List
From ShillehTek
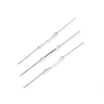
- Normally Open Reed Switch Magnetic Sensor - detects door open/close using a magnet.
- Arduino Nano V3 - the microcontroller that reads the switch and drives the buzzer (any Arduino UNO-compatible board works).
- KY-006 Passive Piezo Buzzer Module - sounds the alarm when the door opens.
- 400-Point Solderless Breadboard - fast, solder-free prototyping.
- 120pcs 20cm Dupont Jumper Wires - simple wiring between parts.
External
- USB cable for the Arduino
Note: Reed switches are just contacts (no power, no polarity, no library). They work identically on Arduino, ESP32, and Raspberry Pi.
Step-by-Step Guide
Step 1 - Gather the Parts
Goal: Everything on the bench.
What to do: Get the two-piece magnetic contact set, an Arduino, a buzzer, a breadboard, and a few jumper wires.

Expected result: Parts ready; note the sensor's two wire leads.
Step 2 - Wire the Circuit
Goal: Connect the switch and buzzer.
What to do: The reed switch has two wires with no polarity: run one wire to digital pin 2 and the other to GND. The buzzer's positive lead goes to digital pin 8, and the negative lead goes to GND. You will enable the Arduino's internal pull-up resistor in code, so no external resistor is needed.
Reed switch: one wire -> D2, other wire -> GND
Buzzer:      (+) -> D8, (-) -> GND

Expected result: Switch on D2 with GND return, buzzer on D8.
Step 3 - Upload the Code
Goal: Beep when the door opens.
What to do: With the internal pull-up enabled, the pin reads LOW while the magnet holds the reed closed (door shut) and HIGH the moment the halves separate. Upload this sketch:
const int sensorPin = 2;  // reed switch
const int buzzerPin = 8;  // buzzer

void setup() {
  pinMode(sensorPin, INPUT_PULLUP); // internal pull-up: closed = LOW
  pinMode(buzzerPin, OUTPUT);
  Serial.begin(9600);
}

void loop() {
  int doorOpen = digitalRead(sensorPin); // HIGH = magnet away = door open

  if (doorOpen == HIGH) {
    tone(buzzerPin, 2000);   // sound the alarm
    Serial.println("Door OPEN!");
  } else {
    noTone(buzzerPin);       // silence when closed
  }
  delay(50);
}
Expected result: Separate the two halves and the buzzer sounds; bring them back together and it stops.
Step 4 - Mount It on a Real Door
Goal: Turn the demo into a working alarm.
What to do: Screw or stick the wired half to the door frame and the magnet half to the door itself, aligned and within about half an inch when closed.
Expected result: A door that announces every visitor.
Conclusion
You used a magnetic reed switch sensor with an Arduino to detect a door opening and sound a buzzer. This same simple contact sensor can be used for doors, windows, mailboxes, drawers, and machine guards.
Want the exact parts used in this build? Grab them from ShillehTek.com. If you want help customizing this project or building something for your product, check out our IoT consulting services.
Credit: Photos and images referenced from Instructables (original guide by the Codebender.cc team).






.png?v=25000753014097803521791168436)

.png?v=68677308723310773341791168436)


