

Project Overview
Arduino Nano + SSD1306 OLED Snake game: Build the classic Snake game on an Arduino Nano using a 0.96 inch SSD1306 I2C OLED and an analog joystick, with score tracking, increasing speed, and a game-over restart.
Snake is a great second game after Pong: a grid, a growing body stored in an array, food that appears at random, and death by wall or by your own tail. This version runs on a Nano with a 0.96 inch OLED and a thumbstick, keeps score, speeds up as you grow, and fits in about 90 lines. It is a strong lesson in arrays, grids, and how a few simple rules add up to something addictive.
- Time: ~1 hour
- Skill level: Intermediate
- What you will build: A complete Snake game with joystick control, score display, increasing speed, and a game-over screen.

Parts List
From ShillehTek
- Arduino Nano V3.0 Pre-Soldered - the main microcontroller board running the game
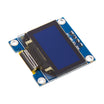
- SSD1306 0.96" I2C OLED - the display for the grid, snake, and score
- KY-006 Passive Buzzer - eat and crash sounds
- 400-Point Breadboard - quick prototyping for the handheld wiring
- Dupont Jumper Wires - connecting the Nano, OLED, joystick, and buzzer
External
- An analog joystick module (KY-023 style)
Note: The screen is 128x64 pixels, but the game plays on a 32x16 grid of 4-pixel cells. Working in cells instead of pixels makes movement, collisions, and food placement all whole-number comparisons, which keeps the code short and the game fair.
Step-by-Step Guide
Step 1 - Wire the handheld
Goal: Connect the screen, joystick, and buzzer to the Arduino Nano.
What to do: Wire the OLED: SDA to A4, SCL to A5, VCC to 5V, GND to GND. Wire the joystick: VRx to A0, VRy to A1, VCC to 5V, GND to GND. Wire the buzzer signal to D8 (and power/ground as required by your module).
Expected result: All the hardware of a handheld console is connected on a breadboard.
Step 2 - Build the data model
Goal: Represent the snake in a way that is easy to update every tick.
What to do: Store the snake as an array of cell coordinates where index 0 is the head. Each tick, every segment copies the position of the one ahead of it so the body follows, then move the head one cell in the current direction. When you eat food, do not drop the tail for that tick, so the snake grows by one.
Expected result: A clear picture of how the snake moves and grows with simple array updates.
Step 3 - Upload the sketch
Goal: Compile and run the full Snake game on the OLED.
What to do: Install the required OLED libraries (Adafruit_GFX and Adafruit_SSD1306) in the Arduino IDE, then upload the sketch below to your Arduino Nano.
Code:
#include <Wire.h>
#include <Adafruit_GFX.h>
#include <Adafruit_SSD1306.h>

Adafruit_SSD1306 oled(128, 64, &Wire, -1);
const int JOY_X = A0, JOY_Y = A1, BUZZ = 8;
const int COLS = 32, ROWS = 16, CELL = 4, MAX_LEN = 120;

int8_t sx[MAX_LEN], sy[MAX_LEN];    // snake cells, index 0 = head
int len, dirX, dirY, foodX, foodY, score;
unsigned long tick, speedMs;

void placeFood() {
  bool onSnake;
  do {
    foodX = random(COLS); foodY = random(ROWS); onSnake = false;
    for (int i = 0; i < len; i++) if (sx[i] == foodX && sy[i] == foodY) onSnake = true;
  } while (onSnake);
}

void newGame() {
  len = 3; dirX = 1; dirY = 0; score = 0; speedMs = 220;
  for (int i = 0; i < len; i++) { sx[i] = 10 - i; sy[i] = 8; }
  placeFood();
}

void gameOver() {
  tone(BUZZ, 200, 400);
  oled.clearDisplay(); oled.setTextSize(2); oled.setCursor(10, 14); oled.print("GAME OVER");
  oled.setTextSize(1); oled.setCursor(34, 44); oled.print("score "); oled.print(score);
  oled.display(); delay(2500); newGame();
}

void setup() {
  oled.begin(SSD1306_SWITCHCAPVCC, 0x3C);
  oled.setTextColor(SSD1306_WHITE);
  randomSeed(analogRead(A3));
  newGame();
}

void loop() {
  // read the stick constantly so quick flicks aren't missed; no reversing into yourself
  int x = analogRead(JOY_X), y = analogRead(JOY_Y);
  if (x < 300 && dirX == 0) { dirX = -1; dirY = 0; }
  if (x > 700 && dirX == 0) { dirX =  1; dirY = 0; }
  if (y < 300 && dirY == 0) { dirX = 0; dirY = -1; }
  if (y > 700 && dirY == 0) { dirX = 0; dirY =  1; }

  if (millis() - tick < speedMs) return;    // one game step per tick
  tick = millis();

  int nx = sx[0] + dirX, ny = sy[0] + dirY;
  if (nx < 0 || nx >= COLS || ny < 0 || ny >= ROWS) { gameOver(); return; }   // wall
  for (int i = 0; i < len; i++) if (sx[i] == nx && sy[i] == ny) { gameOver(); return; }   // tail

  bool ate = (nx == foodX && ny == foodY);
  if (ate && len < MAX_LEN) len++;          // keep the tail this tick = grow
  for (int i = len - 1; i > 0; i--) { sx[i] = sx[i - 1]; sy[i] = sy[i - 1]; }   // body follows
  sx[0] = nx; sy[0] = ny;                   // head moves
  if (ate) { score++; tone(BUZZ, 900, 40); placeFood(); if (speedMs > 80) speedMs -= 6; }

  oled.clearDisplay();
  for (int i = 0; i < len; i++) oled.fillRect(sx[i] * CELL, sy[i] * CELL, CELL - 1, CELL - 1, SSD1306_WHITE);
  oled.drawRect(foodX * CELL, foodY * CELL, CELL - 1, CELL - 1, SSD1306_WHITE);
  oled.display();
}
Expected result: The snake crawls, eats the hollow square, grows, speeds up, and plays a low tone when it hits the edge or itself, then restarts.
Step 4 - Tune the feel
Goal: Adjust difficulty and add optional improvements.
What to do: The starting speed (220 ms per step) and the acceleration (6 ms faster per food, floor of 80 ms) control difficulty, so tweak them. You can also try wrap-around walls by replacing the wall check with modulo arithmetic. If you want extra features, show the score in a corner while playing, and keep a high score in EEPROM so it survives power-off.
Expected result: A version tuned to your taste, with a high score to defend.
Step 5 - Build the handheld
Goal: Move from a breadboard prototype to a portable build.
What to do: Mount the Nano, OLED, and joystick in a small box with a 9 V battery or a TP4056-charged lithium cell. If you want to expand it, add a second game selectable at startup.
Expected result: A pocket console with games you wrote.
Conclusion
On an Arduino Nano with an SSD1306 OLED and a joystick, Snake comes down to arrays, a grid, and four rules, and it is still fun decades later. Writing it yourself is a practical way to learn data structures and game timing, and the same grid engine ideas carry into many other classic games.
Want the exact parts used in this build? Grab them from ShillehTek.com. If you want help customizing this project or building something for your product, check out our IoT consulting services.
Photo credit: Evan Rust on Hackster.io. The original guide by Evan Rust served as the reference for this ShillehTek version.






.png?v=25000753014097803521791168436)

.png?v=68677308723310773341791168436)


