

Project Overview
Arduino Nano "Lie Detector" - Measure Galvanic Skin Response with Two Electrodes and an OLED: This Arduino Nano project measures galvanic skin response (GSR) using two metal electrodes, a resistor, and an analog pin, then displays a live "needle" on an SSD1306 OLED that swings when a reaction hits. When you are startled, stressed, or fibbing, your palms sweat a tiny bit and your skin's electrical resistance drops within a second or two. That change is the signal behind polygraphs, biofeedback toys, and mood-tracking wearables.
This build is a party trick, a biofeedback tool, and a lesson in reading tiny analog changes cleanly.
- Time: ~45 minutes
- Skill level: Beginner-Intermediate
- What you will build: A GSR meter with auto-baseline tracking, a bar-graph needle on the OLED, a Serial Plotter trace, and a beep when the reaction crosses a threshold.

Parts List
From ShillehTek
- Arduino Nano V3.0 Pre-Soldered - the microcontroller that reads A0 and drives the display and buzzer
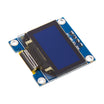
- SSD1306 0.96" I2C OLED - the needle display
- Resistor Kit - provides the 22 kΩ sense resistor for the voltage divider
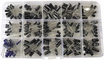
- Electrolytic Capacitor Kit - provides a 1 µF smoothing capacitor
- KY-006 Passive Buzzer - the "gotcha" beep output
- 400-Point Breadboard - for quick prototyping
- Dupont Jumper Wires - for wiring the electrodes, OLED, and buzzer
External
- Two electrodes: aluminum foil wrapped around two fingers, two coins, or two short copper pipe sections to hold
Note: This runs from 5 V through a 22 kΩ resistor, so the current through your skin is well under a quarter of a milliamp and you will not feel a thing. Keep it that way: never connect the electrodes to anything mains-powered. Also, no gadget detects lies; this detects arousal, which is a fun and different thing.
Step-by-Step Guide
Step 1 - Build the Sense Circuit
Goal: Turn skin resistance into a stable voltage the Arduino can read.
What to do: Wire Electrode A to 5V. Wire Electrode B to A0. Place a 22 kΩ resistor from A0 to GND, and place the 1 µF capacitor across A0 and GND (+ to A0, - to GND). Your skin and the resistor form a voltage divider: lower skin resistance means more voltage at A0. Connect the OLED over I2C on A4/A5, and connect the buzzer to D8.

Expected result: Holding both electrodes gives a reading somewhere in the low hundreds; letting go drops it to zero.
Step 2 - See the Signal
Goal: Learn what a GSR reaction looks like on a live trace.
What to do: Print A0 to the Serial Plotter, hold the electrodes, and sit still for thirty seconds so the trace flattens. Then have someone clap suddenly behind you. About one to two seconds later the line jumps up, then slowly drifts back over ten to twenty seconds. That is the GSR response, and the delay is why the meter needs to track a slow baseline rather than compare against a fixed number.
Expected result: A recognizable bump after each surprise.
Step 3 - Upload the Sketch
Goal: Display a live needle on the OLED, track baseline drift, and beep on reactions.
What to do: Install the required OLED libraries (Adafruit_GFX and Adafruit_SSD1306), then upload the sketch below to your Arduino Nano.
Code:
#include <Wire.h>
#include <Adafruit_GFX.h>
#include <Adafruit_SSD1306.h>

Adafruit_SSD1306 oled(128, 64, &Wire, -1);
const int GSR = A0, BUZZ = 8;
const float ALERT = 25;              // deviation (ADC counts) that counts as a reaction
float fast = 0, slow = 0;            // fast-following value and slow-moving baseline

void setup() {
  Serial.begin(9600);
  oled.begin(SSD1306_SWITCHCAPVCC, 0x3C);
  oled.setTextColor(SSD1306_WHITE);
  slow = fast = analogRead(GSR);
}

void loop() {
  int raw = 0;
  for (int i = 0; i < 16; i++) raw += analogRead(GSR);   // average away noise
  raw /= 16;

  fast = 0.8 * fast + 0.2 * raw;      // responds in ~1 s
  slow = 0.995 * slow + 0.005 * raw;  // drifts over ~30 s: the "resting" level
  float dev = fast - slow;            // positive = conductance rose = reaction

  Serial.print(raw); Serial.print(" "); Serial.print(slow); Serial.print(" "); Serial.println(dev);

  // needle: center = no change, right = reaction, left = relaxing
  int needle = constrain(64 + dev * 2, 4, 124);
  oled.clearDisplay();
  oled.drawRect(4, 20, 120, 24, SSD1306_WHITE);
  oled.drawFastVLine(64, 16, 32, SSD1306_WHITE);            // center mark
  oled.fillRect(min(64, needle), 24, abs(needle - 64), 16, SSD1306_WHITE);
  oled.setTextSize(1);
  oled.setCursor(0, 0);  oled.print(raw < 20 ? "hold both electrodes" : "GSR meter");
  oled.setCursor(0, 54); oled.print("dev "); oled.print(dev, 1);
  if (dev > ALERT && raw > 20) { oled.setCursor(80, 54); oled.print("REACT!"); tone(BUZZ, 1500, 80); }
  oled.display();
  delay(50);
}
Expected result: The bar swings right and "REACT!" flashes a second or two after a startle or an awkward question, then eases back to center as the baseline catches up.
Step 4 - Tune and Use It Fairly
Goal: Adjust sensitivity so it reacts when it should.
What to do: If it fires constantly, raise ALERT or slow the fast filter; if it never fires, lower ALERT. Dry hands read high resistance, so a little moisture helps. Run a few baseline questions ("is today Tuesday?") first so you can compare reactions rather than trusting one swing. Remember what it measures: nerves, not honesty.
Expected result: A demo that is convincing at parties and honest about its limits.
Step 5 - Turn It into Biofeedback
Goal: Use the meter as a relaxation and breathing trainer.
What to do: Flip the goal: try to move the needle left by relaxing and slowing your breathing. Log the slow baseline over a session to a PC or an SD card, add a breathing-pace LED that pulses at six breaths per minute, and you have a calm-down trainer based on the same principle as commercial stress wearables.
Expected result: A device that teaches you to lower your own stress response.
Conclusion
Under the "lie detector" fun is a solid signal-processing lesson on the Arduino Nano: a voltage divider, oversampling, and two exponential filters that separate a fast reaction from a slow drift. Those same filters clean up light sensors, load cells, and battery monitors, and the electrodes make for a memorable analog demo.
Photo and schematic credit: Mirko Pavleski on Hackster.io.
Want the exact parts used in this build? Grab them from ShillehTek.com. If you want help customizing this project or building something for your product, check out our IoT consulting services.







.png?v=25000753014097803521791168436)

.png?v=68677308723310773341791168436)


