Project Overview
ESP32-S3 Wi-Fi Speaker: Pair an ESP32-S3 N16R8 with a MAX98357 I2S amplifier and a 4 Ω speaker to build a small speaker that reads out any text you type and streams internet radio, with an external antenna for a stronger Wi-Fi link.
- Time: about 1 hour
- Skill level: Beginner to Intermediate
- What you will build: A breadboard Wi-Fi speaker controlled from the Serial Monitor: type a sentence to hear it spoken, or switch between two radio stations and set the volume.

Parts List
From ShillehTek
- ESP32-S3 N16R8 development board with IPEX antenna connector
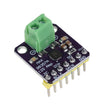
- MAX98357 I2S Class D amplifier module
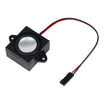
- 4 Ω 3 W square mini speaker with Dupont lead
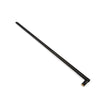
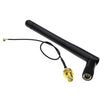
- 2.4 GHz RP-SMA male Wi-Fi rod antenna
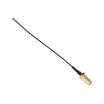
- IPEX1 antenna adapter cable, 10 cm (choose the RP-SMA female option to match the rod antenna)
- Or, instead of the two items above: the 2.4 GHz Wi-Fi antenna with adapter lead set
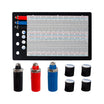
- 1660-point solderless breadboard with base (room for the wide ESP32-S3 board)
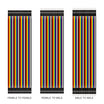
- Dupont jumper wires
External
- USB-C data cable
- A 2.4 GHz Wi-Fi network with internet access
- Arduino IDE with the ESP32 board package (core 3.x)
Note: the text-to-speech feature uses an online speech service through the audio library, so it needs internet access and may change if that service changes. The radio part only needs a working stream URL.
Step-by-Step Guide
Step 1 - Wire the amplifier and speaker
Goal: Connect the MAX98357 to the ESP32-S3's I2S pins and attach the speaker.
What to do: The MAX98357 takes three digital audio lines and runs from 5 V. On most MAX98357 boards, leaving SD and GAIN unconnected gives a mono mix of both channels at 9 dB gain, which suits a single speaker.
- MAX98357 Vin → ESP32-S3 5V (or VIN), GND → GND
- MAX98357 LRC → GPIO5
- MAX98357 BCLK → GPIO6
- MAX98357 DIN → GPIO7
- Speaker → the amplifier's + and − screw terminals

Expected result: Five wires between the boards plus the speaker on the screw terminals. Use one 4 Ω speaker per amplifier; two 4 Ω speakers in parallel would present 2 Ω, which is below what the MAX98357 is designed for.
Step 2 - Fit the external antenna
Goal: Give the ESP32-S3 a solid Wi-Fi link for streaming.
What to do: Press the IPEX (U.FL) end of the adapter cable straight down onto the board's antenna socket until it clicks; do not slide it on at an angle. Screw the rod antenna onto the RP-SMA end. RP-SMA and SMA look alike but have opposite center contacts, so the rod antenna (RP-SMA male) needs the RP-SMA female version of the adapter. Fit the antenna before running Wi-Fi code; a module wired for an external antenna will have poor range without one.
Expected result: The rod antenna stands upright next to the breadboard, connected through the 10 cm lead.
Step 3 - Install the board package and audio library
Goal: Prepare the Arduino IDE for the ESP32-S3 and I2S audio.
What to do: Install esp32 by Espressif Systems (version 3.x) in the Boards Manager. Download the ESP32-audioI2S library by schreibfaul1 from GitHub as a ZIP and add it with Sketch → Include Library → Add .ZIP Library. Then set the board options:
- Board: ESP32S3 Dev Module
- Flash Size: 16MB
- PSRAM: OPI PSRAM (the N16R8 has 8 MB, and recent versions of the audio library expect PSRAM)
- Partition Scheme: a 16MB scheme with a 3MB app, or Huge APP
- USB: if your board has two USB-C ports, use the one marked COM or UART; if you use the native USB port instead, set USB CDC On Boot to Enabled so the Serial Monitor works
Expected result: A blank sketch compiles and uploads to the ESP32-S3.
Step 4 - Upload the speaker sketch
Goal: Connect to Wi-Fi, set up I2S and listen for commands.
What to do: Enter your Wi-Fi name and password at the top, then upload. Plain text you type is sent to connecttospeech(); lines that start with a slash are commands. audio.loop() must run constantly, so the sketch reads the Serial Monitor without any blocking delays.
// ShillehTek ESP32-S3 Wi-Fi speaker: type text to hear it, or stream internet radio (MAX98357)
#include <WiFi.h>
#include "Audio.h"                       // ESP32-audioI2S by schreibfaul1

const char *WIFI_SSID = "YOUR_WIFI_NAME";
const char *WIFI_PASS = "YOUR_WIFI_PASSWORD";

const int I2S_LRC  = 5;                  // MAX98357 LRC  (word select)
const int I2S_BCLK = 6;                  // MAX98357 BCLK (bit clock)
const int I2S_DOUT = 7;                  // MAX98357 DIN  (audio data)

const char *STATIONS[] = {
  "http://ice1.somafm.com/groovesalad-128-mp3",   // SomaFM Groove Salad
  "http://stream.srg-ssr.ch/m/rsj/mp3_128",       // Radio Swiss Jazz
};
const int STATION_COUNT = sizeof(STATIONS) / sizeof(STATIONS[0]);
const char *TTS_LANG = "en";
const size_t MAX_LINE = 200;             // keep each sentence short for the speech service

Audio audio;
char line[MAX_LINE + 1];
size_t lineLen = 0;
int volume = 12;                         // 0..21

void printHelp() {
  Serial.println("Type any text and press Enter to hear it.");
  Serial.println("Commands: /radio 1-2, /vol 0-21, /stop, /rssi, /help");
}

// Reads an integer after a command; returns false if no digits follow
bool readNumber(const char *p, int &out) {
  while (*p == ' ') p++;
  if (*p < '0' || *p > '9') return false;
  out = atoi(p);
  return true;
}

void handleLine(char *s) {
  while (*s == ' ') s++;
  if (*s == '\0') return;
  if (s[0] != '/') {                     // plain text: speak it
    Serial.printf("Speaking: %s\n", s);
    audio.connecttospeech(s, TTS_LANG);
    return;
  }
  int n = 0;
  if (strncmp(s, "/radio", 6) == 0) {
    if (readNumber(s + 6, n) && n >= 1 && n <= STATION_COUNT) {
      Serial.printf("Station %d: %s\n", n, STATIONS[n - 1]);
      audio.connecttohost(STATIONS[n - 1]);
    } else {
      Serial.printf("Pick a station from 1 to %d\n", STATION_COUNT);
    }
  } else if (strncmp(s, "/vol", 4) == 0) {
    if (readNumber(s + 4, n)) {
      volume = constrain(n, 0, 21);
      audio.setVolume(volume);
    }
    Serial.printf("Volume %d of 21\n", volume);
  } else if (strcmp(s, "/stop") == 0) {
    audio.stopSong();
    Serial.println("Stopped");
  } else if (strcmp(s, "/rssi") == 0) {
    Serial.printf("Wi-Fi signal: %d dBm\n", WiFi.RSSI());
  } else {
    printHelp();
  }
}

void setup() {
  Serial.begin(115200);
  WiFi.mode(WIFI_STA);
  WiFi.begin(WIFI_SSID, WIFI_PASS);
  Serial.print("Connecting to Wi-Fi");
  uint32_t start = millis();
  while (WiFi.status() != WL_CONNECTED && millis() - start < 20000) {
    delay(500);
    Serial.print('.');
  }
  if (WiFi.status() != WL_CONNECTED) {
    Serial.println("\nWi-Fi failed - check the name, password and antenna");
    while (true) delay(1000);
  }
  Serial.printf("\nConnected, IP %s, signal %d dBm\n", WiFi.localIP().toString().c_str(), WiFi.RSSI());

  audio.setPinout(I2S_BCLK, I2S_LRC, I2S_DOUT);
  audio.setVolume(volume);
  printHelp();
  audio.connecttospeech("Hello from ShillehTek. Your speaker is ready.", TTS_LANG);
}

void loop() {
  audio.loop();                          // keep this fast: it feeds the I2S buffer
  while (Serial.available()) {
    char c = (char)Serial.read();
    if (c == '\r') continue;
    if (c == '\n') {
      line[lineLen] = '\0';
      handleLine(line);
      lineLen = 0;
    } else if (lineLen < MAX_LINE) {
      line[lineLen++] = c;
    }
  }
}
Expected result: The Serial Monitor (115200 baud) shows the IP address and Wi-Fi signal, and the speaker says "Hello from ShillehTek. Your speaker is ready."
Step 5 - Talk to it and tune in
Goal: Use the text-to-speech and radio features.
What to do: Set the Serial Monitor line ending to Newline. Then try:
-
The coffee is readyspeaks the sentence (keep each line under 200 characters) -
/radio 1plays SomaFM Groove Salad,/radio 2plays Radio Swiss Jazz -
/vol 15sets the volume from 0 to 21 -
/stopstops playback,/rssiprints the Wi-Fi signal strength
Speaking a sentence replaces whatever is playing, so send /radio 1 again to resume the station. To add your own stations, put any direct MP3 or AAC stream URL in the STATIONS list.
If you want to verify streaming headroom, compare /rssi readings with the antenna upright in the same room versus another room. Readings around -50 to -65 dBm stream comfortably; below about -75 dBm you may hear dropouts. If the sound crackles or distorts, lower the volume to 10 to 14, make sure Vin is on 5 V rather than 3V3, and keep the speaker wires away from the antenna lead.
Expected result: Typed sentences are read out within a second or two, and the radio plays continuously.
Conclusion
You built a Wi-Fi speaker with an ESP32-S3 N16R8, a MAX98357 I2S amplifier and a 4 Ω speaker: it reads out typed text, streams internet radio, takes volume and station commands over serial, and uses an external antenna for a stronger connection.
Want the exact parts used in this build? Grab them from ShillehTek.com. If you want help customizing this project or building something for your product, check out our IoT consulting services.
Credits
All photos and images in this tutorial are credited to Quartz Components on Hackster.io. The original guide by Quartz Components served as the reference for this ShillehTek version. We thank them for their excellent work in the maker community.