

Project Overview
Arduino Uno pushbutton interrupts demo: Normal Arduino code checks inputs only when loop() gets around to it, so a press can be missed during a long delay(). Interrupts fix that by pausing whatever is running, executing a tiny function the instant the pin changes, then resuming. In this guide, you will build a minimal demo where a button toggles an LED instantly while the main loop is deliberately busy, and you will learn the key rules that keep interrupt code reliable.
- Time: ~30 minutes
- Skill level: Beginner to Intermediate
- What you will build: A side-by-side demonstration of polling versus interrupts, with a debounced interrupt handler and a press counter shared safely with the main loop.

loop() is doing.Parts List
From ShillehTek
- Arduino Uno R3 Super Starter Kit - Uno, LEDs, resistors, and buttons in one box
- Tactile Button Kit - provides the momentary pushbutton used for the interrupt input
- Resistor Kit - 220Ω for the LED current limit
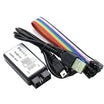
- 8-Channel USB Logic Analyzer - helps you see button bounce and why debouncing matters
- 400-Point Breadboard - quick prototyping for the wiring
- Dupont Jumper Wires - simple breadboard connections
External
- None
Note: On the Uno and Nano only pins D2 and D3 support external interrupts (INT0/INT1). The Mega has six, and ESP32 boards can use nearly any GPIO. Always write digitalPinToInterrupt(pin) instead of a raw interrupt number so your sketch ports between boards.
Step-by-Step Guide
Step 1 - Wire button and LED
Goal: Connect one input on an interrupt-capable pin.
What to do: Wire the button between D2 and GND. The internal pull-up will be enabled in code, so pressed equals LOW.
Wire the LED as: D12 to 220Ω resistor to LED to GND.

Expected result: Hardware is ready for both the polling and interrupt versions.
Step 2 - See the problem first (polling)
Goal: Experience why interrupts exist.
What to do: Upload a sketch whose loop() reads the button, toggles the LED, then calls delay(3000) to simulate a long job (for example, a sensor read or a network call). Press the button at random moments.
Expected result: Most presses are missed because the Arduino only checks the button once every three seconds.
Step 3 - Upload the interrupt version
Goal: Toggle the LED instantly using an interrupt service routine (ISR).
Code:
const int LED = 12, BUTTON = 2;

volatile bool ledState = false;           // 'volatile': shared between ISR and loop()
volatile unsigned long lastEdge = 0;
volatile unsigned long presses = 0;

void onButton() {                         // the ISR: keep it short, no Serial, no delay
  unsigned long now = millis();           // reading millis() inside an ISR is fine
  if (now - lastEdge < 200) return;       // debounce: ignore bounces within 200 ms
  lastEdge = now;
  ledState = !ledState;
  digitalWrite(LED, ledState);
  presses++;
}

void setup() {
  Serial.begin(9600);
  pinMode(LED, OUTPUT);
  pinMode(BUTTON, INPUT_PULLUP);
  attachInterrupt(digitalPinToInterrupt(BUTTON), onButton, FALLING);   // fire on press
}

void loop() {
  // the "long job": loop() is blocked, but the button still works
  noInterrupts();                         // read the shared counter atomically
  unsigned long p = presses;
  interrupts();
  Serial.print("Busy for 3 s... presses so far: ");
  Serial.println(p);
  delay(3000);
}
What to do: Upload the sketch and press the button while the Serial Monitor shows that the board is busy.
Expected result: The LED toggles instantly on every press, even during delay(), and the counter prints on the next Serial line.
Step 4 - Apply the three ISR rules
Goal: Avoid the classic interrupt bugs.
What to do: Keep the ISR tiny: set a flag or bump a counter, then do the real work in loop(). Mark every variable the ISR touches as volatile, or the compiler may cache a stale copy. When loop() reads a multi-byte shared variable (anything bigger than a byte on an 8-bit AVR), wrap the read in noInterrupts()/interrupts() so it cannot be updated halfway through.
Also note: delay(), Serial printing, and timekeeping depend on interrupts, so they do not work as expected inside an ISR.
Expected result: Interrupt code that behaves consistently on the bench and in the field.
Step 5 - Try other interrupt modes and observe bounce
Goal: Understand edge modes and why debouncing is needed.
What to do: Change FALLING to RISING (fires on release), CHANGE (both edges so you can time how long the button was held), or LOW (fires continuously while pressed). If you have a logic analyzer, clip it onto D2 and press the button to observe contact chatter that creates many fast edges from one press.
Expected result: You can match interrupt trigger modes to the job and understand what the debounce window is filtering.
Conclusion
Arduino interrupts are how microcontrollers stay responsive while doing slow things. With a button on an interrupt pin, the Uno can toggle an LED instantly even when loop() is blocked in a long delay, as long as you follow the volatile, atomic-read, and keep-it-short rules.
Want the exact parts used in this build? Grab them from ShillehTek.com. If you want help customizing this project or building something for your product, check out our IoT consulting services.
Image credit: Photos and diagrams are credited to Rafi Rasheed T C on Hackster.io. The original guide by Rafi Rasheed T C served as the reference for this ShillehTek version.







.png?v=25000753014097803521791168436)

.png?v=68677308723310773341791168436)


