
Project Overview
Raspberry Pi + KY-037 sound sensor: in this project you use the KY-037 digital output to toggle an LED on and off with a snap or clap, using a short Python script on the Raspberry Pi.
This is part 2 of the KY-037 tutorial series and builds on the basic sound-detection setup from part 1.
- Time: 20 to 40 minutes
- Skill level: Beginner
- What you will build: A sound-activated LED toggle (snap or clap to switch the LED on or off)
Parts List
From ShillehTek
- ShillehTek parts collection - source common components for Raspberry Pi GPIO projects
- ShillehTek Amazon Store - alternative place to get modules like the KY-037
External
- KY-037 sound sensor - provides a digital (D0) sound-detected signal
- Raspberry Pi (any model with GPIO pins, example used: Raspberry Pi 4B) - runs the Python script and controls GPIO
- 3 male-to-female jumper wires - connect the KY-037 to the Raspberry Pi GPIO header
- 1 LED (any color) - visual output you toggle
- 1 x 220-ohm resistor - limits current through the LED
- Breadboard (optional) - keeps wiring organized
- Thin screwdriver - adjust the KY-037 potentiometer sensitivity
Note: This tutorial uses the KY-037 digital output (D0). Power the KY-037 from the Raspberry Pi 5V pin as shown, and use a series resistor for the LED.
Step-by-Step Guide
Step 1 - Gather your components
Goal: Make sure you have the KY-037, an LED, and the required Raspberry Pi GPIO wiring parts ready.
What to do: Collect the parts listed above, including a 220-ohm resistor and a thin screwdriver to adjust the KY-037 potentiometer.
Expected result: You are ready to wire the sensor and LED to the Raspberry Pi.
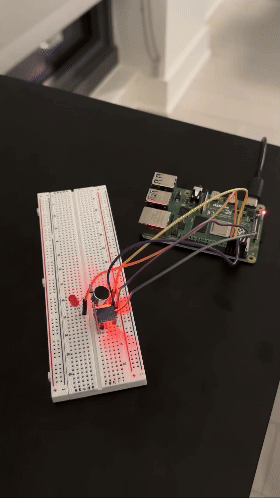
Step 2 - Wire the KY-037 sound sensor and LED to the Raspberry Pi
Goal: Connect the KY-037 digital output to the Pi so sound detection can be read on a GPIO input, and wire an LED to a GPIO output.
What to do: Wire the KY-037 to the Raspberry Pi:
- VCC (KY-037) to 5V (Pin 2) on the Raspberry Pi.
- GND (KY-037) to GND (Pin 6) on the Raspberry Pi.
- D0 (KY-037) to GPIO 4 on the Raspberry Pi (Pin 7 physical).
Wire the LED to the Raspberry Pi:
- Connect the longer leg (anode) of the LED to GPIO 17 on the Raspberry Pi (Pin 11 physical).
- Connect the shorter leg (cathode) of the LED to one end of the 220-ohm resistor.
- Connect the other end of the resistor to GND (Pin 9) on the Raspberry Pi.
Important: Use the resistor to prevent too much current from flowing through the LED.
Fine-tune the KY-037 potentiometer to a point just below the detection threshold so a snap or clap can trigger the output reliably.
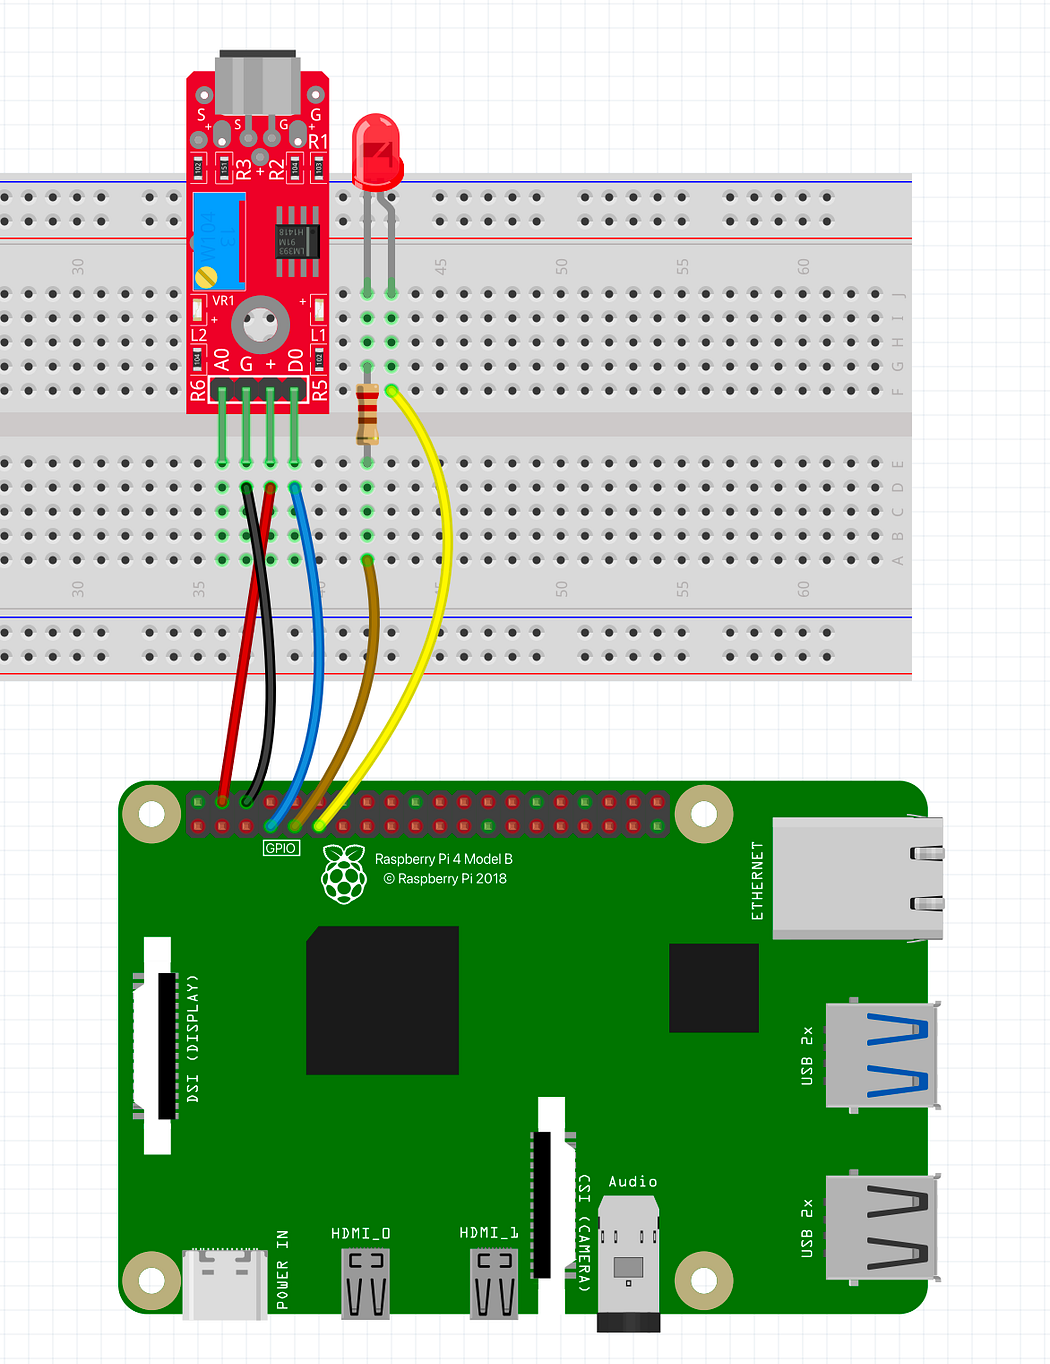
Expected result: The KY-037 is powered from 5V/GND, its D0 goes to GPIO4, and the LED is connected to GPIO17 with a 220-ohm resistor to ground.
Step 3 - Write the Python code
Goal: Create a script that reads KY-037 sound detection and toggles the LED state each time a sound event is detected.
What to do: Create a new Python file named sound_led_control.py on your Raspberry Pi and paste in the code below.
Code:
import RPi.GPIO as GPIO
import time

# Set up GPIO pin numbering mode and define pins for sensor and LED
GPIO.setmode(GPIO.BCM)
SOUND_SENSOR_PIN = 4  # GPIO pin number connected to D0 pin of KY-037
LED_PIN = 17  # GPIO pin number connected to LED

# Set up the pins
GPIO.setup(SOUND_SENSOR_PIN, GPIO.IN, pull_up_down=GPIO.PUD_DOWN)  # Configure sound sensor pin as input
GPIO.setup(LED_PIN, GPIO.OUT)  # Configure LED pin as output

# Initialize LED state
led_state = False

# Function to toggle LED based on sound detection
def toggle_led():
    global led_state
    if led_state:
        GPIO.output(LED_PIN, GPIO.LOW)  # Turn off the LED
        print("LED turned OFF")
    else:
        GPIO.output(LED_PIN, GPIO.HIGH)  # Turn on the LED
        print("LED turned ON")
    led_state = not led_state  # Toggle the state

# Main loop to check for sound detection and toggle LED
try:
    print("Starting sound sensor program. Snap or clap to toggle the LED.")
    while True:
        if GPIO.input(SOUND_SENSOR_PIN) == 1:  # Sound detected
            toggle_led()
            time.sleep(1)  # Wait for a second to avoid multiple toggles on one sound
except KeyboardInterrupt:
    print("Program interrupted. Cleaning up GPIO settings.")
finally:
    GPIO.cleanup()  # Clean up all GPIO settings
Expected result: You have a script that toggles GPIO17 each time GPIO4 reports a sound-detected event, with a 1-second delay to prevent multiple toggles.
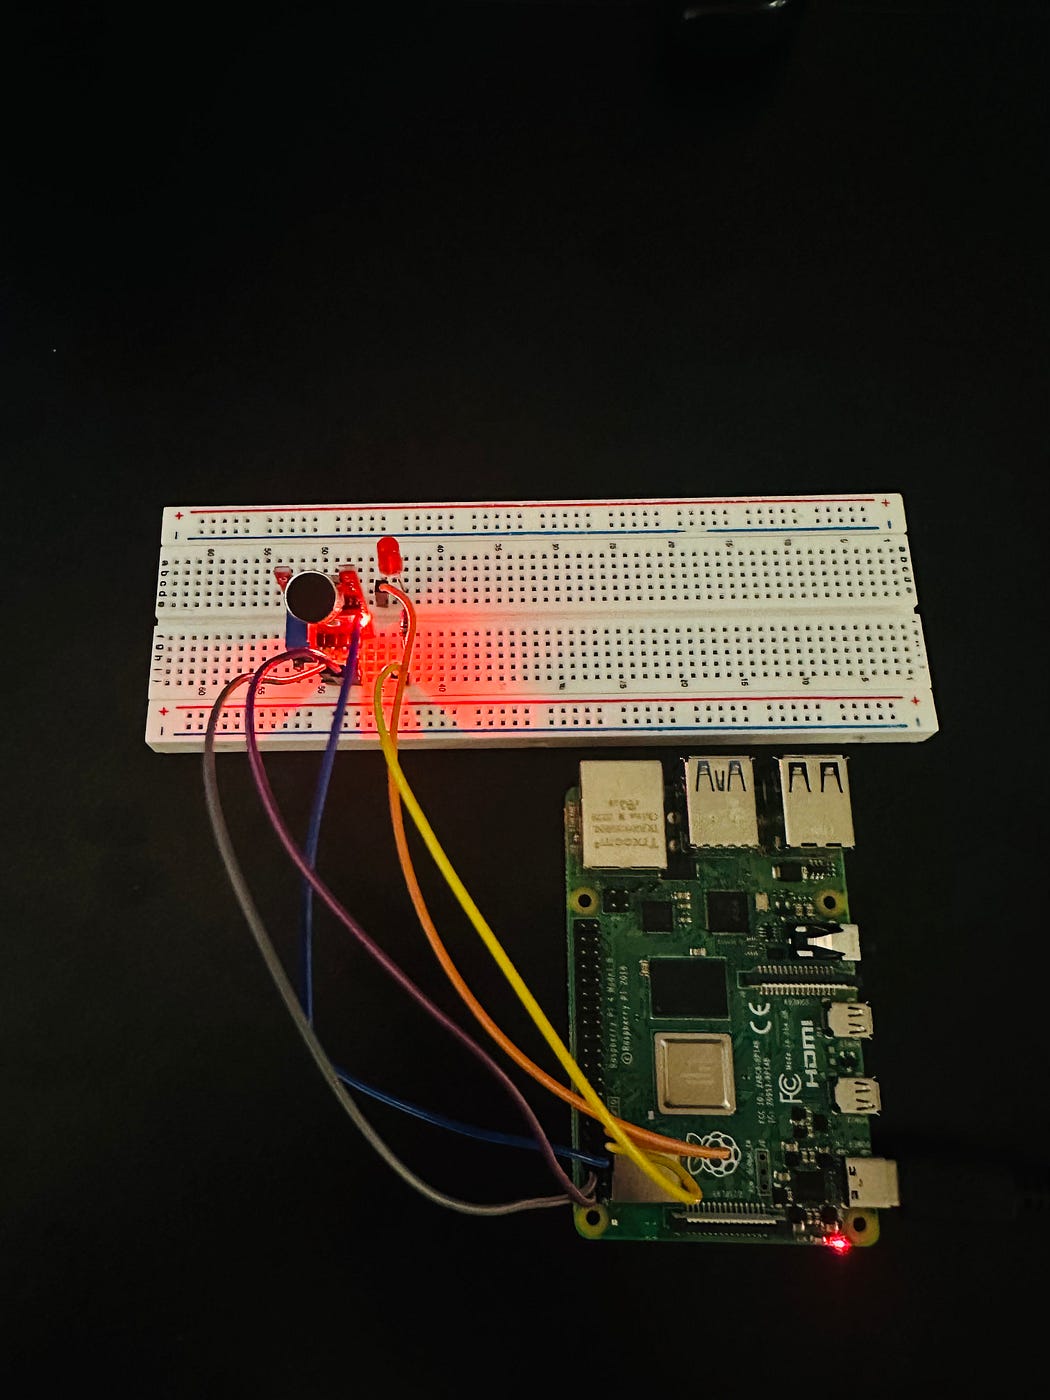
Step 4 - Run the code and test
Goal: Start the program and verify the LED toggles when you snap or clap near the sensor.
What to do: In a terminal on the Raspberry Pi, navigate to the folder containing sound_led_control.py and run:
python3 sound_led_control.py
You should see: “Starting sound sensor program. Snap or clap to toggle the LED.”
Snap your fingers or clap near the KY-037. If needed, adjust the potentiometer sensitivity on the module.
Expected result: The LED switches on or off with each snap or clap (depending on its previous state), and the terminal prints “LED turned ON” or “LED turned OFF”.
Conclusion
You built a sound-activated LED toggle using a Raspberry Pi, the KY-037 sound sensor (digital output D0 to GPIO4), and an LED on GPIO17. Each detected snap or clap flips the LED state, making a simple but useful pattern for interactive GPIO projects.
Want the exact parts used in this build? Grab them from ShillehTek.com or the ShillehTek Amazon Store. If you want help customizing this project or building something for your product, check out our IoT consulting services.
More resources: YouTube Channel, Buy Me A Coffee, and UpWork.


.png?v=25000753014097803521767701813)

.png?v=68677308723310773341767701813)


