

Video Tutorial (Optional)
Watch first if you want to see the Raspberry Pi USB camera stream over the local network using Python 3, Flask, OpenCV, and Picamera2.
Project Overview
In this project, you use a Raspberry Pi with a USB camera (via Picamera2) to stream live video to a local computer over your local network using Python 3, Flask, and OpenCV.
This tutorial builds on Part 1 (which used a Raspberry Pi camera module). Here, you leverage the community-supported Picamera2 stack to stream from a USB-based camera.
- Time: 15 to 30 minutes
- Skill level: Beginner
- What you will build: A Flask endpoint that serves a live MJPEG video stream from your Raspberry Pi USB camera
Parts List
From ShillehTek
- Optional prototyping parts from ShillehTek - not required for this software-based streaming tutorial
External
- Raspberry Pi running Raspberry Pi OS
- USB camera compatible with the Raspberry Pi
- Local network (Pi and your computer on the same LAN)
- Python 3 packages installed via apt: python3-opencv, python3-flask, python3-picamera2
Note: Keep your USB camera plugged into the Raspberry Pi before running the script. The Flask app binds to 0.0.0.0 so it can be accessed from other devices on your network.
Step-by-Step Guide
Step 1 - Install the required libraries
Goal: Install Flask, OpenCV, and Picamera2 so the Raspberry Pi can capture frames and serve them over HTTP.
What to do: On the Raspberry Pi, open a terminal and run:
sudo apt update; sudo apt install python3-opencv python3-flask python3-picamera2If you still have issues with packages later, you can try installing them with pip instead.
Expected result: The packages install successfully with no errors.
Step 2 - Create the Python streaming script
Goal: Create a Flask app that captures frames with Picamera2, encodes them as JPEG, and streams them as MJPEG.
What to do: Plug in your USB camera, then create a new Python file (name it however you like) and paste the code below.
Code:
from flask import Flask, Response
from picamera2 import Picamera2
import cv2

# You can donate at https://www.buymeacoffee.com/mmshilleh

app = Flask(__name__)

camera = Picamera2()
camera.configure(
    camera.create_preview_configuration(
        main={"format": "XRGB8888", "size": (640, 480)}
    )
)
camera.start()


def generate_frames():
    while True:
        frame = camera.capture_array()
        ret, buffer = cv2.imencode(".jpg", frame)
        frame = buffer.tobytes()

        yield (
            b"--frame\r\n"
            b"Content-Type: image/jpeg\r\n\r\n" + frame + b"\r\n"
        )


@app.route("/video_feed")
def video_feed():
    return Response(generate_frames(), mimetype="multipart/x-mixed-replace; boundary=frame")


if __name__ == "__main__":
    app.run(host="0.0.0.0", port=5000)
Expected result: You have a script that starts a Flask server and exposes a /video_feed streaming endpoint.
Step 3 - Run the server on the Raspberry Pi
Goal: Start the Flask app so your Raspberry Pi begins serving the live MJPEG stream.
What to do: Run your script with Python 3 (use your actual filename):
python3 your_script_name.pyExpected result: The terminal shows Flask is running and listening on port 5000.
Step 4 - Find your Raspberry Pi IP address
Goal: Identify the Raspberry Pi address so your local computer can connect to the stream.
What to do: On the Raspberry Pi, run:
ifconfigFind the IP address in the inet section of the active network interface.
Expected result: You have the Raspberry Pi IP address (for example, 192.168.1.50).
Step 5 - Open the stream from your local computer
Goal: View the live video stream in your desktop browser over the local network.
What to do: On your local computer, open a browser and go to:
http://<Your Raspberry Pi IP>:5000/video_feed
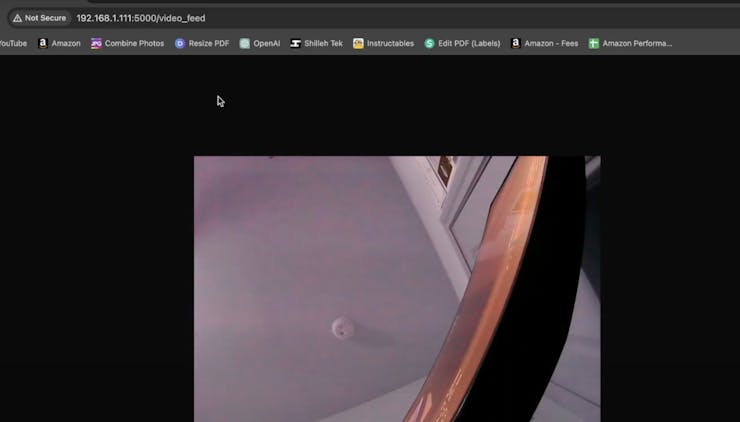
Expected result: You see the live video stream in your browser.
Conclusion
You set up a Raspberry Pi USB camera stream using Picamera2, Flask, and OpenCV, and viewed it from a local computer by opening the /video_feed endpoint in a browser.
If you want to follow more builds, you can subscribe here: Youtube. You can also support the channel here: https://www.buymeacoffee.com/mmshilleh, and access code via the Level 1 perk here: https://www.youtube.com/@mmshilleh/membership.
Want parts for your next Raspberry Pi build? Grab what you need from ShillehTek.com. If you want help customizing this project or building something similar for your product, check out our IoT consulting services.


.png?v=25000753014097803521779072085)

.png?v=68677308723310773341779072085)


