Sending Messages & Commands to Your Raspberry Pi Using MQTT
Mahmood M. Shilleh
Hello! I'm a mechanical engineer and software enthusiast based in Austin, TX, where I run ShillehTek. My company promotes IoT education and offers consulting along with a range of microelectronic products. I'm passionate about all things tech, from coding to design. When I'm not working, I enjoy working out, playing sports, and discovering new places.
Follow me on social media to stay updated and connect! Let's make technology exciting together.
Share
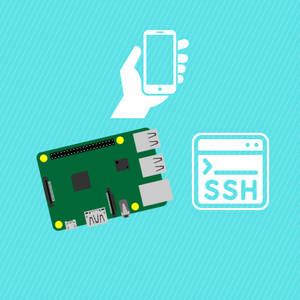
In this tutorial learn how to send messages to/from your local computer to your Raspberry Pi over the local network using the Mosquitto MQTT and Python! It's free and incredibly easy to set up and manage. This can form the basis of incredible IoT and distributed systems applications! You can do some amazing things with this simple tool in practice.
Before reading the remainder, be sure to subscribe and support the channel if you have not!
An interactive version of this video and downloadable instructions available on Razzl on the App Store and Android Store which contains the code and PDF instructions. Cheers!
On your Raspberry Pi run the following commands in your terminal.
sudo apt update
sudo apt install -y mosquitto mosquitto-clients
pip install paho-mqtt
Next, add these two lines to the config
listener 1883
allow_anonymous true
Add them to the bottom of the file by first typing
sudo nano /etc/mosquitto/mosquitto.conf
You should then restart the mosquitto service with the command,
sudo systemctl restart mosquitto
The last information you need is the IP Address of your Raspberry Pi, you can get it by running the 'ifconfig' command in the terminal and looking at the following section (See Image). In the wlan0 section.
Now you have all of the infrastructure you need on the Raspberry Pi side to use Mosquitto!
The only thing left is to download and run the code in Python attached to this project on Razzl, or simply copy the code in the video.
You should run the code once and let it remain running as long as you want to receive messages on the Pi, you can modify the on_message function to fit the demands of your project, this is the function that is called every time your MQTT channel receives a message.
Your Raspberry Pi at this point is waiting for messages/commands, very exciting. You should also get a result code of 0 when you first run the script. That means the code is working.
Step 2-) Local Code
On your local computer run the following code, attached to the project on Razzl. It is very simple, you are just sending a message to the topic for the MQTT broker.
Make sure you also pip install paho.mqtt
If everything is successful you should see a message in the console of your Raspberry Pi Python code as shown in the image! Congrats you did it.
You can now leverage MQTT and do more intricate things, such as send commands to control GPIO pins, maybe send a command to take a photo or more! This can form the basis of incredibly complex and powerful IoT and embedded systems applications.
Conclusion
Hope you enjoyed the video, let me know what you think of the Razzl platform. Be sure to follow me there and also follow me on YouTube and other social media. Also, would love to hear your questions in general and I look forward to doing more intricate MQTT and robotics tutorials for you guys.