Editing pixels in an image can be crucial for image processing techniques. Thankfully the sharp library in NodeJS makes it incredibly easy to unravel the raw pixel data of an image and thus make it incredibly easy to edit pixels based on your conditions. In this tutorial I will show how to edit an image’s pixels based on an if condition. We will make all white photos in the image transparent by looping through each individual pixel.
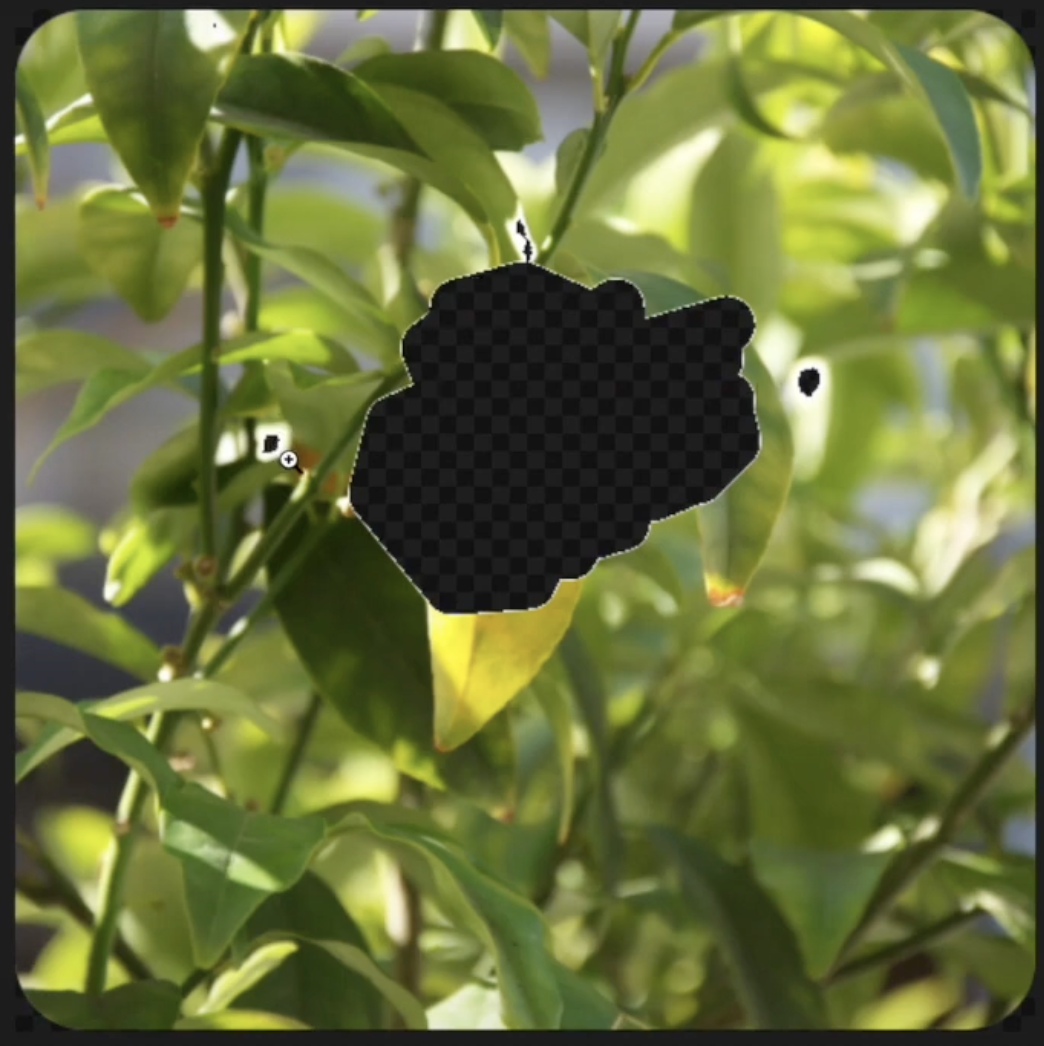
The result will look as follows:
Before

After
Subscribe:
Support:
https://www.buymeacoffee.com/mmshilleh
Step 1-) npm install sharp
If you are in a Node project it should be easy to do this, having a Node project is a pre-req for this tutorial by the way :)
Step 2-) Code
const sharp = require("sharp")

imagePath = 'original.png'
maskImage = 'mask_file.png'
const width = 300;
const height = 200;

async function editPixels(imagePath) {
  const buffer = await sharp(imagePath)
  .ensureAlpha()
  .raw()
  .toBuffer({ resolveWithObject: true })
  .then( async ({ data, info }) => {
    const { width, height, channels } = info;
    for (let i = 0; i < data.length; i += channels) {
      if ([data[i]] == 255 && [data[i + 1]] == 255
         && [data[i + 2]] == 255) {
          data[i] = 100;
          data[i + 1] = 200;
          data[i + 2] = 30;
          data[i + 3] = 125;
        }
    }
   await sharp(data, { raw: { width, height, channels } })
        .toFormat('png')
        .toFile('new.png')
  })
}

editPixels(maskImage)
Code Explanation:
- We simply import the sharp library.
- We pass the image into the sharp function as the path to the image from the home directory in our project. In this case, the image is in the root dir of the project.
- The .ensureAlpha() method ensures there is an alpha channel on the image, RGBA, where A is for alpha. Alpha channel dictates the transparency of a pixel and some images actually do not have an alpha channel. It is recommended to have one for your image.
- The .raw() method followed by the .toBuffer({ resolveWithObject: true }) method simply splits your image into data and info, where data is the raw pixel data that we will use to edit, and info contains the information about the dimensions and number of channels of our image. We have 4 channels since it is an RGBA image, however, images can have 3 or even less than that (which is uncommon).
- In a for loop we loop through 4 elements at a time, each four elements in our data array indicate one pixel, where the values are between 0-255 indicating the respective RGBA value of that pixel. We can then undergo a simple check to see if it is white (255, 255, 255) is the value of a white pixel by the way. If it is a white pixel we make all values 0 to make it transparent in the PNG. Of course, you can do whatever pixel manipulation and if-condition are needed for your application.
- Finally we save the image as a new png file, and tada! We have our final image.
Conclusion
That is all you need to do to edit images at the pixel level in NodeJS. If this made your life easier do not forget to subscribe, or even better, donate to the channel! Any questions please let me know in the Youtube comments. Thanks, everyone!