Today, we're delving into the practical aspects of AWS IoT Core. If you do not know, AWS IoT Core is Amazon's managed cloud service designed for Internet of Things applications. It lets you connect devices securely to the cloud, collect and analyze data, and take action based on that data.
In this guide, we'll walk you through the steps to publish messages to the Raspberry Pi Pico using MQTT. Whether you're a developer or just starting out in IoT, this post is tailored to provide a straightforward understanding of AWS IoT Core integration. Let's get started on this hands-on exploration into the world of connected devices.
With the example we have today we will be able to toggle on and off the onboard LED using AWS IoT Core coupled with MicroPython on the Raspberry Pi Pico W. This will allow you to get an understanding of how to develop some powerful distributed system applications with IoT. It is also free to get started with all of this!
Before reading the remainder, be sure to subscribe and support the channel if you have not!
Subscribe:
Support:
https://www.buymeacoffee.com/mmshilleh
Hire me at UpWork to build your IoT projects:
https://www.upwork.com/freelancers/~017060e77e9d8a1157
1-) Create Policy and Thing on AWS IoT Core
To start receiving messages on our Raspberry Pi Pico W over the internet, we need to create the policy and the certificates for the device on AWS. We will be using AWS IoT Core as mentioned which is a service offered by Amazon. There are dozens of services offered in AWS but we will focus on this one.
Create an account if you have not at https://aws.amazon.com/ which should be free to get started.
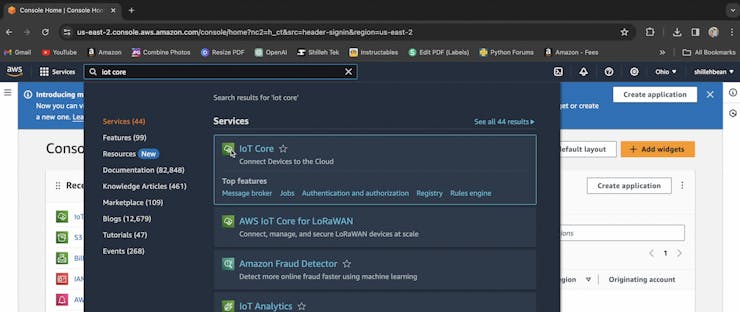
Once you are done, go to the AWS Console and search IoT Core in the search bar, select IoT Core accordingly to open the service.
To create a policy scroll down on the left side menu and select Policies under Security.

There are many ways you can customize this policy, for our general purpose we can customize it as follows:
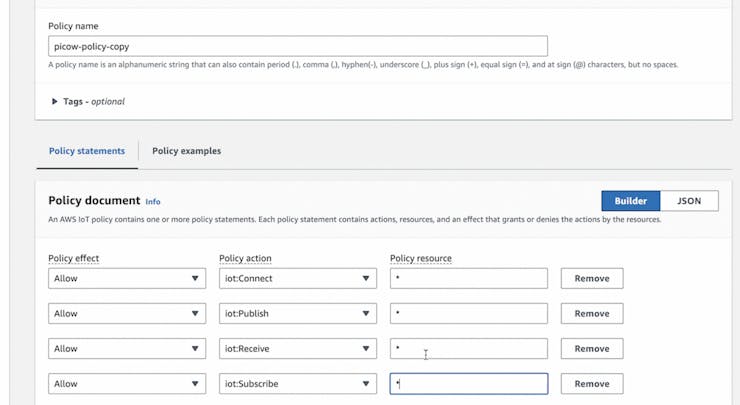
You can name it however you like! For further customization of policies, you can look into their documentation. In general, policies are designed to limit/extend access of a device to the channels of your IoT network.
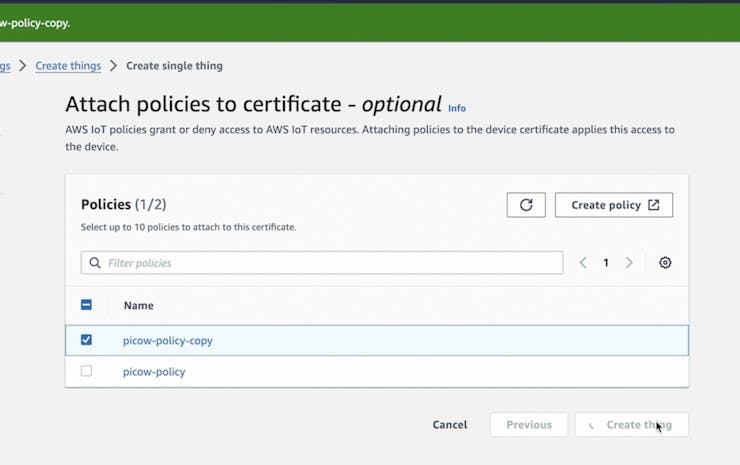
Once you have your policy setup you can create a Thing, go to All Devices in the left bar and select Things > Create Things.

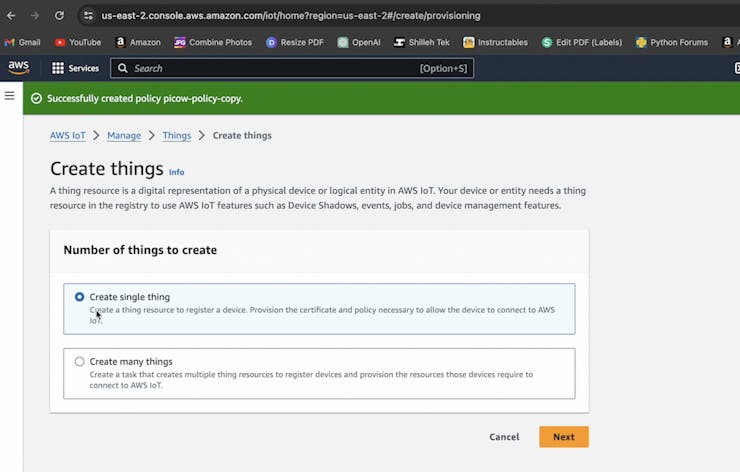
Name it as you like:

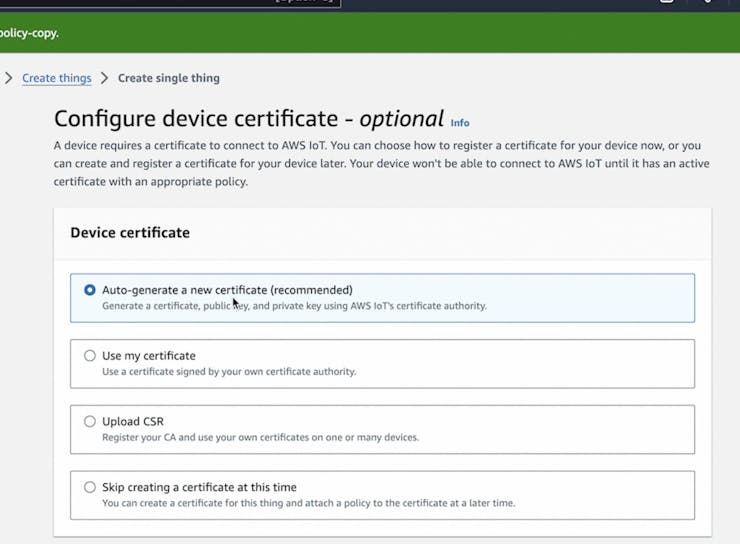
We can auto generate the cert for our purposes:
Add the policy you created to your Thing:
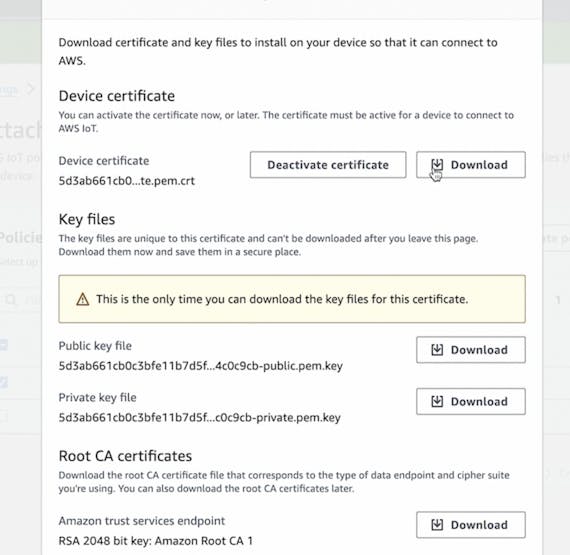
Now you have a Thing, you will need to download 4 files, shown below.
Device Cert, Public and Private Key, and Root CA 2048 file.
You will need to upload these to your Pico W for your MQTT client to work!
Finally, save the endpoint of your AWS IoT Core server, we will also be substituting it in the code. You can find it here by going to the Settings on the left:

Keep this information as private as possible
2-) Code Setup
Open your MicroPython editor, in this case we are using Thonny to manage files on the Pico W. Upload the 4 files accordingly to the Pico W:

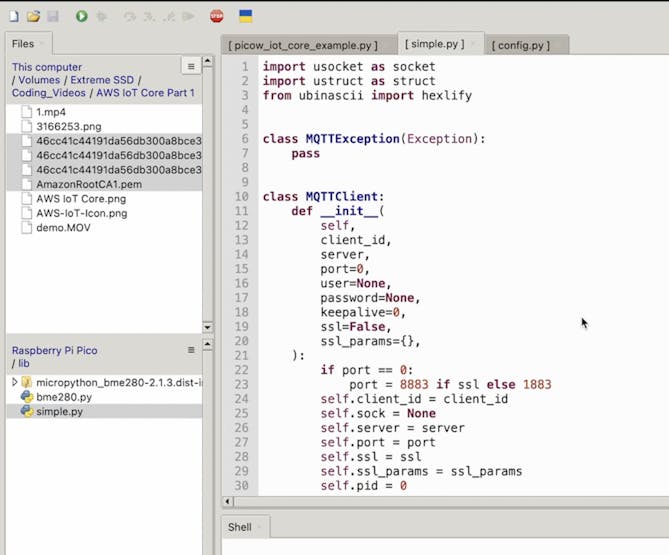
Now download the umqtt library we need to communicate with AWS. You can find the code for this here:
You can copy the contents of this file and substitute it in a file in your lib folder. Create a simple.py file and just copy the code into it. This is all you need for the library.
Now finally once we have that, we can create a python file in the home directory of our Raspberry Pi and substitute/modify this code:
# module imports
import machine
import network
import ssl
import time
import ubinascii
from simple import MQTTClient
import config
SSID = config.SSID
WIFI_PASSWORD = config.WIFI_PASSWORD
MQTT_CLIENT_ID = ubinascii.hexlify(machine.unique_id())
### Replace with the names of the files from your certs and keys
MQTT_CLIENT_KEY = "46cc41c44191da56db300a8bce37e1c2ebafa2211becebde9dc6a778fd6c3829-private.pem.key"
MQTT_CLIENT_CERT = "46cc41c44191da56db300a8bce37e1c2ebafa2211becebde9dc6a778fd6c3829-certificate.pem.crt"
### You can find this URL by going into the AWS IoT Core Settings under "Endpoint"
MQTT_BROKER = config.IOT_CORE_ENDPOINT
MQTT_BROKER_CA = "AmazonRootCA1.pem"
led = machine.Pin("LED", machine.Pin.OUT)
# function that reads PEM file and return byte array of data
def read_pem(file):
with open(file, "r") as input:
text = input.read().strip()
split_text = text.split("\n")
base64_text = "".join(split_text[1:-1])
return ubinascii.a2b_base64(base64_text)
def connect_internet():
try:
sta_if = network.WLAN(network.STA_IF)
sta_if.active(True)
sta_if.connect(SSID, WIFI_PASSWORD)
for i in range(0, 10):
if not sta_if.isconnected():
time.sleep(1)
print("Connected to Wi-Fi")
except Exception as e:
print('There was an issue connecting to WIFI')
print(e)
# callback function to handle received MQTT messages
def on_mqtt_msg(topic, msg):
# convert topic and message from bytes to string
topic_str = topic.decode()
msg_str = msg.decode()
print(f"RX: {topic_str}\n\t{msg_str}")
# process message
if topic_str is 'LED':
if msg_str is "on":
led.on()
elif msg_str is "off":
led.off()
elif msg_str is "toggle":
led.toggle()
connect_internet()
# read the data in the private key, public certificate, and
# root CA files
key = read_pem(MQTT_CLIENT_KEY)
cert = read_pem(MQTT_CLIENT_CERT)
ca = read_pem(MQTT_BROKER_CA)
# create MQTT client that use TLS/SSL for a secure connection
mqtt_client = MQTTClient(
MQTT_CLIENT_ID,
MQTT_BROKER,
keepalive=60,
ssl=True,
ssl_params={
"key": key,
"cert": cert,
"server_hostname": MQTT_BROKER,
"cert_reqs": ssl.CERT_REQUIRED,
"cadata": ca,
},
)
print(f"Connecting to MQTT broker")
# register callback to for MQTT messages, connect to broker and
# subscribe to LED topic
mqtt_client.set_callback(on_mqtt_msg)
mqtt_client.connect()
mqtt_client.subscribe('LED')
# main loop, continuously check for incoming MQTT messages
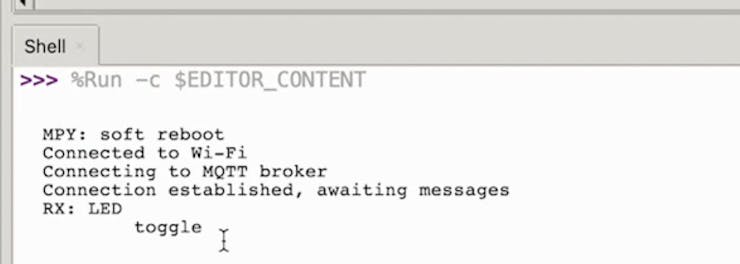
print("Connection established, awaiting messages")
while True:
mqtt_client.check_msg()This Python script sets up an MQTT client on a Raspberry Pi Pico to communicate with AWS IoT Core. It connects to Wi-Fi, subscribes to an MQTT topic ('LED'), and responds to messages by controlling an LED. The script uses secure MQTT communication with TLS/SSL, and the necessary certificates and keys are read from the specified files. The on_mqtt_msg function handles incoming MQTT messages, and the main loop continually checks for new messages. Make sure to replace the placeholder values in the configuration section with your actual credentials and file names.
Note that, I use a config file to hide some sensitive information, you can just substitute the files as a string in the code above.
To test this, we can go back to the AWS console and test on the 'LED' channel we defined. Note that we can create multiple channels in MQTT but in this example we used a simple subscribe channel.
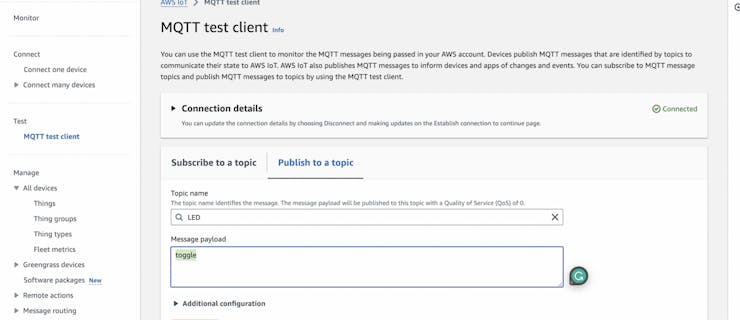
You should see the Shell contain a message in the editor and also see your onbaord LED flip its on status to off/on. You can keep clicking this to toggle the LED, pretty cool!
Conclusion
If you enjoyed this video/tutorial be sure to subscribe to the channel and like the video! Even better consider donating in the BuyMeACoffee link above. Let me know if you have any questions and stay tuned, thanks!